


· By Boat Juice Team
A Boat Owner's Guide to Waxing Your Gelcoat for a Perfect Shine
Ever seen that chalky, faded look on a boat? That's a tell-tale sign of a neglected gelcoat. Think of your boat's gelcoat as its skin—it’s the first and most important line of defense against sun, salt, and grime. A proper job of waxing gel coat isn't just about getting a mirror shine; it's about proactively shielding your investment.
Why a Good Wax Job Is Your Gelcoat's Best Friend
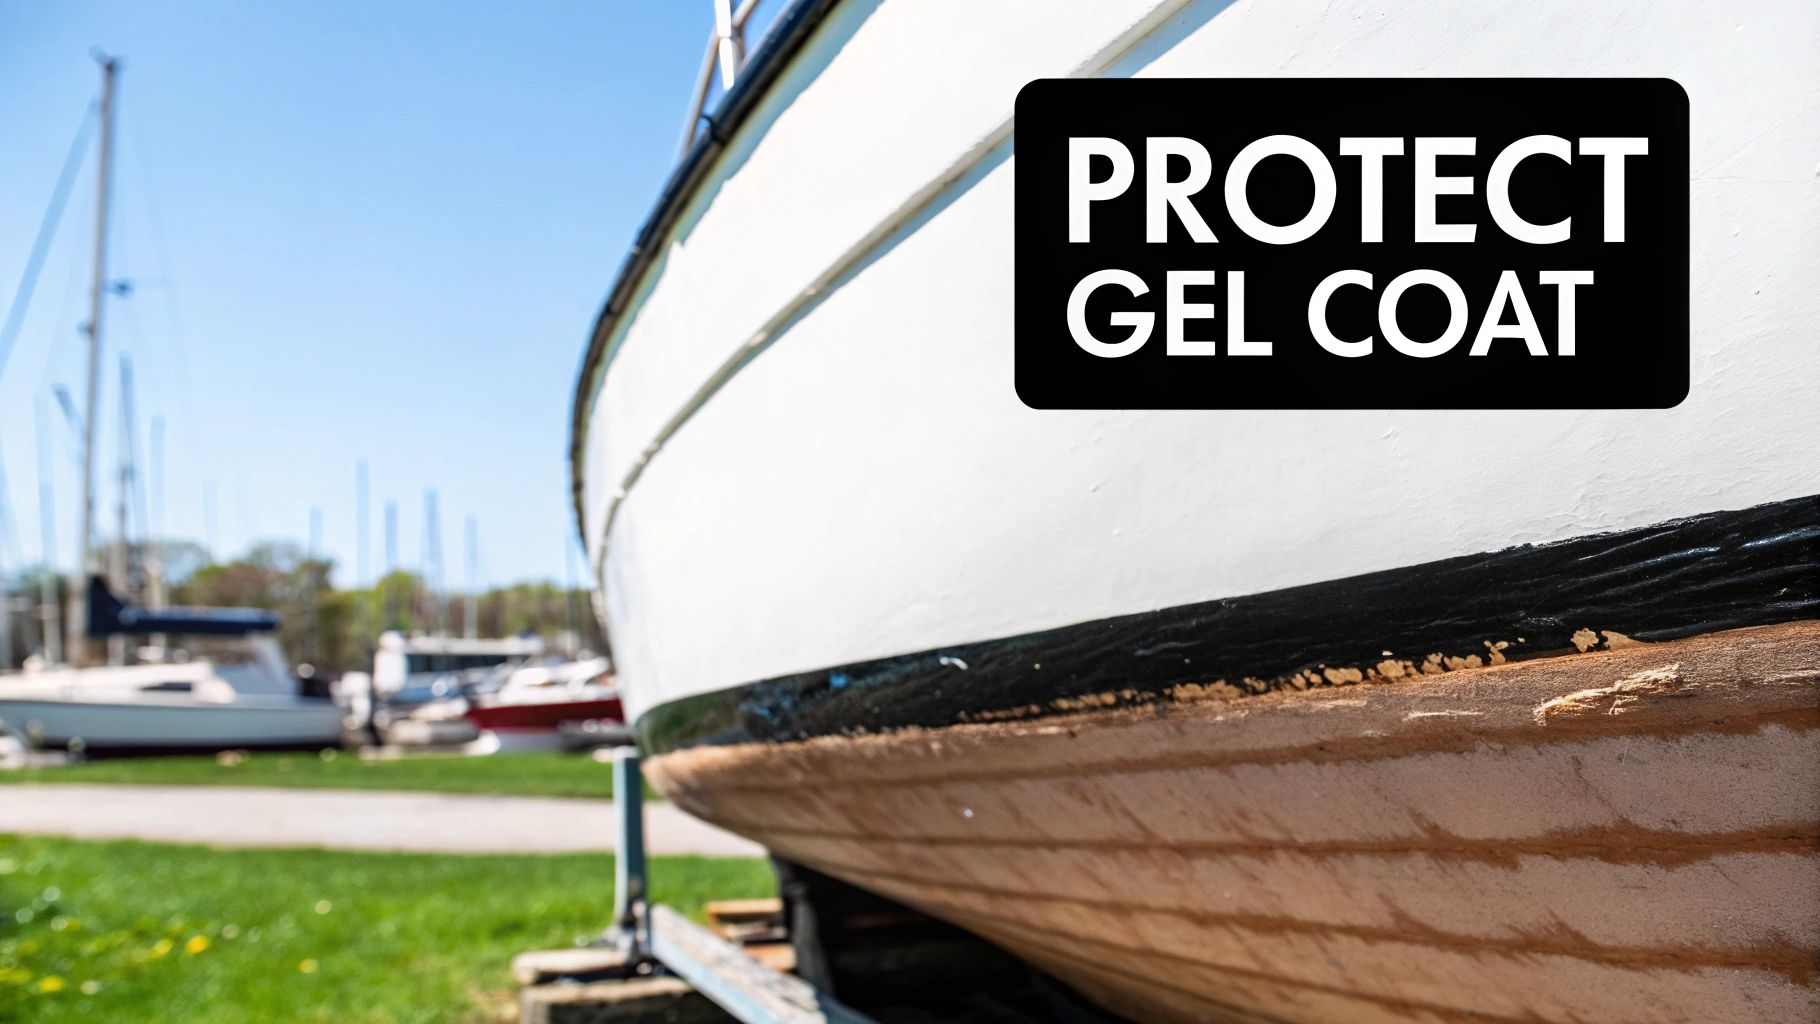
Your boat is constantly under attack. UV rays are the biggest enemy, causing that dull, chalky oxidation that makes a boat look old before its time. Why does this happen? Gelcoat is porous, and without a protective layer, those UV rays penetrate the surface and break down the resins, leading to that faded look.
The Perks of a Protected Hull
When you lay down a solid coat of wax, you’re creating a slick, hydrophobic (water-repelling) barrier. This barrier fills in the gelcoat's pores, which is why grime, fish scales, and those annoying hard water spots have a tough time sticking around.
- Easier Cleanups: Post-trip wipe-downs become a breeze instead of a chore.
- UV Protection: A quality wax acts like sunscreen for your boat, fighting off fading and chalking.
- Serious Shine: It restores that deep, rich gloss that turns heads at the dock.
- Long-Term Value: A well-maintained hull is a major factor in preserving your boat's value.
Here's the bottom line: a sacrificial layer of wax takes the abuse so your gelcoat doesn't have to. You're not just cleaning; you're actively preserving the integrity and look of your hull every time you apply it.
With boating more popular than ever, taking care of your vessel is crucial. The marine gelcoat market, currently valued at a whopping USD 1.2 billion, is expected to more than double by 2034. This growth shows just how vital these protective layers are for today's boat owners.
The idea of applying a protective layer of wax for lasting performance isn't unique to boating; it's a universal concept for protecting valuable gear. With the right approach, you can get results that look like they came straight from a pro's shop, saving you money and giving you the satisfaction of a job well done.
Prepping Your Gelcoat for a Flawless Finish
Before you even dream of that glossy, head-turning shine, let’s get one thing straight: 90% of a great wax job happens in the prep work. Rushing this stage is the number one reason boat owners end up disappointed with the results.
A perfectly clean and smooth surface is non-negotiable. It’s what allows the wax to create a strong, even bond, giving you that deep gloss and durable protection you’re really after. Think of it like painting a wall—you wouldn't just slap a fresh coat over dirt and holes, would you? The same principle applies here; your wax needs a pristine canvas.
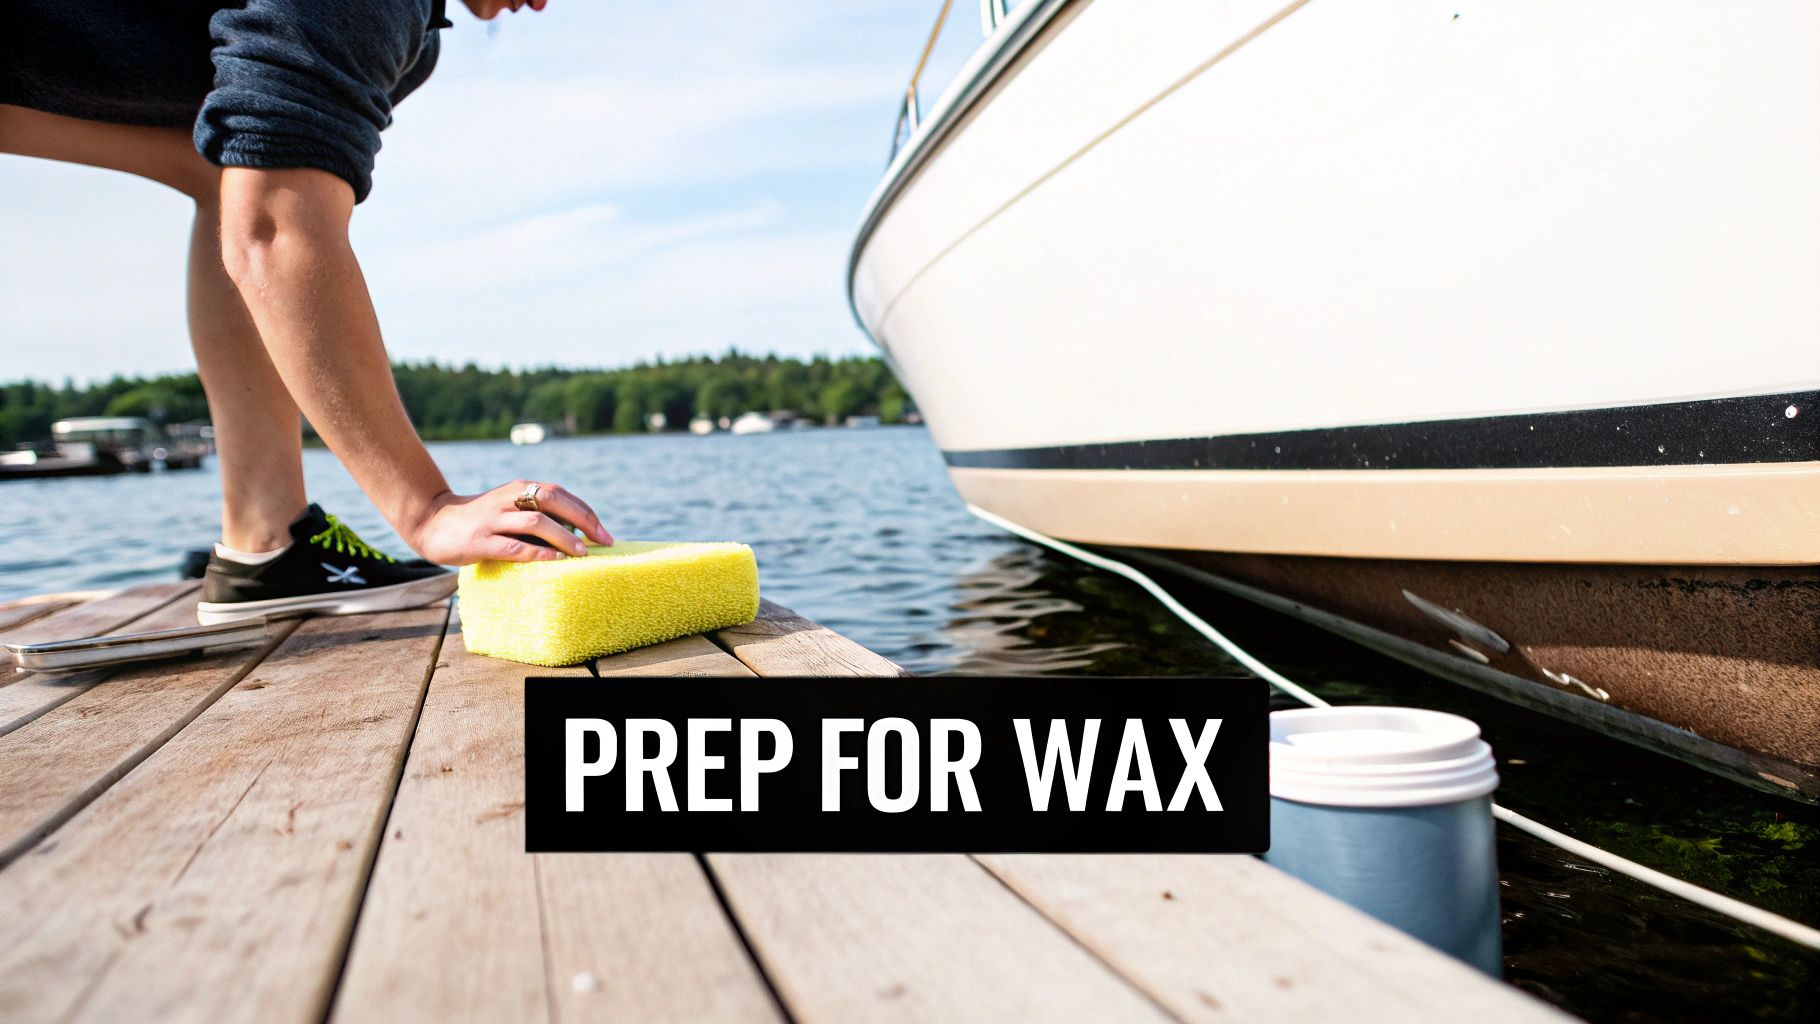
Step 1: The Initial Wash Down
First things first, your boat needs a thorough wash. This isn't just a quick rinse. You need to remove all the loose surface contaminants like salt spray, bird droppings, dust, and general grime from your last trip out.
For this initial cleaning, use a pH-neutral boat soap. Harsh detergents or dish soaps can strip away any old wax, but they can also be unnecessarily aggressive on your gelcoat. A quality soap like Boat Juice Wash & Shine is a great solution because it effectively lifts dirt without compromising the finish underneath.
Step 2: Inspecting for Stubborn Blemishes
Once your boat is clean and dry, it's time to play detective. Get it under good light and take a close look at the surface. You're hunting for any issues that the wash couldn't solve—anything that will prevent the wax from adhering properly.
- Chalky Water Spots: These are nasty mineral deposits left behind as water evaporates.
- Minor Stains: Look for light scuffs or discoloration from fenders or environmental fallout.
- Oxidation: Does the surface look dull or feel slightly chalky to the touch? That’s a tell-tale sign of UV damage.
For those stubborn, etched-in water spots, you’ll need a more targeted approach. Using a specialized product like Boat Juice Extreme Water Spot Remover lets you dissolve these mineral deposits chemically. This is much safer than harsh, abrasive scrubbing that can easily scratch the gelcoat. Just spray it on, let it dwell for a moment, and wipe it away.
A quick heads-up: If your inspection reveals significant chalking, widespread dullness, or fine scratches, your gelcoat needs more than just a wax. You'll need to correct the surface first to bring back the shine. We've got you covered with our complete guide on boat compounding and polishing.
Step 3: The Final Touch Test
Here’s the final—and most important—step before you grab your wax. With the boat clean and dry, gently run your bare hand across the gelcoat. Does it feel as smooth as glass?
Or does it feel slightly gritty or bumpy? That texture comes from embedded contaminants—tiny bits of industrial fallout, rail dust, and tree sap that have bonded to your gelcoat. If you apply wax over this, you’re just sealing all that grit in.
To remove these, you’ll need a marine-grade clay bar or a clay mitt. Paired with a proper lubricant (a detail spray or diluted boat soap works well), the clay glides across the surface and safely pulls these tiny particles out of the gelcoat’s pores. The result is a perfectly smooth, decontaminated surface—the ideal foundation for a killer wax job.
Choosing the Right Wax and Tools for Your Boat
Walking down the boat care aisle can feel overwhelming. When it comes to waxing gel coat, the best product really comes down to your goal. Are you looking for that head-turning, boat-show shine, or do you need tough, reliable protection that will last the whole season?
Let's break down the options, because knowing the difference is key to getting the results you want.
Carnauba vs. Synthetic Sealants
The big debate usually comes down to natural carnauba wax versus a modern synthetic sealant. Carnauba waxes are legendary for creating an incredibly deep, wet-looking shine. If you want your hull's color to look rich and almost liquid, nothing beats carnauba.
The catch? Durability. A traditional carnauba wax typically only gives you a few months of protection. It’s perfect if you enjoy waxing a couple of times a season or are prepping for a special event.
On the other side, you have synthetic sealants. These are engineered for performance and longevity, forming a hard, slick barrier that stands up to harsh UV rays and saltwater far longer than natural wax. While the shine is fantastic—think sharp and highly reflective—it doesn't quite have the same warm depth as carnauba.
For most of us who want to "set it and forget it" for the season, a synthetic sealant is the practical choice. You'll also find hybrid products that blend carnauba and synthetic polymers, trying to give you the best of both worlds. To see how far things have come, you can learn more about modern options in our guide to the best spray wax for boats.
To help you decide at a glance, here’s a quick comparison:
Marine Wax and Sealant Comparison
This table gives you a quick rundown to help match a product to your boat and how you use it.
| Wax Type | Key Benefit | Durability | Best For |
|---|---|---|---|
| Carnauba Wax | Deep, wet-look shine | 1-3 months | Boaters prioritizing aesthetic depth and who enjoy frequent waxing. |
| Synthetic Sealant | Long-lasting UV protection | 4-6+ months | The practical boater looking for maximum protection with less effort. |
| Hybrid Wax/Sealant | Balanced shine and durability | 3-5 months | A great all-around choice for good looks and solid protection. |
Choosing the right one is more than just looks—it's about preserving your investment.
It's a bigger deal than you might think. The marine industry actually makes up 40% of the entire gelcoat market. And here's a startling stat: up to 70% of boats show signs of chalky oxidation within just two years if left unprotected. A quality sealant is your first line of defense against that dull, faded look.
Hand vs. Machine Application
Once you've picked your product, you have to decide how you're going to apply it. You can absolutely apply wax by hand, but one of the best investments any boat owner can make is a good dual-action (DA) polisher.
Unlike a high-speed rotary buffer that can burn your gelcoat if you're not careful, a DA polisher is incredibly safe because it oscillates in a random orbit. The machine lays down a much more even coat and works the sealant into the gelcoat's pores. This creates a stronger bond, which translates to a better shine and longer-lasting protection—all with way less elbow grease.
If you're ready to make the jump, here’s the gear you'll want:
- A Dual-Action (DA) Polisher: This will quickly become your favorite tool.
- Soft Foam Finishing Pads: Make sure you get pads made for applying wax or sealant, not abrasive cutting pads.
- Plush Microfiber Towels: Don't skimp here. You'll need a stack of clean, high-quality towels to gently buff off the residue.
Staying on top of the latest products and techniques is a smart move. Keeping an eye on boating industry news can give you a heads-up on new innovations in gelcoat care.
Your Hands-On Guide to a Flawless Wax Finish
Alright, this is where all that prep work really pays off. You’ve created a perfectly clean, smooth canvas, and now it's time to lay down that protective, glossy barrier. The most important rule here? Work smart, not hard.
Tackle your boat in small, manageable sections, roughly 2x2 feet at a time. This keeps you in control and prevents the wax from drying out before you're ready to buff it off. You’ll also want to stay out of direct sunlight. Heat makes wax cure too quickly, turning a simple wipe-off into a serious workout. An overcast day or a shady spot is your best bet.
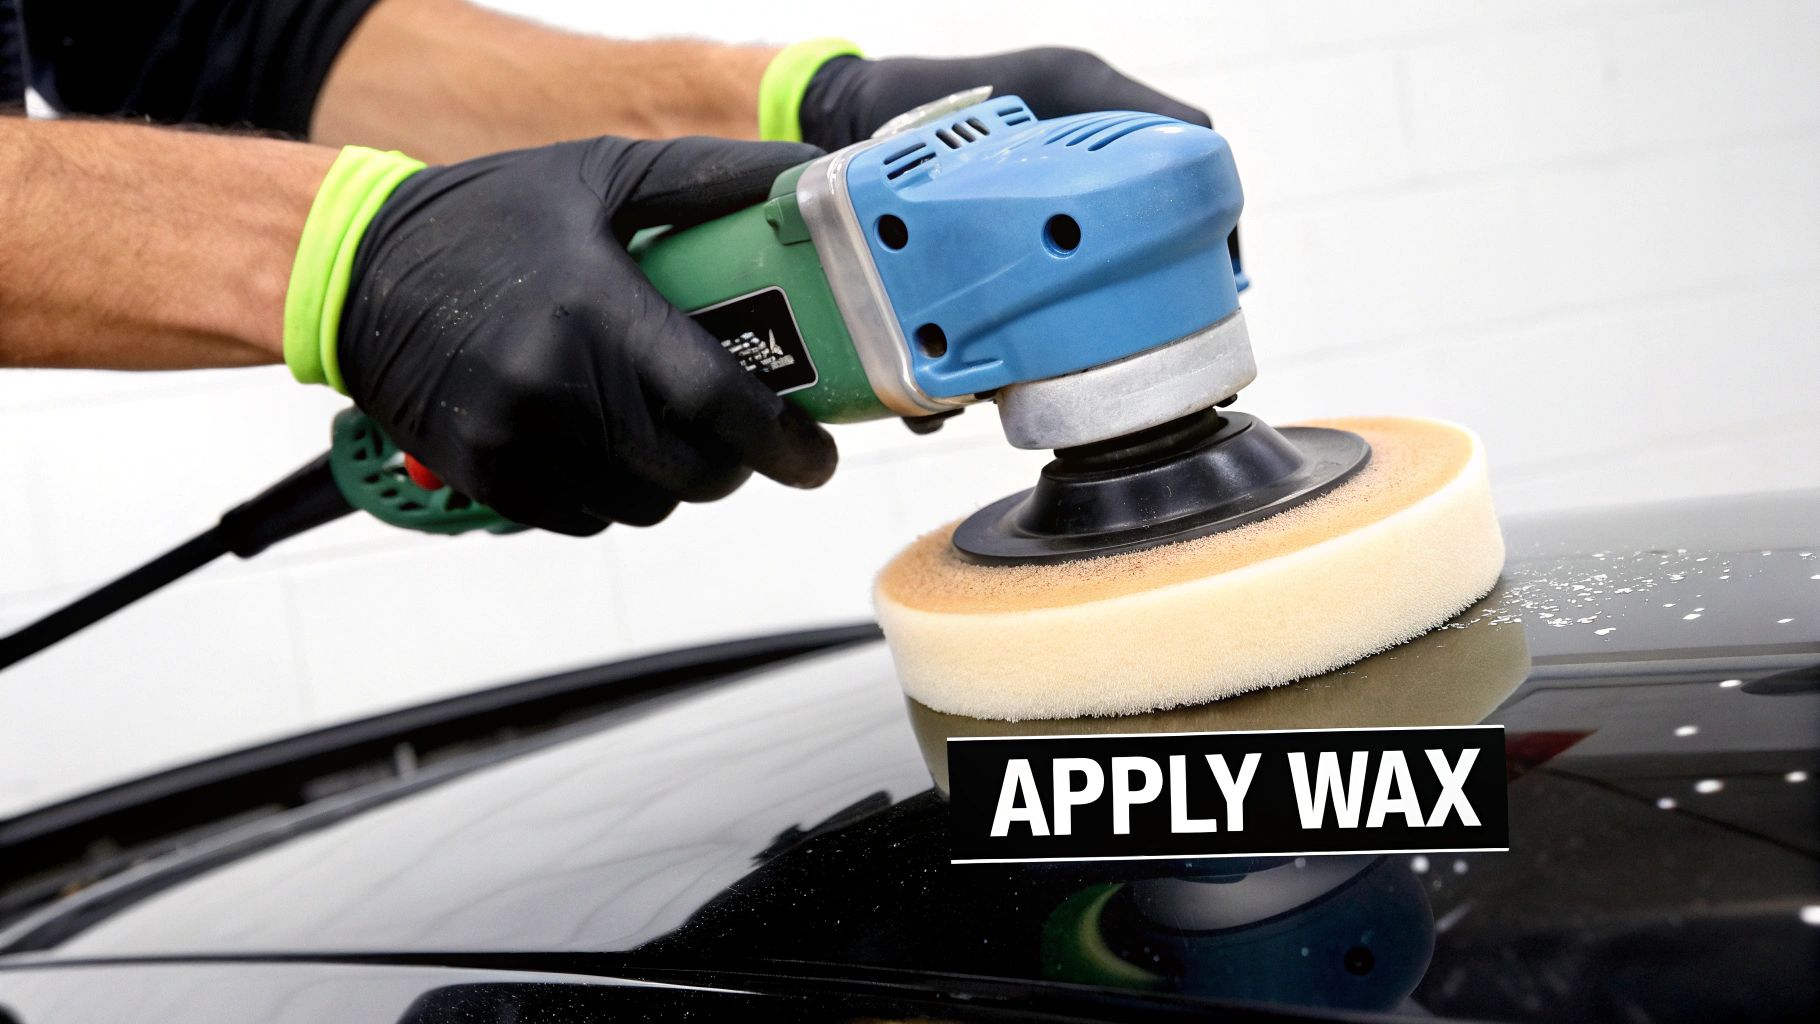
Step 1: Machine Application for an Effortless Shine
If you have a dual-action (DA) polisher, a machine ensures an incredibly thin, even layer of wax, which is key to both maximum protection and an easy buffing experience. Piling on more wax doesn't add more protection—it just makes it harder to remove.
Here’s the step-by-step process:
- Prime the Pad: Apply 3-4 pea-sized dots of your wax or sealant onto a soft foam finishing pad.
- Spread the Product: With the machine off, dab the pad onto your 2x2 section. Turn the machine on its lowest speed (1 or 2) and quickly spread the wax over the area.
- Work It In: Bump the speed up to 3 or 4 and work the product into the gelcoat using a slow, overlapping cross-hatch pattern (side-to-side, then up-and-down). This methodical approach ensures you don't miss a spot.
Let the weight of the machine do the work; there's no need for heavy pressure. Your goal is a thin, hazy film, not a thick, caked-on layer.
Step 1 (Alternate): Applying Wax by Hand
Don't have a machine? No problem. The principles are the same, it just requires a bit more elbow grease. Grab a quality microfiber applicator pad for this.
Dab a small amount of wax onto your pad and use gentle, overlapping circular motions to spread a thin, even layer over your 2x2 section. The key here is to apply consistent pressure to avoid any high and low spots in your coverage.
Pro Tip: Whether you're using a machine or your hand, be very careful to avoid getting wax on non-skid surfaces, rubber trim, or any black plastics. Wax residue can leave a nasty white stain on these materials that is a nightmare to remove. If you get some on these areas, wipe it off immediately.
Step 2: Master the All-Important Swipe Test
This is the most crucial skill to learn when waxing. Knowing precisely when the wax is ready to be removed takes all the guesswork out of it, as different products and conditions affect curing time.
After you've applied wax to a section and let it sit for a few minutes, gently swipe your index finger across the hazy surface.
- If it smears or smudges: The wax is still wet. Give it a few more minutes to set up.
- If your finger glides through cleanly, revealing a slick, glossy surface underneath: Perfect. The wax has cured, and it's time to buff.
Nailing this timing is the secret to an effortless removal. If you buff too soon, you’ll smear a wet product everywhere. If you wait too long, the wax hardens and becomes incredibly difficult to remove, forcing you to scrub and potentially marring your finish.
Buffing and Maintaining Your Shine All Season Long
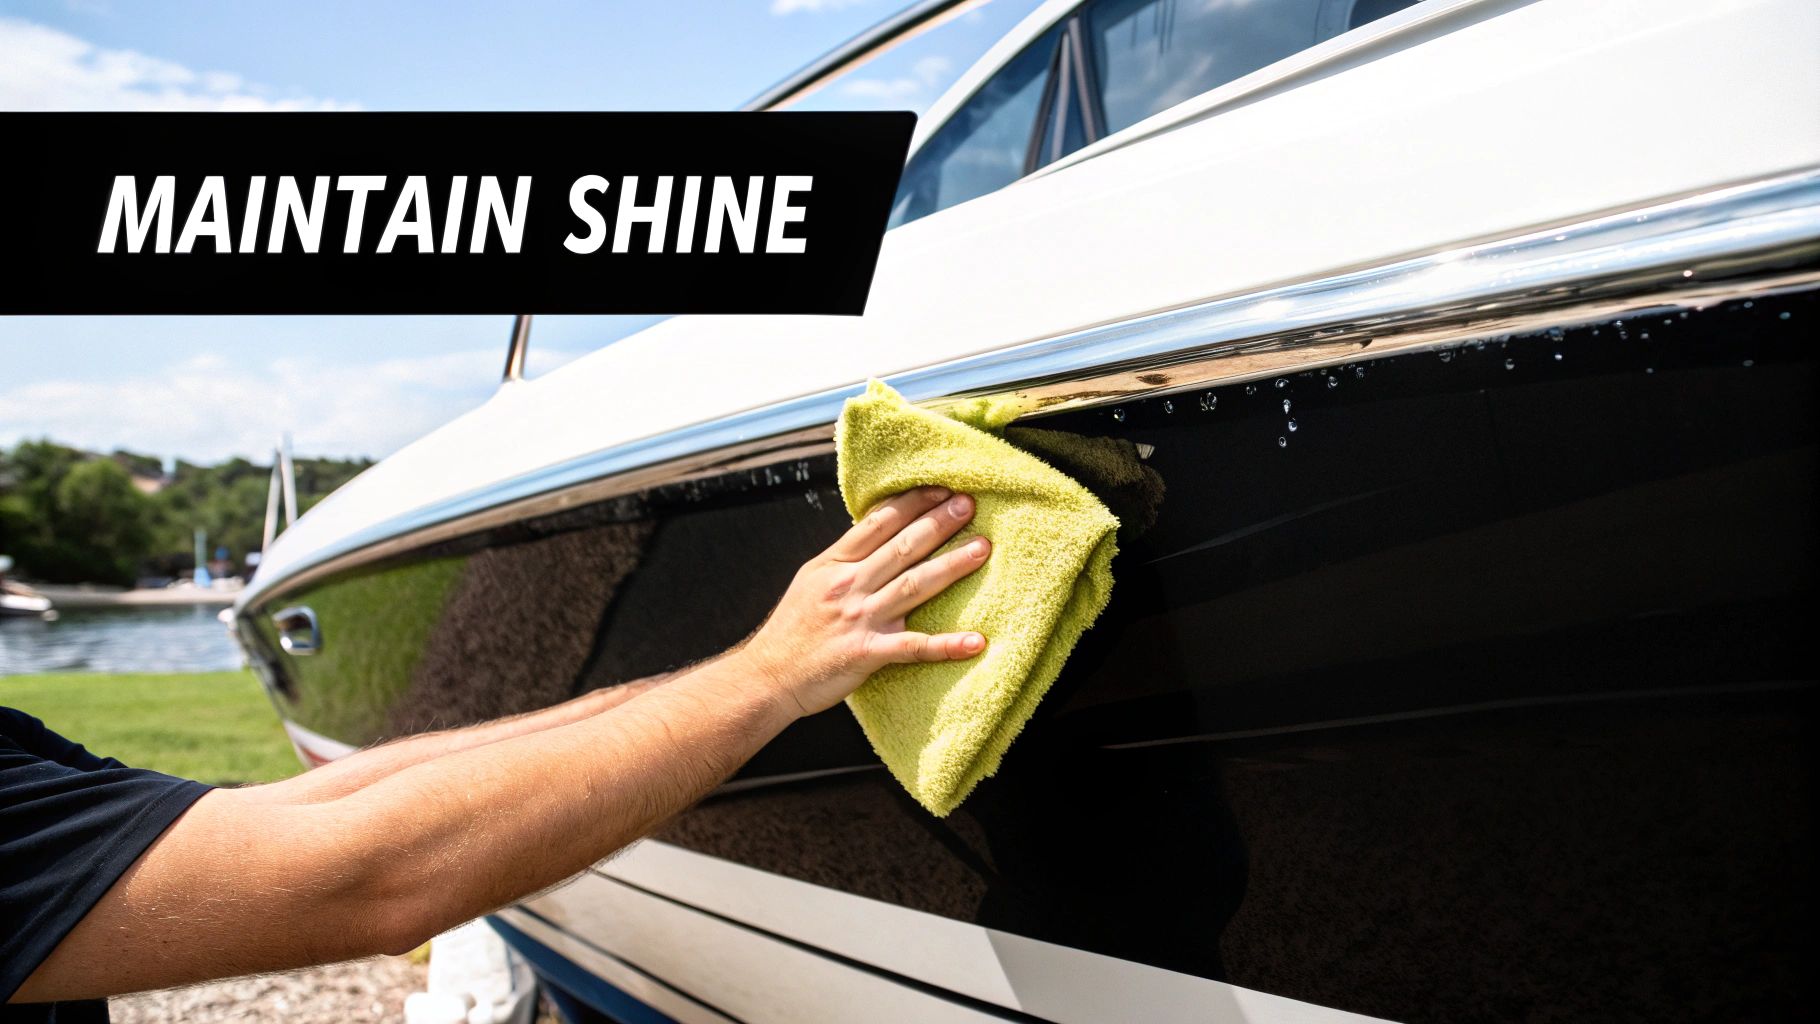
This is the moment of truth—the big reveal. After your swipe test gives you the green light, it’s time to buff off that hazy residue and see the mirror-like shine underneath.
Grab a clean, plush microfiber towel. Using light pressure, start wiping away the haze. The trick is to flip and fold your towel constantly to a clean section. If you keep buffing with a loaded-up part of the cloth, you’re just pushing that haze around, not removing it.
Keeping That "Just Waxed" Look
So you've got this incredible, deep gloss. Now, how do you keep it? A full waxing gel coat job should be on your calendar at least twice a year. The best routine is once in the spring to prepare for the season and again in the fall as part of your winterization.
If your boat lives in harsh saltwater or gets blasted by the sun year-round, consider adding a third application mid-season. It makes a world of difference for long-term protection.
This isn't just about looking good; it's about protecting your investment. With millions of recreational boats in the U.S., oxidation damage alone costs owners an estimated $500 million annually in refinishing costs. A proper wax routine can extend your gelcoat's life by up to 30%. You can discover more about the gelcoat market and why this matters.
The Secret to All-Season Shine
To make that protective wax last and keep your boat looking sharp between those big waxing sessions, the key is simple, consistent upkeep. The real game-changer is adding a quick spray-on protectant to your regular cleanup routine after a day on the water.
After you've washed the boat down, a quick mist and wipe with a quality detail spray is all it takes. This simple step:
- Boosts protection by adding a fresh sacrificial layer on top of your wax.
- Enhances gloss, bringing back that deep, wet look in minutes.
- Makes cleaning easier by reinforcing the hydrophobic barrier.
Something like Boat Juice Protection Spray is perfect for this job. It’s made to add that quick pop of gloss and UV protection, which makes your next wash-down even faster. This simple habit prevents grime from getting a foothold and saves you from heavy-duty restoration work down the road.
This is how you keep your boat looking its best and always ready for the water. For a deeper dive into the basics, check out our guide on how to clean fiberglass boats.
Answering Your Top Gelcoat Waxing Questions
When it comes to gelcoat care, a few questions pop up time and time again. Let's tackle them head-on so you can get to work with confidence.
How Often Should I Really Be Waxing My Boat?
For most boaters, a full wax job twice a year is the sweet spot. A thorough application in the spring sets you up for the season, and another before winter layup protects your investment during the off-season.
If your boat lives in the harsh Florida sun or gets a constant saltwater beating, you might want to consider a mid-season application. That extra layer is cheap insurance against the heavy-duty oxidation and salt these environments throw at your hull.
The real pro-tip for keeping that shine going? Maintenance. A quick spray-down with a quality protectant after each wash seriously extends the life of your base wax coat. It's the secret to making your boat look like you just detailed it, even months later.
Can I Just Use Car Wax on My Boat?
I get this one a lot. While it seems like an easy shortcut, it’s not a good idea. Automotive paint and marine gelcoat are two completely different surfaces. Gelcoat is much more porous and has to withstand a constant assault from UV rays, salt, and water immersion—things your car rarely deals with.
Marine-specific waxes are formulated with stronger UV inhibitors and polymers engineered to bond with that porous gelcoat surface. They are simply tougher and more durable. Car wax might look okay for a week, but it will break down quickly, leaving your gelcoat exposed.
What’s the Real Difference Between a Polish and a Wax?
This is a big point of confusion, but the breakdown is simple: polish corrects, wax protects.
Think of polish as a restorative step. It contains tiny abrasives that gently remove a microscopic layer of oxidized, chalky, or scratched gelcoat. Its job is to cut away the damage—the dullness and swirl marks—to restore the shine.
Wax, on the other hand, is a purely protective, non-abrasive layer. You apply it on top of a clean, and if necessary, polished surface. It creates a sacrificial barrier to shield your finish from the elements. So, if your gelcoat looks tired and faded, you always polish first to fix the surface, then wax to seal in that shine and protect it.
Ready to give your boat that all-season shine and protection? Your next step is to grab the tools for the job. The Boat Juice Protection Spray is the perfect way to maintain your wax job and keep your gelcoat looking its best after every trip. Shop now at shopboatjuice.com and see the difference for yourself.