


· By Boat Juice Team
A DIY Guide to Boat Compounding and Polishing
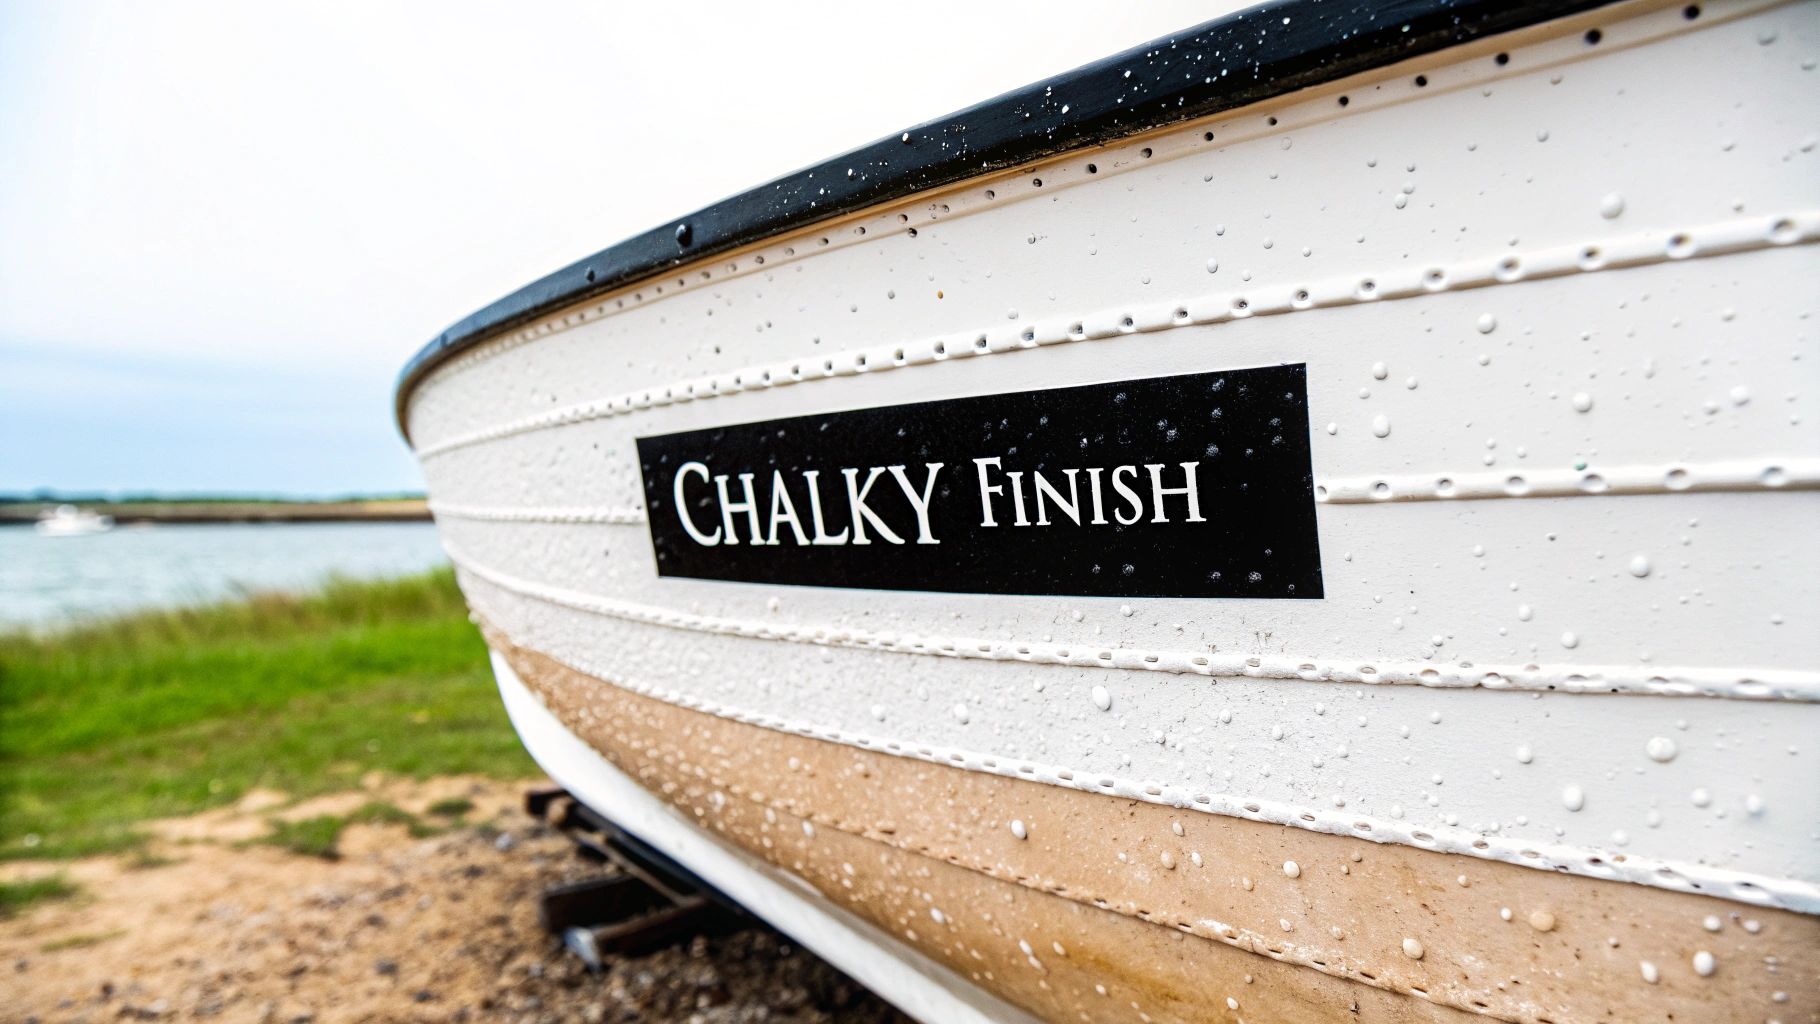
If your boat’s hull has that stubborn, faded look no matter how much you wash it, you know exactly what I'm talking about. That chalky, dull appearance is gelcoat oxidation, a common headache caused by UV rays and the harsh marine environment.
The good news is you can fix it yourself with a two-part process: boat compounding and polishing. Think of it this way: compounding is the heavy-duty restoration that strips away the dead, oxidized layer. Polishing is the final touch, the step that brings back that deep, wet-look shine you love.
Understanding Gelcoat and The Power of Restoration
The shiny, colorful part of your boat’s hull isn't paint; it's a layer of gelcoat over the fiberglass. It’s designed to be your boat's first line of defense against sun, salt, and everything else nature throws at it. But over time, that relentless UV exposure breaks down the gelcoat, leaving it looking dull, chalky, and faded.
You'll know it's oxidation if you can run your hand across the hull and come away with a powdery residue. No amount of soap and water will fix this because the problem isn't dirt on the surface—the surface is the problem. This is especially true after a long summer on the water or when you're getting your boat ready for spring.
The Two-Step Solution You Can Master
To bring back that mirror finish, you need to physically remove that thin, damaged layer of gelcoat. Doing so reveals the fresh, vibrant material underneath, which is exactly what boat compounding and polishing are designed to do. This is a true restoration, not just a deep clean.
And here’s the best part: this is a job you can absolutely tackle yourself. It’ll save you a ton of money and give you that deep satisfaction of a job well done. The trick is simply understanding the distinct role each step plays.
- Compounding is the correction step. You’re using an abrasive liquid to essentially sand away the oxidized layer, taking light scratches and tough stains with it.
- Polishing is the refinement step. After compounding, you follow up with a much finer abrasive that smooths out the microscopic marks left behind, creating a perfectly clear, high-gloss finish.
By taking on this project, you're doing more than just making your boat look great. You're actively protecting your investment. A well-maintained gelcoat prevents deeper degradation and can seriously impact its resale value—sometimes by as much as 20-30%.
In this guide, we’re going to walk you through every single stage, from checking how bad the oxidation is to laying down that final coat of protection. Before you know it, your boat will look brand new again, and you’ll have the skills to keep it looking that way for years to come.
Choosing the Right Tools for the Job
Before you even think about putting a buffer to your boat’s hull, let’s talk gear. Having the right tools is the difference between a frustrating weekend that ends in a swirly mess and a professional-looking finish that’ll turn heads at the dock. This isn't about buying the most expensive stuff out there; it's about making smart choices for your specific boat.
It's no surprise that the demand for quality boat care products is climbing. The global boat polish market was valued at around USD 145 million and is on track to hit USD 198 million by 2033. Why? Because more people are getting into boating, and they realize that consistent polishing isn't just for looks. For the 75% of the market who are recreational boaters like you, it's about protecting a massive investment.
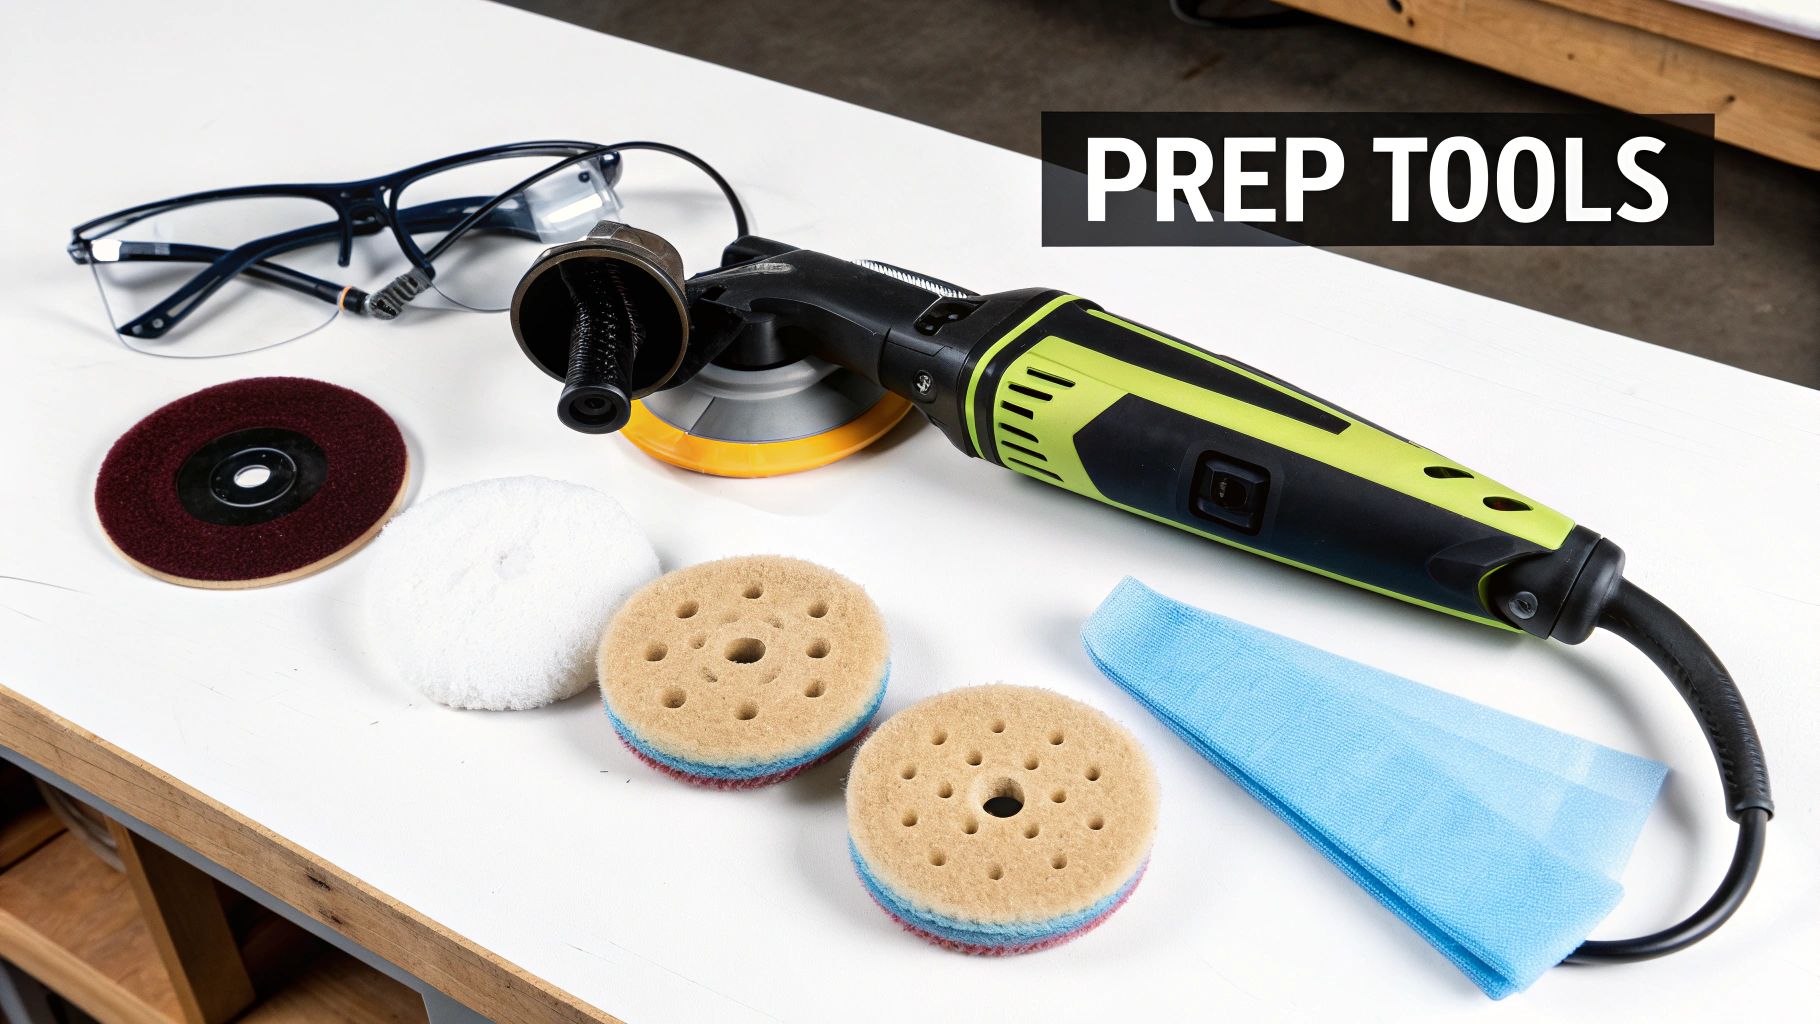
Your Essential Toolkit for Compounding and Polishing
Getting your shopping list right from the get-go saves you from making annoying mid-project runs to the store. Think of this as your mission-critical checklist.
Must-Have Equipment:
- Dual-Action (DA) Polisher: This is your most valuable player. A DA polisher is safer for beginners than a rotary buffer because its head both spins and oscillates. This random pattern dramatically reduces the risk of burning through your gelcoat.
- Extension Cord: Don’t mess around here. Get a heavy-duty, outdoor-rated cord that’s at least 50 feet long. This will give you the freedom to move around the entire boat without constantly unplugging.
- Safety Gear: This isn’t optional. Always wear safety glasses or goggles to keep compound sling out of your eyes. A dust mask is a great idea too, especially when you're cutting through heavy oxidation.
- Masking Tape: Use a high-quality automotive masking tape to protect the things you don't want to polish. This includes vinyl decals, chrome trim, and any non-skid surfaces.
- Microfiber Towels: Stock up on these. You'll need a healthy supply of clean, high-quality microfiber towels to wipe away residue without scratching the beautiful finish you just created.
Pro Tip: Don't skimp on your towels. Cheap, low-quality microfiber can leave behind fine scratches, basically undoing all your hard work. Invest in a plush, edgeless set specifically for detailing.
Selecting the Right Compounds and Pads
This is where the real expertise comes in. The secret to a great finish is to start with the least aggressive method needed to get the job done. Why? Because going too heavy-handed with a super-aggressive compound can remove more gelcoat than necessary, and you want to preserve as much of that protective layer as you can.
The table below will help you assess your boat's gelcoat and figure out the right starting point for your project.
Matching Your Tools to Your Boat's Oxidation Level
| Oxidation Level | Visual Cues | Recommended Compound | Recommended Pad |
|---|---|---|---|
| Light | Dull finish, minor chalkiness that comes off on a finger | Finishing Polish | Foam Polishing Pad |
| Medium | Obvious chalkiness, color is faded, feels slightly rough | Medium-Cut Compound | Foam Cutting Pad |
| Heavy | Thick, chalky layer; color is severely faded and muted | Heavy-Cut Compound | Wool Cutting Pad |
To figure out where you land on this chart, try the fingernail test. Gently drag your fingernail across the oxidized surface. If it leaves a clean, shiny line with just a little pressure, you're likely in the light-to-medium range. If you have to press hard to see any difference and the surface feels like fine-grit sandpaper, you’re dealing with heavy oxidation.
Here’s a quick rundown of your pad options:
- Wool Cutting Pads: These are the big guns for heavy oxidation. The natural fibers are aggressive and generate more heat, which helps the compound slice through that dead, chalky top layer of gelcoat.
- Foam Cutting & Polishing Pads: Foam pads come in different densities, or "aggressiveness." An orange or yellow foam cutting pad is perfect for medium oxidation, while a soft white or black foam pad is what you'll use with a finishing polish to bring out that deep, wet-looking gloss.
Once you have your polisher and pads picked out, you'll need the liquids. A solid plan for most projects is to start with a heavy or medium-cut compound and follow it up with a finishing polish. The compound does the corrective work, and the polish refines the surface to a mirror shine. For more ideas on what to get, check out our guide on the best boat cleaning products to round out your arsenal.
With your gear assembled and ready to go, you've already won half the battle. Next up, we’ll dive into the prep work that sets the stage for a flawless finish.
Prepping Your Boat for a Perfect Finish
You wouldn’t wax a dirty car, right? So you definitely can’t expect a mirror shine from compounding a grimy hull. Proper preparation is what separates a frustrating, mediocre job from a stunning, professional-level result. If you skip these next steps, you're pretty much guaranteed to be grinding dirt into your gelcoat, not polishing it.
Think of your boat's surface as a canvas. Before you can create a masterpiece, that canvas has to be perfectly clean. This means getting rid of every bit of surface gunk, tackling stubborn mineral deposits, and protecting all the sensitive areas that aren't getting polished. It might feel like extra work, but it pays off big time in the final finish.
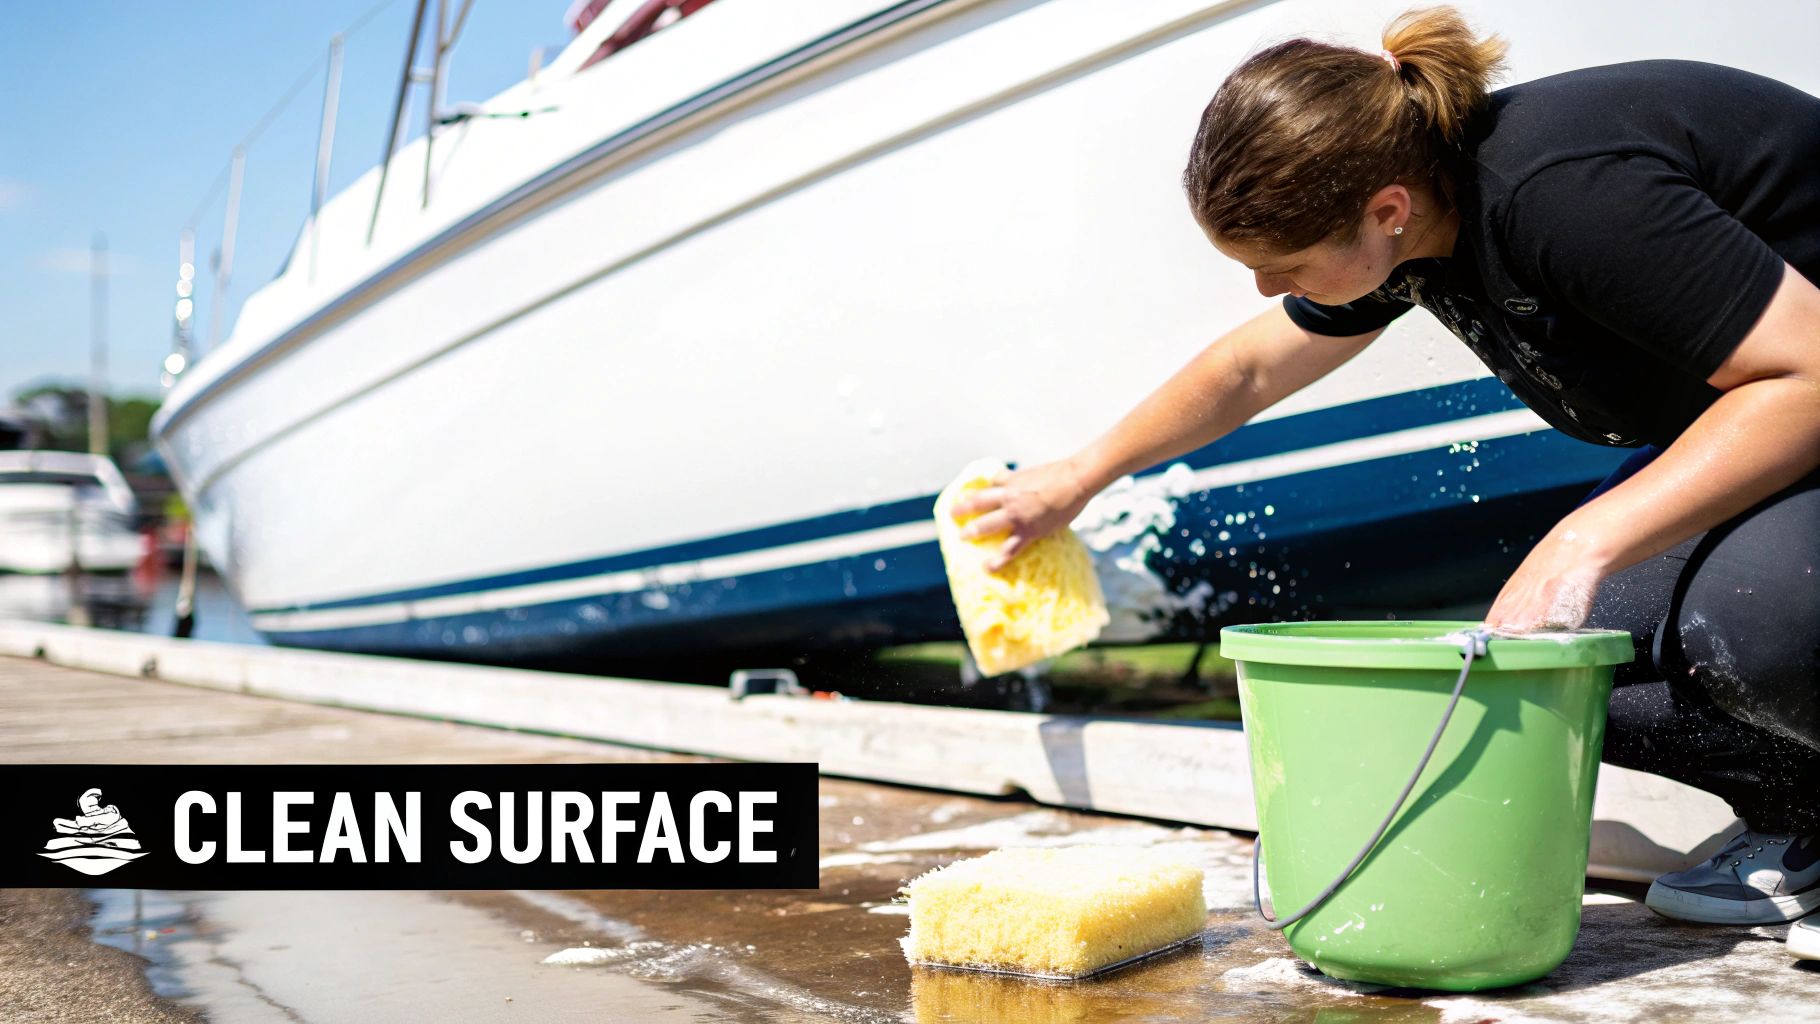
Start with a Thorough Wash
First thing's first: give your boat a good wash. This removes all the loose dirt, salt spray, bird droppings, and general grime that's been sitting on the surface. You’re clearing the deck—literally—for the more intensive work to come.
For this wash, use a soap that’s effective but won’t strip any existing wax or sealant, especially if some parts of your boat don't even need compounding. A pH-neutral formula is your best bet because it lathers up to lift dirt away, making it easy to rinse off without leaving residue.
Why a Good Soap Matters: Reaching for a harsh detergent or dish soap can do more harm than good. They strip away protective coatings and dry out your gelcoat, making it even more susceptible to future oxidation. A dedicated boat soap is made to clean effectively while being gentle on the surfaces you're trying to protect.
There's a reason the boat cleaner market is a big deal; it's projected to grow from USD 1,951.2 million to USD 3,500 million by 2035. This huge growth just goes to show that boat owners and pros alike understand that a high-quality clean is the non-negotiable foundation for any successful polishing project.
Chemical Decontamination to Remove the Tough Stuff
After washing, your hull might look clean, but it's probably hiding contaminants that a simple wash can't touch. I'm talking about those embedded mineral deposits from hard water—the stuff that creates those annoying, crusty water spots that feel rough to the touch.
If you try to compound over these spots, your buffer pad will immediately get clogged with mineral grit. This kills its cutting power and can even scratch the gelcoat. The only way to deal with this is chemical decontamination. You have to dissolve these deposits before you start abrading the surface.
This is where a targeted product like Boat Juice Exterior is essential. The proprietary formula is specifically designed to break down and dissolve these mineral deposits on contact, making it the perfect prep step before you polish.
- Spray the cleaner directly onto a small section of the hull.
- Let it sit for 30-60 seconds—you might even see it working its magic.
- Gently wipe the area with a clean microfiber towel.
- Make sure to thoroughly rinse the section with fresh water.
This step ensures your compounding pad is only touching the gelcoat itself, which leads to a much cleaner, faster, and more effective correction process. For a deeper dive, check out our complete guide on how to clean fiberglass boats.
Mask Off and Protect Sensitive Areas
The final prep step is arguably the most critical for a clean, professional job: masking. Your buffer will be spinning at thousands of RPMs, and it's incredibly easy to scuff up or stain surfaces you don't mean to polish. Take the time now to carefully tape off any sensitive areas.
Using a high-quality automotive masking tape, cover these areas:
- Vinyl Decals and Graphics: Compound can stain and fray the edges of your graphics.
- Chrome and Stainless Steel Trim: You don't want to accidentally scratch or dull your shiny hardware.
- Non-Skid Deck Surfaces: Compound residue is a total nightmare to remove from textured surfaces.
- Vinyl Seats and Upholstery: Protect any seating that’s close to the hull area you'll be working on.
- Plastic or Rubber Rub Rails: These can be easily discolored by compounds and polishes.
This might take you 30 minutes, but it will save you hours of cleanup and headaches later. Once your boat is clean, decontaminated, and masked off, you have a perfectly prepared surface, ready for the real transformation to begin.
Time to Make That Gelcoat Shine: The Compounding Process
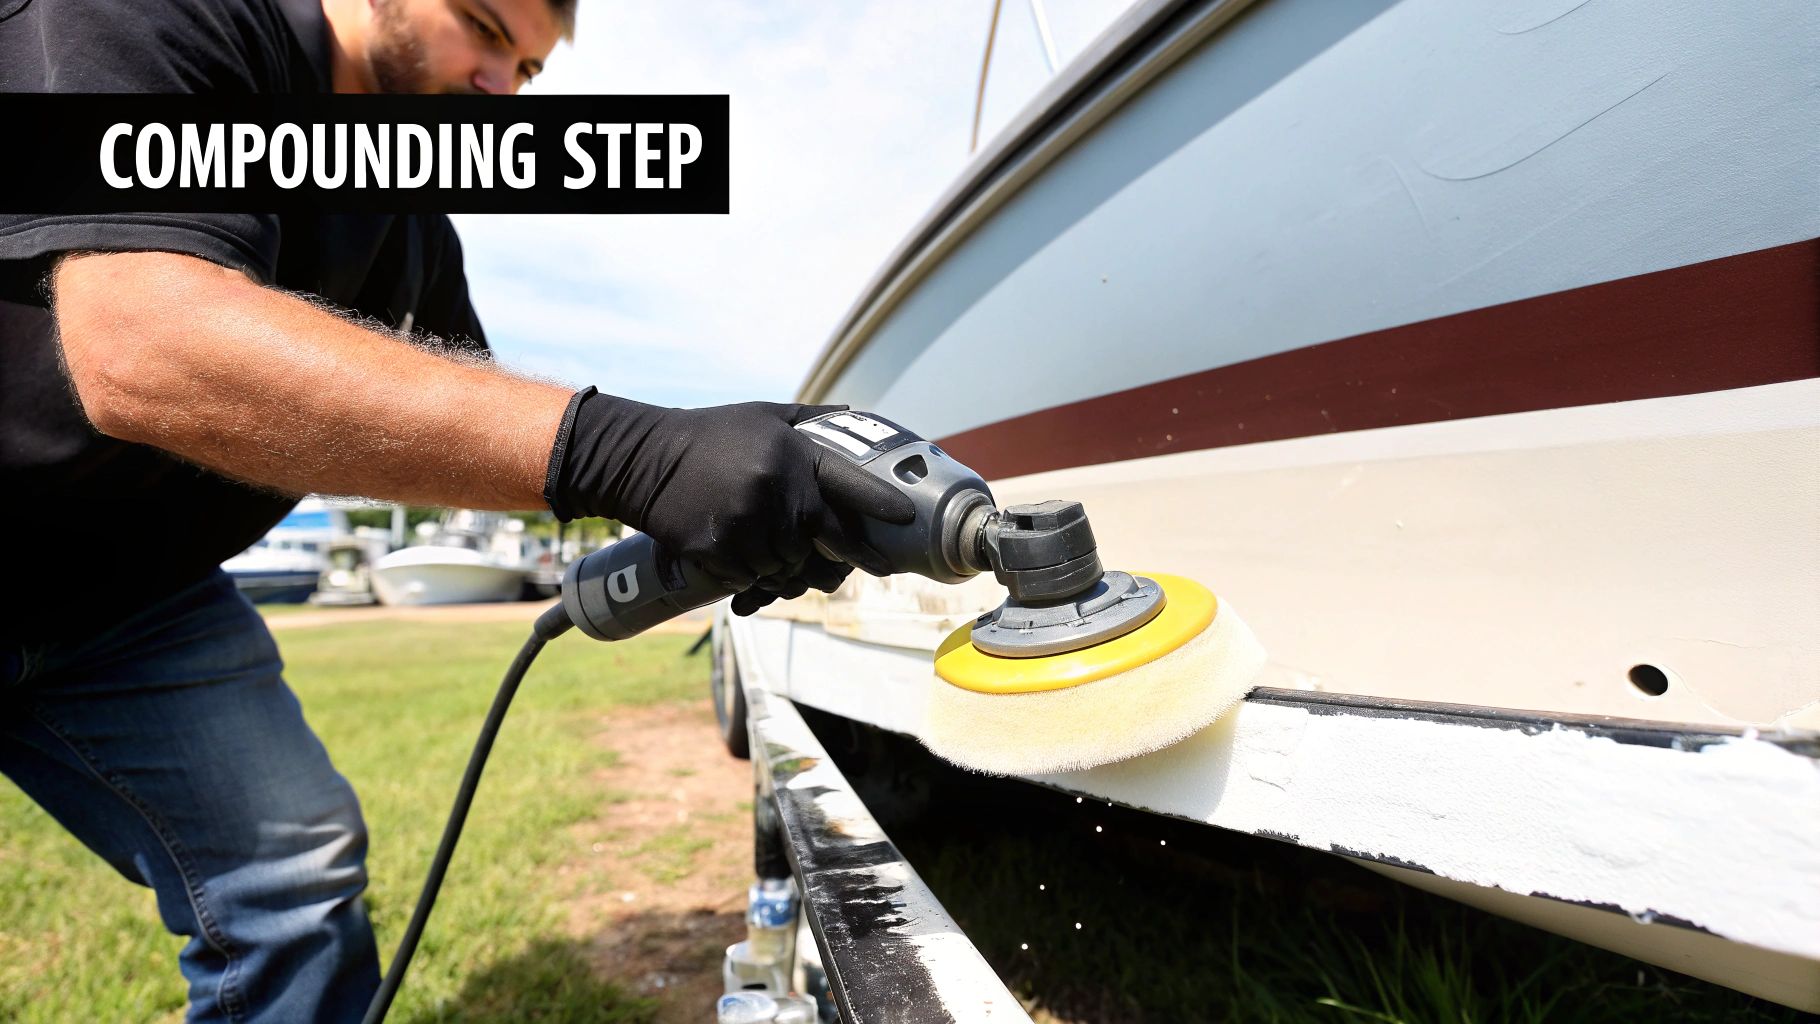
Alright, the prep work is done. Your boat is clean, decontaminated, and all the delicate bits are safely taped off. Now comes the fun part—this is where you get to physically erase years of oxidation and watch that color come roaring back to life.
If you're new to this, it can feel a little intimidating, but it's a straightforward process if you stay methodical. You're not just smearing product around; you're using microscopic abrasives to carefully level the gelcoat surface, stripping away that dead, chalky top layer to reveal the fresh, vibrant finish hiding underneath.
Priming Your Pad and Dialing in the Speed
First, you have to "prime" your compounding pad. A bone-dry pad is a recipe for swirl marks and won't spread the compound evenly. To get it ready, just apply four to five pea-sized dots of compound in a circle near the edge of your pad, plus one more right in the center.
Now, before you hit the power button, gently press the pad against the hull in a small 2'x2' section. This simple move stops the compound from slinging all over you and the boat the second the machine kicks on.
For a dual-action polisher, a great starting point for compounding is a speed setting between 3 and 4. This gives you enough muscle to cut through the oxidation without creating too much heat and risking damage to the gelcoat.
Mastering the Cross-Hatch Pattern
Want an even, professional-looking finish? The secret is a consistent pattern. The most effective technique by far is the cross-hatch pattern. It ensures you hit every square inch of your working area from multiple directions, which is the key to a perfectly uniform result.
Here’s your action plan:
- Place the primed pad flat against the hull on your 2'x2' section.
- Switch the polisher on and quickly spread the compound over the area on a low speed.
- Crank the speed up to your working setting (3 or 4) and start moving the polisher slowly from left to right, overlapping each pass by about 50%.
- After you've covered the whole section horizontally, switch it up. Now move the polisher up and down, again with that 50% overlap.
That whole sequence is considered one "pass." For most boats, you'll need to do two to three complete passes per section to fully work the compound and break down all the oxidation.
Pro Tip: Let the machine do the heavy lifting. You only need to apply enough downward pressure to keep the pad flat on the surface—we're talking maybe 5-10 pounds of pressure, tops. Leaning on it too hard will just bog down the motor, making it less effective and leading to a splotchy finish.
How to Know When You're Done
So, how do you know when it's time to move to the next section? Look for a couple of tell-tale signs. First, the compound itself will change. It will go from a wet, opaque liquid to a very thin, almost translucent film. That’s your signal that the abrasives have broken down and done their job.
Second, just use your eyes. Grab a clean microfiber towel, wipe the area down, and hit it with a flashlight. That dull, chalky look should be gone, replaced by a much glossier, more consistent surface. If you still spot some hazy patches, it probably just needs one more pass.
Keep Your Pads Clean for Better Results
As you work your way around the boat, your compounding pad will inevitably get clogged with old compound and all the oxidation you've removed. A "caked" pad doesn't cut well and can even introduce new scratches. You need to clean it often—I recommend doing it after every single section.
No need to break out the soap and water each time. The quickest way is to grab a stiff brush or a pad cleaning tool. Just hold the polisher with the pad facing up, turn it on low, and gently press the brush against the spinning pad. In a few seconds, it will fluff the fibers right up and knock out all the gunk.
A clean pad cuts faster, works better, and gives you a superior finish. Don't skip this step!
Once you've worked this system section by section around the entire boat, you'll be looking at a haze-free, deeply restored hull. It’s going to look a thousand times better, but we’re not quite finished. The next step is to refine this surface even further to get that truly spectacular, wet-look shine.
Bringing Out That Deep, Wet-Look Shine
After all that compounding, your boat’s hull is finally free from that chalky, faded oxidation. The color is rich and uniform, but if you catch it in the right light, you might see a slight haze or some super-fine swirl marks. Don’t panic—that’s totally normal. This is where polishing comes in to take the finish from good to truly breathtaking.
Think of it this way: compounding is like sanding wood with medium-grit paper. You've leveled the surface and knocked down the big problems. Polishing is like following up with fine-grit paper to create a surface so smooth and perfect that light reflects off it flawlessly. This is the step that turns a clean boat into a showstopper.
Refining the Surface with Polish
The actual motions of polishing are almost identical to compounding, but the mindset and the tools are completely different. Your goal is now pure refinement, not aggressive correction. To get that deep, wet-look shine, you’ll need to make two key changes to your setup.
-
Switch to a Finer Polish: Boat polish uses much smaller, less aggressive abrasives than a compound. These tiny particles are designed to buff out the micro-marring left by the previous step, not cut through heavy oxidation.
-
Grab a Softer Foam Pad: Put that wool pad or firm cutting pad away. Now you’ll want a soft foam finishing pad—they’re often color-coded white, black, or blue. These pads have very little "cut" and are perfect for gently working the polish over the surface without introducing new scratches.
This one-two punch of a fine polish and a soft pad is the secret sauce for creating incredible depth and clarity in your gelcoat. It’s how you get a finish that looks like you could dip your hand right into it.
Polishing Technique for Maximum Gloss
With your new finishing pad on the polisher, squeeze out four pea-sized dots of polish. Just like before, stick to small 2'x2' sections and use that same methodical cross-hatch pattern.
The big difference here is machine speed. Back it down a notch to a setting of 2 or 3. Your goal is to gently burnish the surface, not aggressively cut it. Let the machine glide over the gelcoat with just enough pressure to keep the pad flat against the hull.
After two or three complete passes, you’ll see the polish break down into a thin, oily film. That’s your cue. Grab a fresh, plush microfiber towel and buff away the residue to reveal an absolutely jaw-dropping shine.
Pro Tip: Always use a separate, dedicated microfiber towel for wiping off polish. Never reuse the towel you used for compound removal. It’s likely contaminated with abrasive particles that can easily scratch the perfect finish you just created.
The Final, Can't-Skip Step: Protection
You've put in the sweat equity, and your boat looks phenomenal. Now, you absolutely have to protect that finish. Leaving freshly polished gelcoat exposed to the elements is like parking a brand-new car in a hailstorm. UV rays, salt, and water spots will immediately start attacking the surface, undoing all your hard work.
This step is non-negotiable. You need a protective layer to act as a sacrificial barrier between your pristine gelcoat and the harsh marine environment. It's where looks and longevity meet. In the marine detailing world, a high-gloss finish is everything, which is why 85% of premium polishes now include UV inhibitors to fight sun damage. This reflects what boat owners demand: a way to revitalize their boat's look while safeguarding their investment. You can dive deeper into these trends by reading the full research on the boat polishes market.
You’ve got a few options for protection, each with its own pros and cons:
- Waxes: Traditional carnauba waxes give a deep, warm glow but are the least durable, usually lasting only a few months.
- Sealants: These synthetic polymers chemically bond to the gelcoat, providing excellent UV protection for 6-12 months.
- Ceramic Coatings: The king of durability. Ceramic coatings create a hard, glass-like shell over your gelcoat that can last for years with proper care.
For simple and effective ongoing maintenance, a quality spray-on product is your best friend. A quick wipe-down with Boat Juice Exterior sealant spray after each trip adds a powerful layer of UV blockers and SiO2 ceramic protection. It's hands-down the easiest way to maintain that just-polished look all season long and make sure your hard work keeps turning heads.
Got Questions About Boat Compounding? We’ve Got Answers.
It's one thing to read a step-by-step guide, but it's another to actually grab a polisher and get to work. It’s totally normal to have a few questions pop up before you dive in. Getting those sorted out can be the final confidence boost you need to get the job done right.
Let's walk through some of the most common things people ask before they start.
How Often Should I Really Be Compounding My Boat?
This is probably the most common question, and the answer is refreshingly simple: compound as little as possible. Think of compounding as a major correction, not regular maintenance. It literally removes a thin layer of gelcoat to get rid of heavy, chalky oxidation.
For most boats, this is a job you'll only need to tackle every 2-3 years, maybe even longer if you're good about upkeep.
Polishing is a different story. It's much gentler and perfect for an annual tune-up to bring back that deep gloss, often as part of your spring prep routine.
Here's the key takeaway: The best way to avoid compounding is with consistent maintenance. A quick wipe-down with a quality cleaner and protectant after each trip does wonders to stop UV damage before it starts.
Can I Just Do This by Hand?
I admire the ambition, but trying to compound an entire boat by hand is a recipe for exhaustion and disappointment. You might be able to work out a small scuff, but that's about it.
Boat gelcoat is incredibly tough—way harder than the clear coat on your car. You simply can't generate the consistent speed and friction needed by hand to effectively cut through oxidation. It’ll wear you out and leave you with a patchy, uneven finish.
Do yourself a huge favor and invest in a good dual-action (DA) polisher. It's the game-changer that makes professional results achievable for you at home.
Help! I Finished and Now I See Swirl Marks. What Did I Do Wrong?
First off, don't panic! This happens, and it's completely fixable. Those fine, circular scratches you're seeing are often called holograms or swirl marks. They almost always come down to one of a few things:
- The compound was a little too aggressive for the job.
- Your pad got gunked up with old product and contaminants.
- You moved the polisher too fast, not giving the abrasives time to break down properly.
The fix is easy. Grab a clean, soft foam finishing pad, switch to a finer polish, and go back over the area. Use a slower machine speed with light pressure. This gentle pass will smooth out those tiny scratches, leaving behind nothing but a crystal-clear shine.
Sometimes, compounding can reveal deeper issues that were hiding under the haze. If you uncover some more serious gouges, our guide on simple boat gelcoat repairs has you covered.
With these common questions answered, you're ready to go. You’ve got the full playbook, from prep to protection, and you know how to handle the curveballs. It's time to bring that showroom shine back to your boat.
Your boat deserves to look its best after every outing. With the right techniques and products, you can keep your gelcoat looking brand new all season long. Boat Juice makes it easy with our full line of American-made detailing products designed for boaters like you. From our powerful Exterior cleaner to our long-lasting ceramic sealant, we have everything you need to maintain that perfect shine.
Your next step is clear: now that you've restored the shine, protect it. Shop the full Boat Juice collection now!