


· By Boat Juice Team
How to Remove Water Spots From Boat Surfaces The Right Way
To get water spots off your boat, you first have to know what you’re up against. Those annoying white marks are simply mineral deposits left behind when water evaporates. A quick wipe-down with a microfiber towel right after you pull the boat out can prevent most fresh spots. But for the tough, baked-on stains, you'll need something stronger, like a dedicated marine water spot remover.
Why Do Those Annoying Water Spots Keep Coming Back?
Ever spend an hour rinsing your boat after a great day on the lake, only to come back the next morning and find it covered in chalky, white spots? It’s a classic, frustrating moment for any boat owner. Those spots aren't dirt; they're the ghosts of the water that was once there.
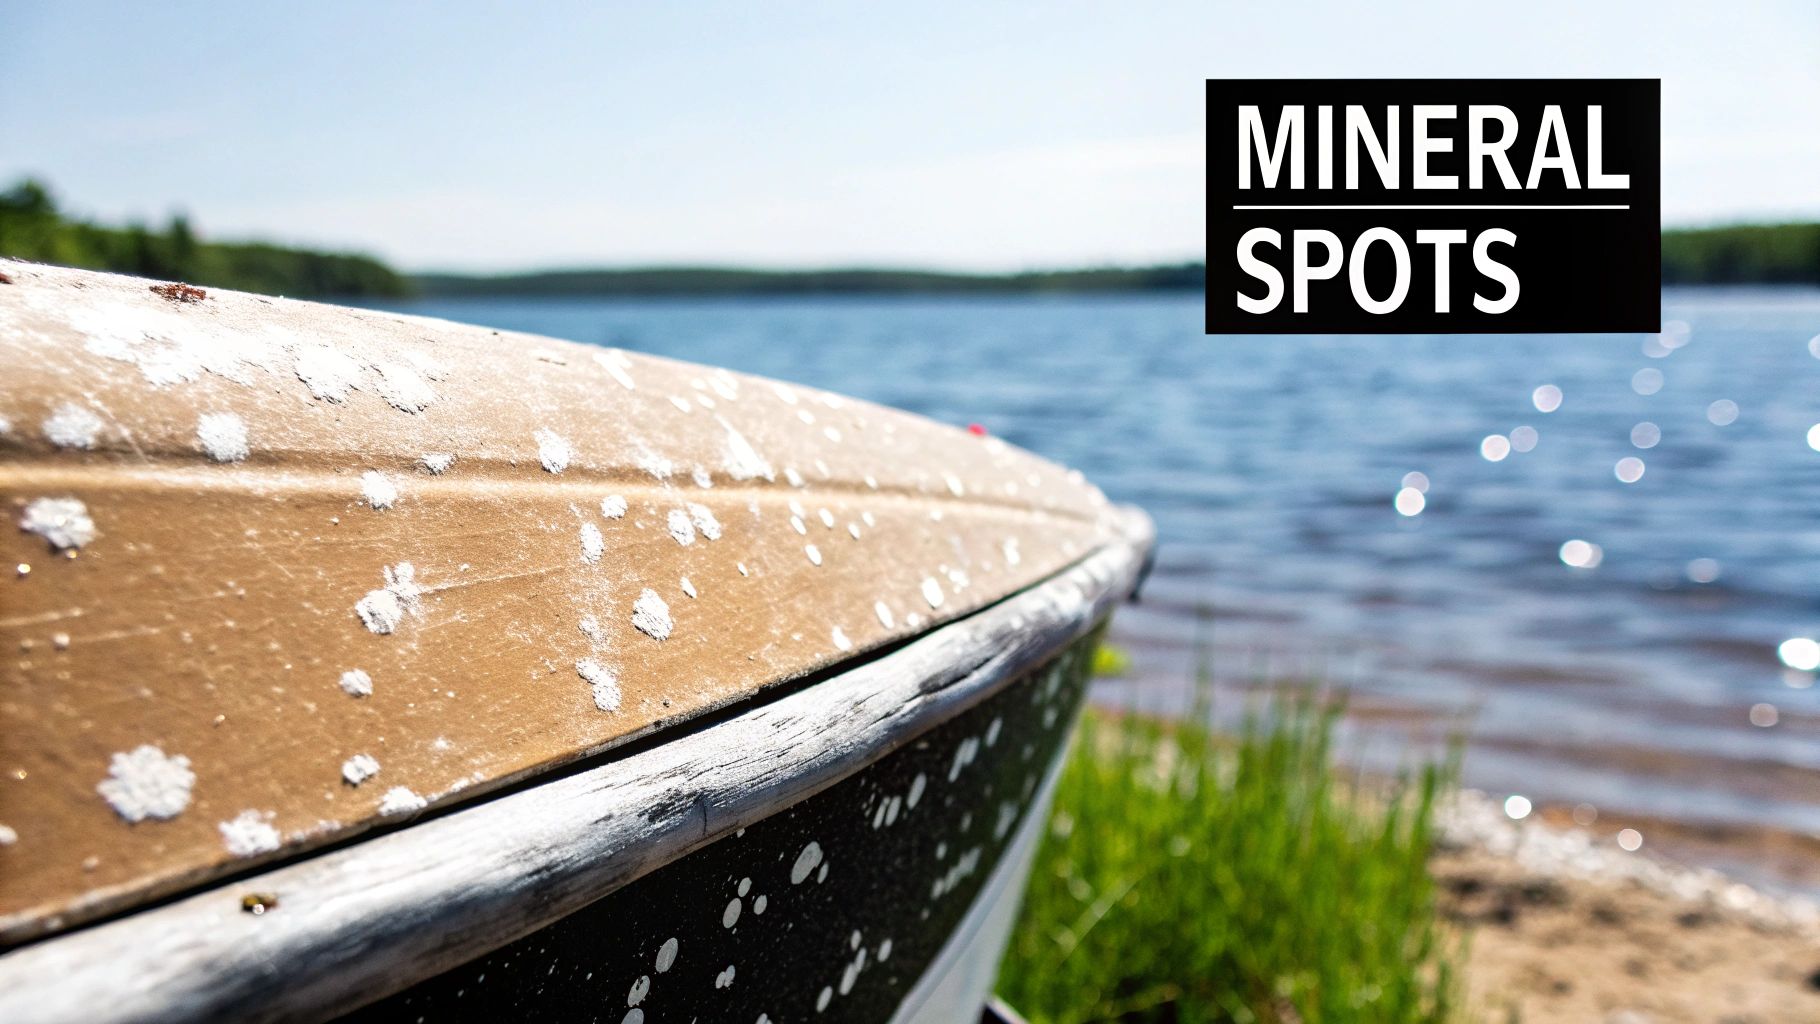
The simple truth is that almost all water, whether it's from a lake, river, or your garden hose, is loaded with dissolved minerals. The main culprits are usually calcium and magnesium. When a bead of water sits on your gelcoat and dries in the sun, the H₂O evaporates, but those minerals get left behind as a chalky residue.
It's All About Hard Water
The severity of your water spot problem is directly linked to the "hardness" of the water your boat lives in. Hard water simply means it has a higher concentration of minerals. More minerals mean every single drop leaves behind a bigger, uglier deposit.
- Location, Location, Location: Some lakes and rivers are infamous for their hard water, capable of leaving stubborn spots after just a few hours of fun.
- The Culprit at Home: Don't forget about your tap water! The very water you use to rinse your boat can be the source of the problem, which is why understanding how to get rid of hard water for good can be a game-changer for prevention.
Think of the sun as a kiln. When it beats down on your boat, it bakes those mineral deposits right onto the gelcoat, glass, and vinyl. The heat speeds up the process, turning a simple residue into a tough, crusty stain that soap and water won't even touch.
Pro Tip: Never splash lake water on your boat to "rinse it off" on a hot day. You're just dousing it with more minerals and making the problem ten times worse.
Fresh Spots vs. Permanent Etching
It’s also crucial to know that not all water spots are created equal. There's a big difference between a fresh spot and a stain that's been there for weeks, especially during the peak summer boating season.
A fresh water spot is just a surface-level mineral deposit. Annoying? Yes. Removable? Absolutely, with the right cleaner and a bit of effort.
But if you let those spots sit for days or weeks, the minerals can start to chemically react with your boat's finish. The acidic nature of the deposits can actually eat into the gelcoat, creating permanent "etching." This leaves a subtle, rough patch that even the best cleaners can't fix, forcing you to break out the polisher and compound. This is exactly why tackling water spots quickly is your best line of defense.
Your Essential Toolkit For Tackling Water Spots
Before you can get rid of those stubborn water spots, you have to have the right gear. Showing up to the dock with just a bucket of soapy water and an old t-shirt is a fast track to a long, frustrating afternoon. Having the right tools on hand makes the whole process faster, safer, and a heck of a lot more effective.
It’s like trying to hammer a nail with a screwdriver—you might make a dent, but you won't get the job done right. The same goes for boat cleaning. Most general-purpose cleaners are fine for everyday dirt, but they just don't have what it takes to break down the tough mineral deposits that cause water spots.
The Non-Negotiables For Your Cleaning Kit
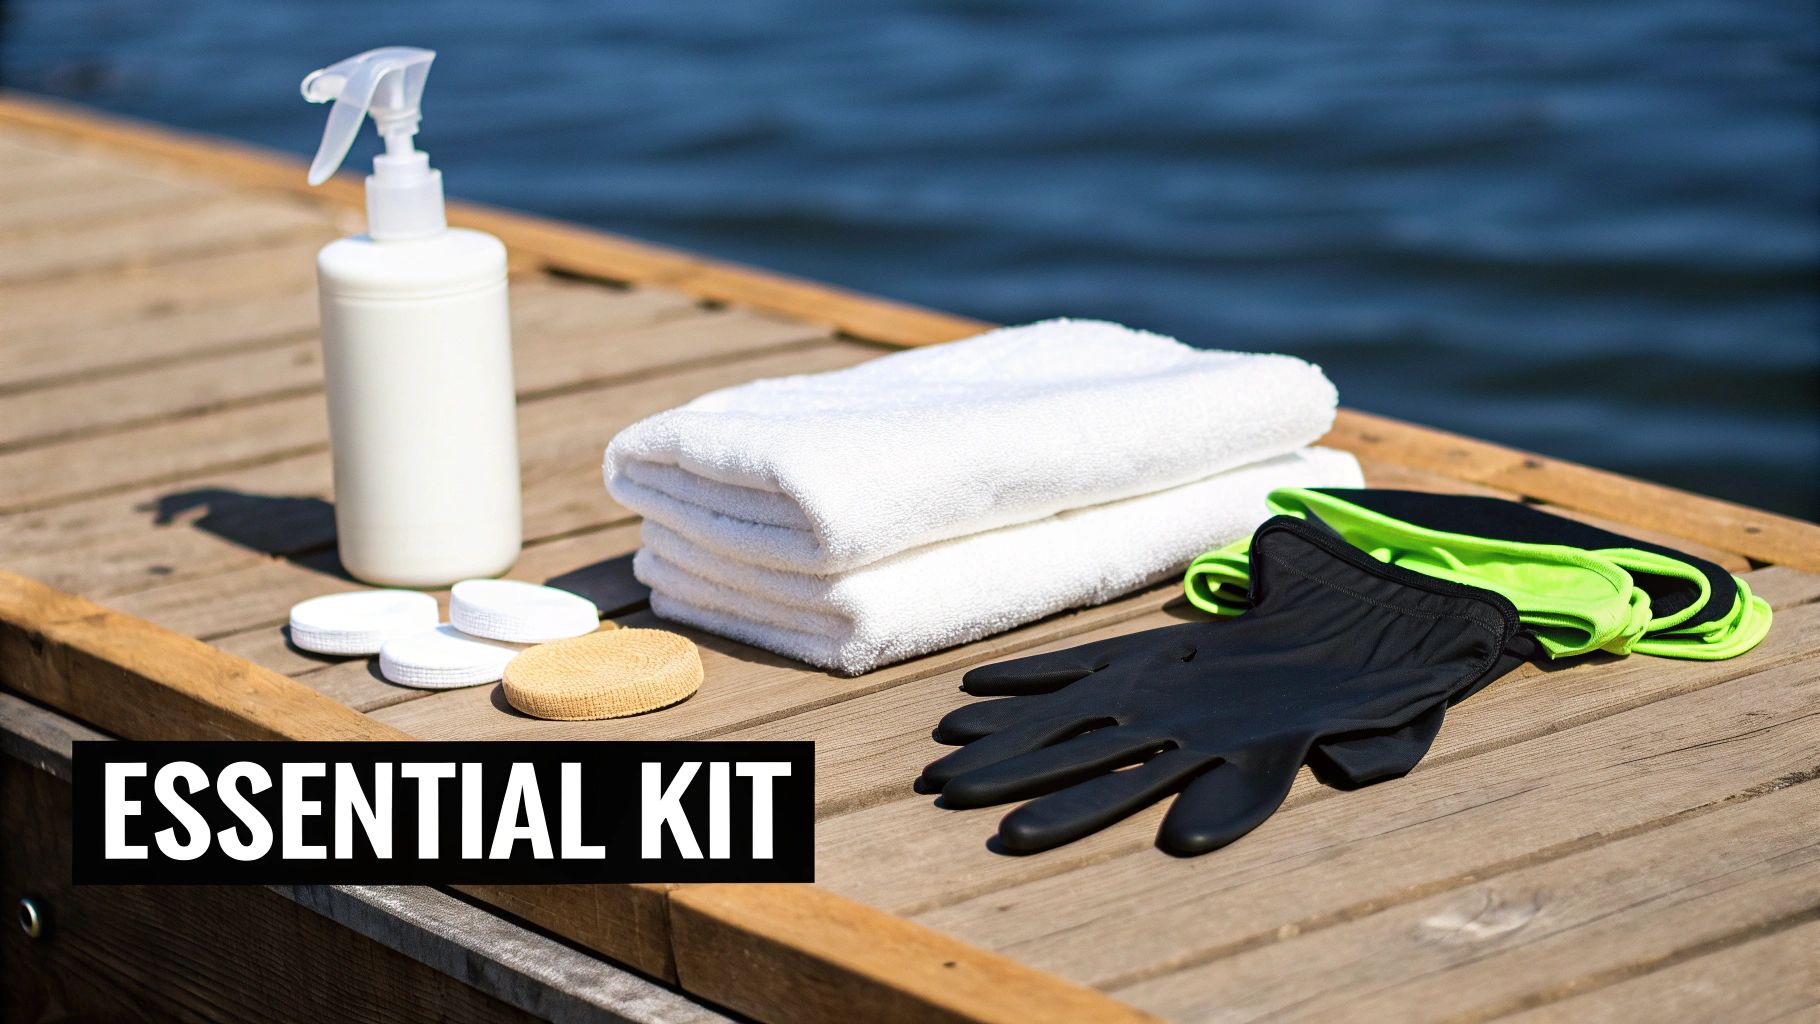
Let's assemble your perfect water spot-busting arsenal. These are the core items you'll need to get professional results without accidentally damaging your boat's finish.
- High-Quality Microfiber Towels: This is your most important tool. You’ll want a clean, plush stack of them ready to go. Microfiber is incredibly absorbent, and its tiny fibers are designed to lift and trap mineral gunk without scratching your delicate gelcoat or glass.
- A Dedicated Water Spot Remover: This is the hero of the show. A specialized product is chemically designed to dissolve the calcium and magnesium that regular soap just smears around. It does the heavy lifting for you, so you don't have to scrub your arms off.
- Protective Gloves: Some of these cleaners can be a bit harsh on your skin. A simple pair of nitrile or rubber gloves keeps your hands protected and lets you focus on the job without worrying about irritation.
Industry tests have shown that minerals bond to boat gelcoat with surprising strength, resisting basic soaps in over 92% of cases. Detailers often charge anywhere from $100 to $300 to handle these spots, but doing it yourself with the right stuff can slash that cost by more than 80% and take just a few minutes.
Why a Specialized Remover Is So Important
So, why not just grab a generic cleaner or a bottle of vinegar from the kitchen? It all comes down to pH balance and protecting your boat's surfaces. Your boat’s gelcoat is porous and surprisingly sensitive. Using harsh, acidic cleaners like vinegar can eat right through your protective wax layer, leaving the finish exposed to UV damage and oxidation.
This is where a product like Boat Juice Extreme Water Spot Remover really shines. It’s formulated with a specific pH level that aggressively dissolves mineral deposits without being corrosive to your gelcoat, vinyl, or glass. It works on a chemical level to break down the spot, letting you simply wipe it away.
Key Takeaway: Using the right tool for the job isn't just about getting it done; it's about preserving your investment. A dedicated water spot remover protects your boat by cleaning safely, ensuring you don't cause a bigger problem while trying to fix a small one.
Choosing the right product can feel like a chore, but knowing what makes a remover effective is half the battle. If you're looking for more guidance, we've put together a detailed breakdown of the best water spot remover for boats.
How To Diagnose Your Water Spot Problem
Not all water spots are created equal. I'm sure you've seen it—some spots vanish with a quick wipe-down, while others seem to have become a permanent part of your boat's finish. Before you reach for the most aggressive compound on the shelf, let's figure out what you're actually up against.
Going in with the wrong game plan can turn a simple cleanup into a long, drawn-out battle that can even damage your gelcoat. Think of yourself as a boat doctor for a minute. You wouldn't use a sledgehammer to crack a nut, and you shouldn't attack a fresh water spot with a heavy-duty compound. A quick diagnosis will help you use the least aggressive method necessary to get the job done right.
The Two Types of Water Spots You'll Encounter
Water spots really boil down to two main categories. Knowing which one you're fighting is the first step to winning the war.
-
Type 1 Mineral Deposits: These are the fresh ones. They're just the chalky, white mineral residue left behind when hard water evaporates, sitting right on top of your boat's surface. They look awful, but the good news is they haven't caused any real damage... yet.
-
Type 2 Etched Spots: These are the real villains. When you let those mineral deposits bake in the sun for too long, their acidic nature can actually eat into the gelcoat or clear coat. This creates a tiny, microscopic crater in the finish. Even after you clean the mineral off, that indented "scar" is left behind.
Your Simple Diagnostic Tests
You don't need any high-tech gear to figure out what kind of spots you have. Your own eyes and hands are the best tools for the job.
The Visual Test: How Does the Light Reflect?
First, find a good patch of water spots on your boat. Get down low and look at the surface from an angle, letting the sunlight or a bright flashlight glance across it.
If the spots seem to "disappear" or get really faint when you change your viewing angle, you're almost certainly dealing with Type 1 mineral deposits. The spot is just a film on top, so changing how the light reflects can hide it. This is great news! It means a good chemical cleaner should be all you need.
On the other hand, if the spot stays put as a dull, distorted area no matter which way you look at it, you’re probably looking at Type 2 etching. The light is catching on the edges of that tiny crater in the finish, which is why it's always visible. This means cleaning alone won't cut it; you're going to have to polish.
The Fingernail Test: Feel for the Damage
Now, it's time to get hands-on. Clean a small test spot with a quick detailer to get rid of any surface dirt, then gently run your fingernail over one of the water spots.
If your fingernail glides smoothly right over the spot without catching on anything, you've got a surface-level deposit. The finish underneath is still smooth and intact. A quality water spot remover, like Boat Juice Extreme, will be your new best friend.
But, if you can feel a little bit of roughness or a subtle edge as your nail goes over the spot, that’s a dead giveaway for etching. The minerals have physically damaged the gelcoat, and a chemical cleaner just can't smooth out that microscopic divot. This confirms you'll need a polish or compound to level the surface back out.
Water Spot Severity and Recommended Action
Use this table to quickly identify the type of water spots you're dealing with and find the best course of action.
| Severity Level | Visual Cues | Feel (Tactile Test) | Recommended First Action |
|---|---|---|---|
| Light (Type 1) | Chalky, white film. Spots may "disappear" at certain angles. | Surface feels completely smooth. | Chemical cleaner (e.g., Boat Juice Extreme) |
| Moderate (Type 1/2) | Spots are very distinct, but surface still has some shine. | May feel a very slight texture or grittiness. | Strong chemical cleaner; may need light polish if cleaner isn't enough. |
| Severe (Type 2) | Dull, hazy patches that are visible from all angles. | Can feel a distinct edge or roughness with a fingernail. | Skip the cleaner. Go straight to a polish or light compound. |
With this quick, two-part diagnosis, you're armed with the knowledge to pick the perfect tool for the job. Now you can move on to the right removal method with confidence.
Removing Water Spots From Every Boat Surface
Okay, you've got your tools laid out and you know what kind of water spots you’re up against. Now for the satisfying part—getting hands-on and bringing back that showroom shine. Different materials need a slightly different touch, so let's walk through it surface by surface to ensure you get a perfect finish.
The golden rule is to always start gentle. If your diagnosis pointed to simple surface deposits (Type 1), a good chemical remover is your best friend. If those spots have started to etch into the surface (Type 2), you’ll need to step things up to a light polish.
Tackling Your Gelcoat and Painted Hull
The hull is where water spots love to show up and ruin the view. Your goal is to dissolve those stubborn mineral deposits without stripping away your wax or scratching the finish. Always work in small, manageable sections, maybe 2x2 feet at a time, especially on a warm day when products can dry out quickly.
Here are your actionable steps for light to moderate spots:
- Spray: Lightly mist a purpose-built cleaner like Boat Juice Extreme Water Spot Remover directly onto the affected 2x2 section.
- Wait: Let the product sit for 15-30 seconds. This gives the chemicals time to work their magic and break down the mineral bonds.
- Wipe: Gently wipe the area with a clean, plush microfiber towel.
- Reapply if Needed: If spots remain, resist the urge to scrub harder. Instead, reapply the remover, let it sit again, and wipe. Let the chemicals do the work, not your elbow grease.
When Chemical Cleaners Aren't Enough
If a chemical remover doesn't get the spots out after two attempts, it’s time to call in a light polish or a cleaner wax. These products contain very fine abrasives that gently level out the etched surface, removing the spot while laying down a fresh layer of protection. Dab a small amount onto a microfiber applicator pad and work it in with gentle, overlapping circles. Once it hazes over, just buff it off with a fresh microfiber towel.
Pro Tip: Try to do this job in the shade or on a cool, overcast day. Direct sun heats up the hull, causing cleaners and polishes to evaporate way too fast, which can leave a streaky mess.
Achieving Crystal-Clear Glass and Windshields
Water spots on your windshield are more than just an eyesore; they can be a genuine safety hazard. Glass feels tough, but you can scratch it with the wrong approach.
Here are the steps for perfectly clear glass:
- Spray: Apply your trusted water spot remover directly onto the glass.
- Spread: Use one clean microfiber towel to spread the product evenly across the surface.
- Buff Dry: Immediately grab a second, completely dry microfiber towel to buff the glass to a perfect, streak-free shine. Using two towels is key—it prevents you from just smearing the dissolved minerals back over the glass.
For really baked-on spots, try a bit of fine-grade #0000 steel wool along with your water spot remover. It sounds scary, but this super-fine steel wool is actually softer than glass and won't scratch it. It has just enough bite to mechanically lift away those caked-on mineral deposits. Even though this guide to water stains removal is for homes, it offers great insight into breaking down the minerals on any glass surface.
Protecting Your Stainless Steel and Chrome
Your cleats, railings, and chrome accents deserve to gleam in the sun. Thankfully, cleaning them is pretty straightforward. A quick spray of water spot remover and a wipe with a microfiber towel is all it takes. For getting into tight corners, an old toothbrush works wonders—just spray the cleaner, use the brush to gently agitate the area, and wipe it clean. If you want to dive deeper into caring for your boat's surfaces, check out our guide on how to clean fiberglass boats.
Safely Cleaning Vinyl and Upholstery
Water spots on vinyl seats are a common headache, but you need to be careful. Vinyl is much more sensitive than gelcoat, and harsh chemicals can lead to permanent discoloration or damage.
Here's the safe way to clean your seats:
- Test First: Always test your water spot remover on a small, hidden area of the upholstery to ensure it's compatible.
- Apply to Towel: Lightly mist the cleaner onto your microfiber towel, not directly onto the vinyl itself. Wiping with a dampened towel gives you better control and prevents oversaturation.
- Wipe & Dry: Gently wipe the spots away and follow up with a clean, dry towel to remove any residue.
Taking this surface-specific approach is the secret to success. It ensures you remove water spots from your boat safely and effectively, leaving every part looking brand new. An estimated 80% of the 62 million annual leisure boat outings in North America result in pesky water spots, and untreated spots can lead to a 15% drop in resale value.
Keeping Water Spots Away For Good
You just put in the elbow grease to get your boat looking incredible again. The last thing you want is for those ugly water spots to reappear the second you hit the lake. The real secret to a permanently spot-free boat isn't about endless cleaning; it's about smart prevention.
After you've done a deep clean and the surface is perfect, the single most effective thing you can do is apply a high-quality sealant or wax. This isn't just about getting a mirror-like shine—it's about creating a defensive shield against the very minerals that cause water spots to form.
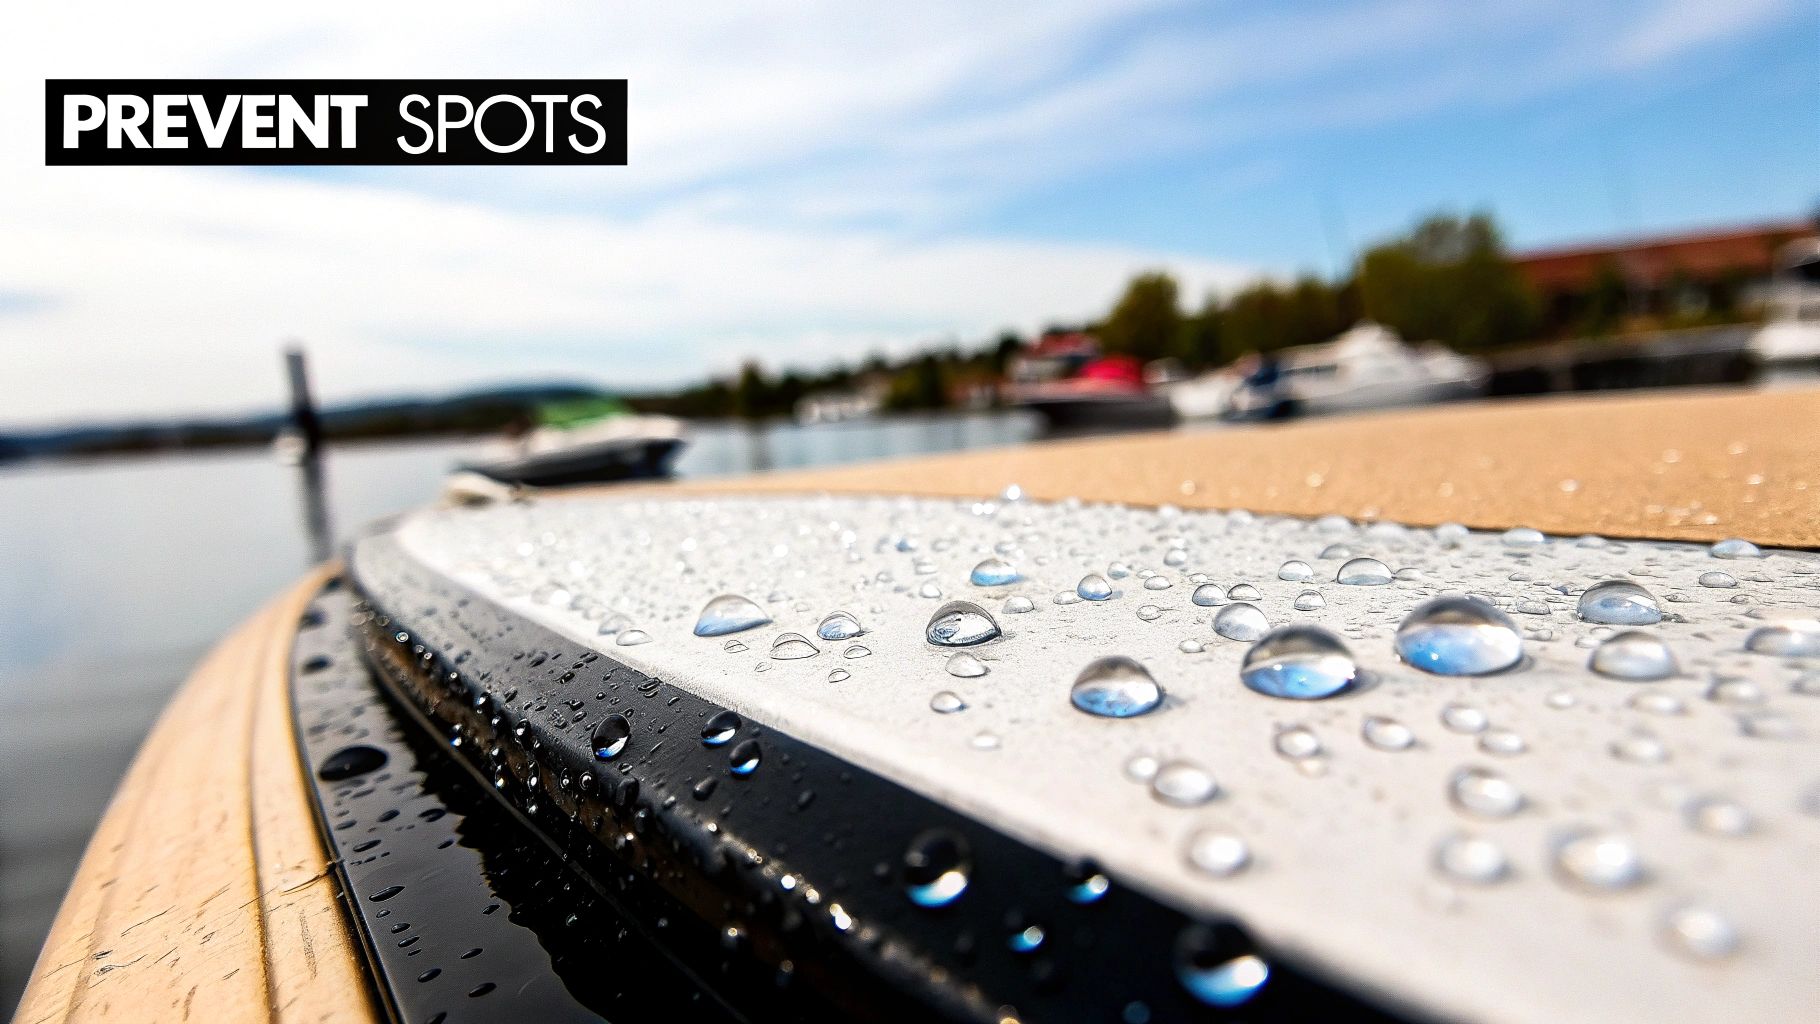
The Power of a Hydrophobic Barrier
A good protective coating makes your boat's surface hydrophobic. That’s just a fancy word for "water-hating." Instead of water spreading out and clinging to your gelcoat, it beads up into tight, perfect little droplets. This is where the magic happens.
When water beads up, it barely touches the surface. As your boat moves or even just sits in the breeze, those beads simply roll right off, taking all the dissolved minerals with them. They don't get a chance to dry and leave a chalky residue. A product like Boat Juice Protection is made for exactly this—an easy-to-use spray sealant that creates that slick, hydrophobic effect.
Build Simple Habits Into Your Routine
Beyond that initial layer of protection, a few small habits can make all the difference. Think of these as your daily defense that saves you from hours of heavy-duty cleaning down the road.
- The End-of-Day Wipe-Down: This is non-negotiable and the most important habit you can form. Before trailering up or throwing the cover on, give the boat a quick wipe with a quality drying towel. You’re physically removing the water before it can evaporate and leave its mineral ghosts behind.
- Use a Drying Aid: Want to make that wipe-down even better? Use a quick detailer or a spray wax as you dry. It adds lubrication to prevent swirl marks and lays down a fresh, micro-thin layer of protection.
- Focus on High-Impact Areas: Pay extra attention to places where water always pools—the transom, the swim platform, and the hull sides right above the waterline.
These little steps might take you five or ten minutes, but they will drastically cut down on how often you need to actively remove water spots from your boat.
Maintain Your Protection Layer
That protective sealant is your best friend, but it's not a one-and-done deal. It wears down over time. A good rule of thumb is to add a fresh coat every few months. The real test? When you notice water isn't beading up as tightly as it used to, it's time for a refresh. If you want to dive deeper into creating that perfect base coat, our guide to waxing a gel coat is a great place to start.
Your Top Questions About Boat Water Spot Removal, Answered
Even after you get the hang of it, a few questions always seem to pop up. Let's run through some of the most common ones we hear from boat owners so you can feel confident in your routine.
Can I Just Use Household Vinegar to Get Rid of Water Spots?
We get this one all the time. But while it might seem like a cheap and easy fix, using vinegar on your boat is a gamble you don't want to take. Vinegar is highly acidic, and it will strip any wax or sealant you've painstakingly applied, leaving your gelcoat exposed to the sun. Do it often enough, and you can actually dull the finish.
A dedicated, pH-balanced marine product is engineered to be tough on minerals but gentle on your boat's surfaces. It's simply the safest and most effective way to protect your investment.
How Often Should I Be Removing Water Spots?
Honestly? As soon as you spot them. The longer those mineral deposits sit baking in the hot sun, the more they'll etch into the surface. The best habit you can build is doing a quick wipe-down with a quality drying towel and a spray cleaner after every single trip. This simple five-minute step will prevent 90% of water spots from ever becoming a real problem.
Will a Water Spot Remover Strip the Wax Off My Boat?
That’s a fantastic question, and the answer depends on the product. Harsh, overly acidic removers or heavy-duty compounds will absolutely strip your wax. This is precisely why grabbing a formula made specifically for marine finishes is so important. A quality product like Boat Juice Extreme Water Spot Remover is engineered to dissolve mineral deposits without being aggressive enough to compromise modern waxes or ceramic coatings. That said, it's always smart to top things off with a fresh layer of protection after any deep cleaning.
What’s the Real Difference Between a Water Spot Remover and Regular Boat Soap?
Think of it this way: boat soap is like your daily body wash, while a water spot remover is like a specialized skin treatment. They both clean, but they do very different things.
- Boat Soap: This is for general surface cleaning. Its job is to lift away the easy stuff—dirt, grime, salt, and other loose gunk.
- Water Spot Remover: This is a targeted chemical cleaner with specific ingredients designed to break down the stubborn molecular bonds of minerals like calcium and magnesium, which regular soap just can't touch.
This explains why you can wash your boat perfectly, let it air dry, and still see those frustrating spots reappear. The soap got rid of the dirt, but it left the baked-on minerals behind. You need the right tool for the right job.
Your next step is to put this plan into action. Ready to stop scrubbing and start protecting? The Boat Juice lineup gives you everything you need to remove stubborn water spots and keep them from coming back. Shop our complete boat care kits today and make your end-of-day wipe-down fast, easy, and effective.