


· By Boat Juice Team
Your Guide to Boat Vinyl Cleaning for a Lasting Shine
Taking good care of your boat’s vinyl is so much more than just making it look nice—it’s about protecting your investment. Your seats are constantly blasted by the sun, soaked in saltwater, and subjected to all sorts of spills. A simple, proactive cleaning routine will keep your vinyl looking and feeling great for years to come.
Why Your Boat Vinyl Needs More Than a Quick Rinse
Your boat's vinyl seats live a tough life. They’re up against a relentless assault from intense UV rays, humidity swings, gritty salt crystals, and the inevitable spills from drinks, food, and sunscreen. Just hosing them down might get the loose dirt off, but it does nothing to stop the invisible damage happening just beneath the surface.
Think of your boat's vinyl like your own skin. Without sunscreen, UV rays break down its structure, leaving it brittle, dry, and ready to crack. That's exactly why you see older boats with that faded, chalky upholstery—it's a chemical sunburn, plain and simple.
The Problem with Household Cleaners
It’s tempting to grab whatever all-purpose cleaner or dish soap you have on hand. But while those are fine for your kitchen counter, they can wreak havoc on your boat’s upholstery. Most household cleaners are packed with harsh chemicals, degreasers, or ammonia that do more harm than good.
These aggressive ingredients strip away the vinyl's essential plasticizers, which are the compounds that keep it soft and flexible. Over time, this just fast-forwards the aging process, leaving you with stiff, uncomfortable seats that crack the moment someone sits down. You're trying to clean, but you're actually destroying the material from the inside out.
The real goal of cleaning your boat's vinyl isn't just wiping away today's grime. It's about preserving the material itself so it can handle tomorrow's sun, salt, and fun. Shifting your mindset from just scrubbing stains to proactively protecting your vinyl is the secret to making it last.
The Financial Impact of Neglect
Letting your vinyl go doesn't just put a damper on your weekend outings; it hits you right in the wallet. The condition of your upholstery is one of the first things a potential buyer will notice, and it plays a huge role in your boat’s resale value.
Industry experts have seen neglected vinyl crack or fade in as little as 2-3 years, which can slash your boat's resale value by a whopping 20-30%. Using targeted marine cleaners designed to knock out stubborn water spots, mildew, and oxidation can add years to your vinyl’s life and protect your asset. You can discover more insights about the marine vinyl market and see for yourself why a dedicated maintenance routine isn't a chore—it's one of the smartest investments you can make in your boat.
Getting Your Vinyl Cleaning Kit Ready
Any seasoned boat owner will tell you that the secret to a quick, effective clean isn't just elbow grease—it's having the right tools on hand before you start. The difference between a frustrating afternoon scrubbing and getting a pro-level finish often comes down to what's in your cleaning bucket. So, before we get into the "how," let's talk about the "what."
We're not just grabbing random stuff from under the sink here. This is about building a dedicated kit that will protect your vinyl while making it look brand new.

With this setup, you'll be ready for anything—from a quick wipe-down after a day on the water to a full-on deep clean at the end of the season. Let's break down the essentials and why each one is a must-have.
Your Essential Boat Vinyl Cleaning Supplies
Here’s a quick reference guide to the tools and products that deliver the best results for your boat's upholstery. I keep all of these in a dedicated bag on my boat so I'm always prepared.
| Item | Purpose | Pro Tip |
|---|---|---|
| Soft-Bristle Brush | Gets into the vinyl's texture to lift out embedded dirt and grime without scratching. | Use a circular motion to gently agitate the cleaner. Never use a stiff brush; it'll ruin the finish. |
| Microfiber Towels | Traps dirt, absorbs liquid, and polishes without leaving lint or streaks behind. | Have a few on hand—one for cleaning, one for rinsing, and a dry one for buffing. This prevents smears. |
| Two Buckets | Separates your cleaning solution from your rinse water, keeping dirt off the seats. | Label them "SOAP" and "RINSE" with a marker. It's a simple trick that makes a huge difference. |
| Daily Cleaner | Tackles light messes like dust, water spots, and fresh spills quickly and safely. | A pH-balanced cleaner like Boat Juice Interior won't dry out your vinyl or leave a greasy film. |
| Stain Remover | Fights tough, set-in stains like mildew, which regular cleaners can't handle. | Use a targeted product that is specifically formulated to kill mildew at the root. |
This simple toolkit covers about 99% of what you'll encounter. Having these items ready to go makes the job less of a chore and more of a routine.
Why These Specific Tools Matter
It might seem basic, but let's quickly go over why these specific items work so well.
-
Soft-Bristle Brushes: Your vinyl seats have a subtle grain, and that's exactly where dirt, sunscreen, and grime love to hide. A soft brush is your best friend here. It's gentle enough to avoid scratching the surface but has just enough backbone to get into those crevices and pull the gunk out.
-
Microfiber Towels: Forget old cotton rags. A good stack of clean microfiber towels is non-negotiable. They're designed to grab and hold onto dirt instead of just pushing it around. Plus, they soak up water like a champ, which is key to avoiding streaks.
-
The Two-Bucket Method: This is an old-school detailer's trick that works wonders on a boat. One bucket holds your soapy water, and the other holds clean rinse water. After scrubbing a section, you rinse your dirty brush or towel in the rinse bucket before putting it back into the soap. This stops you from just reapplying dirty water to your seats.
Think of your tools as an investment in your boat's longevity. Using the right brush and towels is just as important as choosing the right cleaner. An abrasive tool can cause irreversible damage in seconds, undoing all your hard work.
Picking the Right Cleaners for the Job
Now for the solutions. Not all stains are the same, so you need a couple of different players on your team. You wouldn't use a hammer to turn a screw, right? Same idea here.
For specialized tasks, you might see people using all sorts of specialized deep cleaning products that are formulated for very specific, tough jobs. On your boat, you can keep it simple by having two main go-to cleaners.
For Your Day-to-Day Clean-Up:
For the everyday stuff—dust from the dock, water spots, or that little bit of spilled drink—you need a gentle, pH-balanced cleaner. This is where a product like Boat Juice Interior comes in handy. It cleans everything up without stripping the vinyl of its essential oils, and it leaves behind a clean, non-slippery finish.
For When Stains Get Serious:
Then there's the big one: mildew. Eventually, we all have to deal with it. Mildew isn't just a surface stain; it puts down roots. That's when you need to bring out a dedicated mildew stain remover. A specialized product is made specifically to kill mildew and lift out those ugly black spots without using harsh bleach that can damage your vinyl and stitching.
Want to explore more options? We put together a complete rundown of the best boat cleaning products to help you choose the right solution for any mess you might find.
Once you have this toolkit assembled, you're officially ready to tackle any cleaning job with confidence.
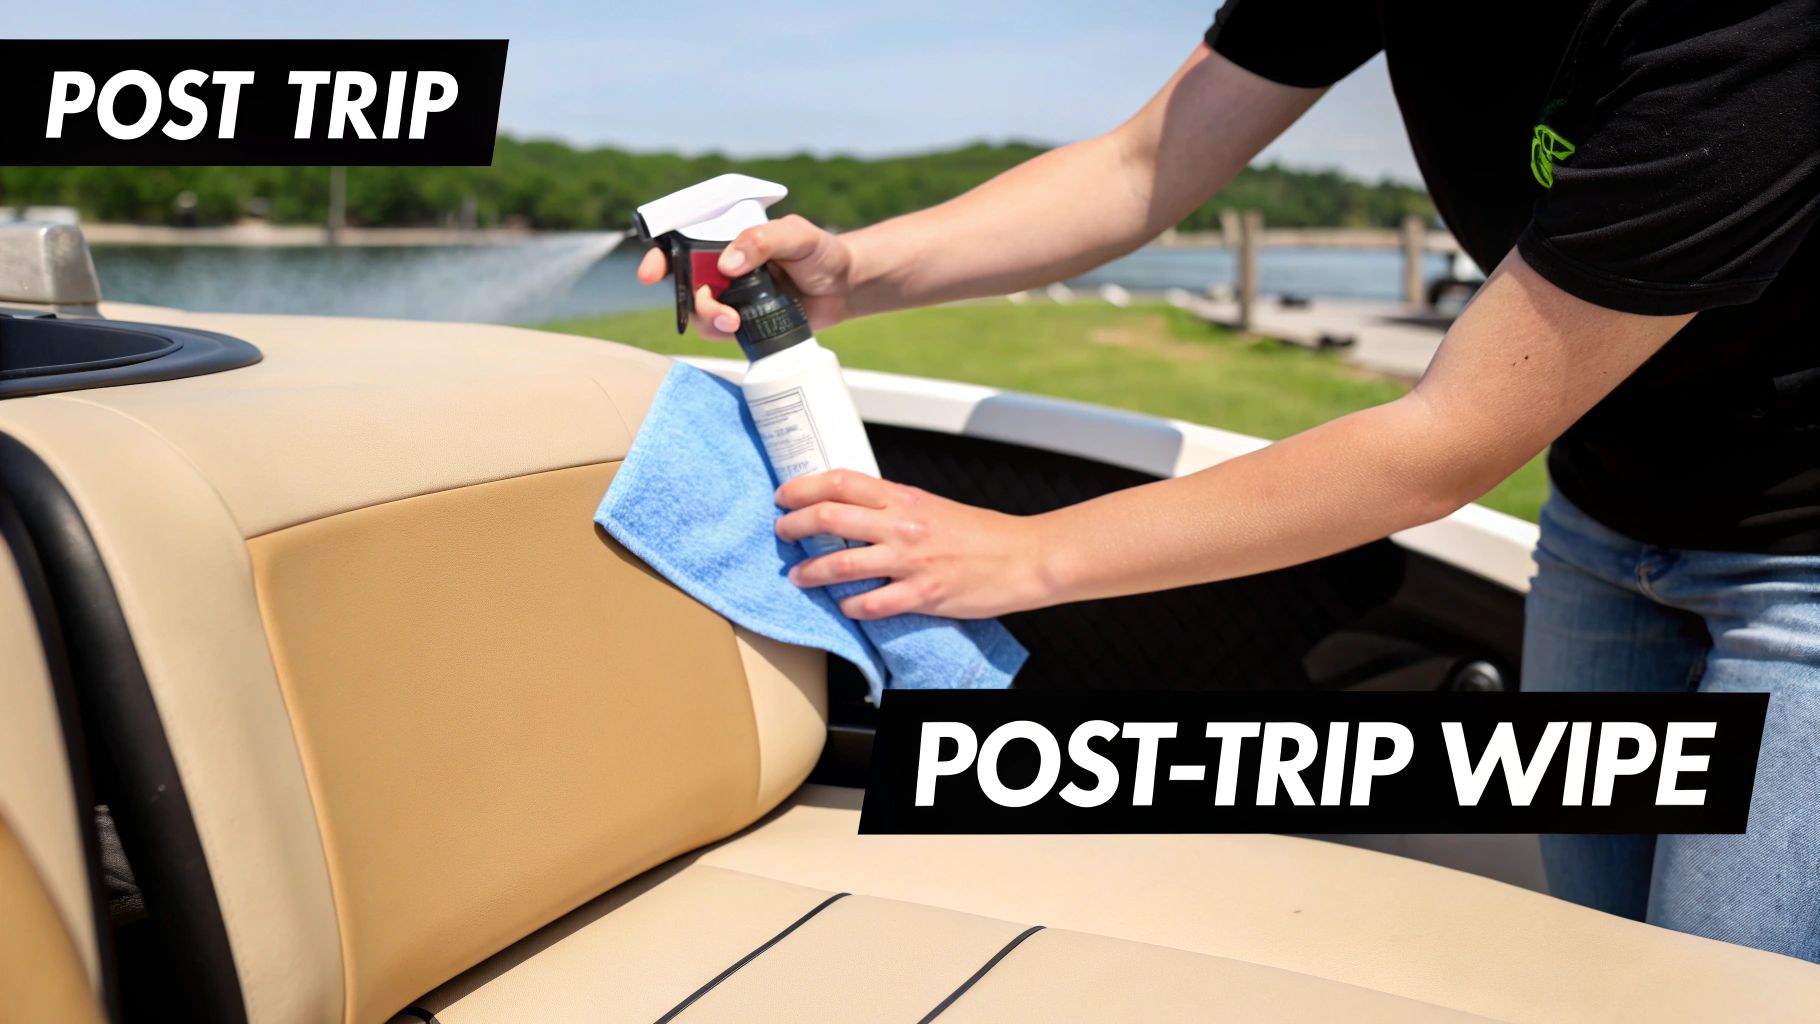
The 10-Minute Post-Trip Wipe Down
The real secret to keeping your boat's vinyl looking factory-fresh isn't some grueling Saturday scrubbing session. It's what you do in the 10 minutes after you pull back up to the dock. This quick wipe-down is the single best habit you can form to stop stains and long-term damage before they even start.
Think about what your seats go through on a typical day out: sunscreen, sweat, salt spray, maybe a little spilled Gatorade. Let that stuff bake in the sun, and it seeps right into the vinyl's pores. That's where you get that stubborn, grimy film and faded color that’s a nightmare to clean later. A quick wipe-down stops all that dead in its tracks.
Think of this little ritual as your first line of defense. It makes those deep cleans far less frequent and a whole lot easier. It’s the perfect, satisfying way to wrap up a great day on the water.
Step 1: A Quick Dry Pass
Before you even think about spraying anything, grab a dry microfiber towel. Your goal is to brush away all the loose stuff that’s settled on the seats during your trip. We’re talking about things like:
- Sand and dirt from the beach or the dock
- Crumbs from those snacks you packed
- Hair, dust, and whatever else can get ground into the seams
Just gently sweep it all onto the floor. Why start dry? Because if you spray a cleaner first, you’re just turning that loose grit into a muddy, abrasive mess. Wiping that around can put tiny scratches into the vinyl’s protective topcoat, which dulls the finish over time. This quick dry pass literally takes a minute and prevents that from happening.
Step 2: Mist and Wipe in Sections
Now that the loose debris is gone, you can get to the actual boat vinyl cleaning. You don’t need to drown the seats. Grab a good pH-balanced cleaner, like our Boat Juice Interior, and lightly mist one section at a time—say, a single seat cushion or a backrest.
Working in small, manageable areas is the trick here. If you spray the whole interior at once, the cleaner will start to dry before you get to it, leaving you with streaks and a sticky feeling. A light mist is all it takes to break down fresh sunscreen, body oils, and grime.
Once a section is misted, take a clean microfiber towel and wipe it down with nice, overlapping strokes. The microfiber is designed to lift and trap the dirt, not just smear it around. Make sure to flip your towel to a clean side often so you’re always lifting grime, not just moving it from one spot to another.
My Go-To Tip: I keep a dedicated "wipe-down kit" in one of the boat’s storage lockers. It's just a spray bottle of Boat Juice Interior and a couple of clean microfiber towels. Having it right there, ready to go, means I never have an excuse to skip this crucial step.
Step 3: A Quick Buff for a Perfect Finish
After you've wiped down all the vinyl, grab one last, completely dry microfiber towel. Go back over everything with a quick buff. This final step is what gets rid of any last traces of moisture or cleaner, leaving you with a perfectly clean, non-greasy, and streak-free finish.
This is super important on hot, sunny days. Any little bit of moisture left on the vinyl can act like a magnifying glass for UV rays, which can cause spotting or even speed up wear and tear. A quick final buff ensures the surface is totally dry and ready for the boat cover.
Once you get the hang of it, this whole process—dry wipe, mist and clean, final buff—genuinely takes less than 10 minutes. It's such a small time investment after each trip, but it pays off huge by keeping your vinyl soft, clean, and looking fantastic for years. Make it part of your end-of-day routine, just like tying up the lines or hitting the battery switch.
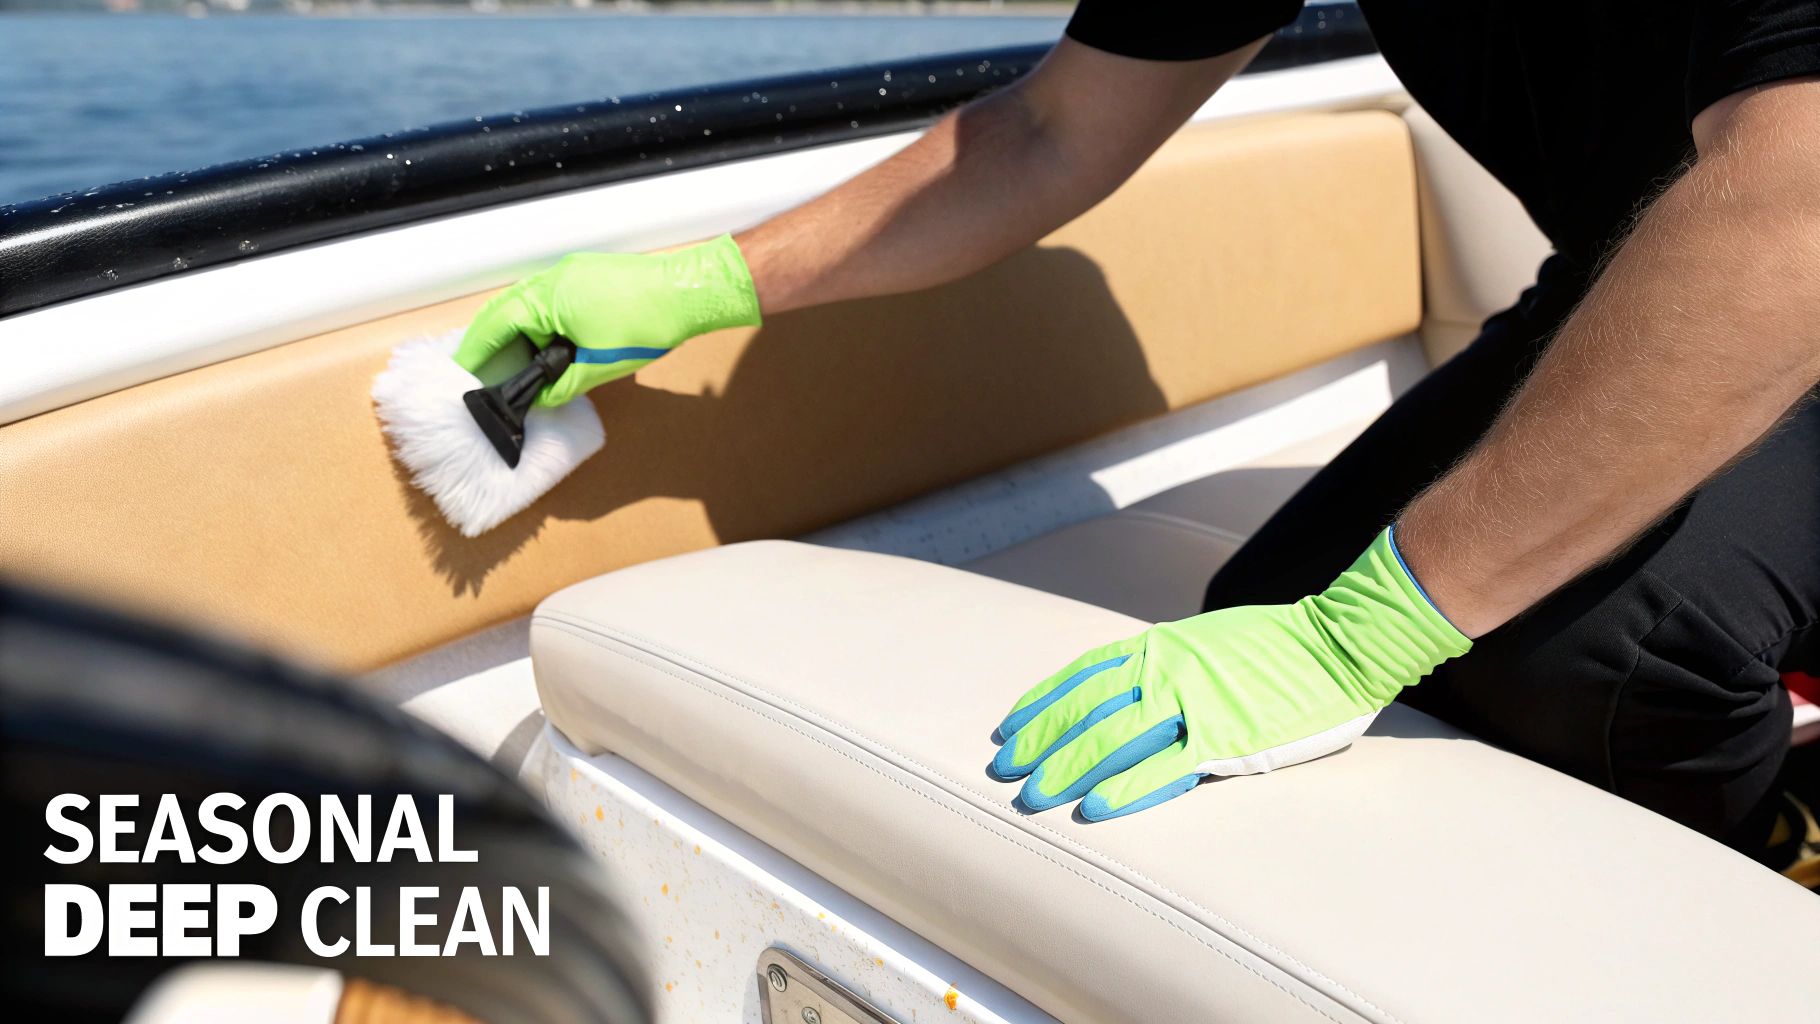
Your Seasonal Deep Cleaning Playbook
While that 10-minute wipe-down is your daily defense, your boat’s vinyl needs a true restoration a couple of times a year. I like to think of it as a seasonal reset—once before you kick off boating season in the spring and again before tucking it away for the winter. This is your chance to finally get rid of the deep, ground-in grime that a quick once-over just can't touch.
This deep clean is what brings back that fresh, vibrant look and feel to your seats. It’s the difference between vinyl that looks "clean" and vinyl that looks genuinely cared for. Sure, it’s a bit more involved, but the payoff is huge, both in how your boat looks and in how long your upholstery lasts.
This process isn't about scrubbing harder; it's about a methodical approach that lifts dirt from the vinyl's texture without being abrasive. Get this right, and you’ll have seats that look nearly new again, setting you up for a great season or a peaceful winter slumber for your boat.
Step 1: Work in Small, Manageable Sections
Here’s the golden rule of a deep clean: never bite off more than you can chew. The single biggest mistake I see people make is spraying down the entire boat interior at once. On a warm day, the cleaner will dry long before you can get to it, leaving behind a sticky, streaky mess that’s even harder to remove than the original dirt.
Instead, you have to divide and conquer. Focus on one small area at a time—a single seat cushion, a backrest, or an armrest. This approach gives you total control, ensuring you can apply your cleaner, scrub thoroughly, and rinse it all away before it has a chance to dry. It's the secret to a uniform, professional-looking result.
Step 2: The Gentle Scrubbing Technique
Once you’ve picked your starting spot, give it a light spray with your cleaner. For this deeper job, you’ll want a product that can break down the tougher grime. A high-quality interior cleaner is what you need here.
Now, grab your soft-bristle brush. The magic is all in the motion. You want to scrub in gentle, overlapping circular motions. This technique works wonders for two reasons:
- It lifts grime effectively: The circular pattern gets the bristles into the vinyl’s textured grain from every angle, lifting out embedded dirt, sunscreen, and body oils.
- It prevents damage: A harsh, back-and-forth scrubbing motion can easily create micro-scratches and wear down the vinyl’s protective topcoat. Gentle circles are far kinder to your upholstery.
You’ll see the cleaner start to foam up a bit as it lifts the dirt to the surface. That’s your signal that it’s working.
Key Takeaway: The goal isn’t to apply more pressure; it’s about giving the cleaner and the brush time to do their job. Let the tools do the work, not your muscles. This patient approach prevents damage and delivers a much better clean.
Step 3: The Critical Final Wipe Down
This is the step that really separates the pros from the amateurs. After you’ve scrubbed a section, it's absolutely crucial to remove every last bit of cleaner and lifted grime. If you leave any residue behind, it becomes a dirt magnet and leaves your seats feeling sticky.
Grab a clean, damp microfiber towel and wipe the entire section thoroughly. The dampness helps neutralize and pick up any remaining cleaning solution. Don't forget to get into the seams and crevices!
Immediately follow this up with a second, completely dry microfiber towel. Buff the area until it's totally dry. This final buff removes any lingering moisture and leaves nothing behind but a clean, smooth, non-sticky surface that looks and feels incredible. Once that section is perfect, you’re ready to move on to the next.
This meticulous process may take a bit longer, but it's the only way to achieve a true, restorative deep clean. It’s a satisfying project that sets the stage for a great-looking boat all season long. For a more detailed look at the entire process from bow to stern, check out our complete guide on how to detail a boat.
And it seems more boaters are catching on. A 2023 survey found that 65% of U.S. boat owners now clean their boats weekly—that's a 15% jump from 2019. This lines up with a 25% rise in spending on maintenance products. The data shows this kind of consistent boat vinyl cleaning boosts longevity by 40-50%, preventing the chalky oxidation that plagues 70% of untreated seats after just one season in the sun. You can dig into the full report and read more about the boat cleaner market trends.
How to Tackle Tough Stains Like a Pro
When you live the boating life, stubborn stains are just part of the deal. It only takes one rogue wave sending a cup of coffee flying or a damp towel left on a seat for too long to leave an ugly mark. But don't sweat it—with the right approach, you can tackle even the most intimidating blemishes without needing to call in a professional.
Think of this as your emergency playbook for the most common culprits. We'll break down the right method for each specific stain, from those pesky black mildew spots to greasy sunscreen smudges. With a targeted plan, you can get your vinyl looking brand new again without causing any damage.
Conquering Mildew The Smart Way
Mildew is, without a doubt, the number one enemy of boat vinyl. Those ugly little black spots aren't just a surface issue; they're a living fungus that has put down roots deep into the vinyl's pores. That’s why scrubbing with a regular cleaner often fails—you might wipe away the surface stain, but the roots are still there, ready to grow back with a vengeance.
To beat mildew for good, you need a product designed to kill it at its source.
- Prep the Area: Give the area a quick wipe-down with a gentle interior cleaner. This gets any surface-level dirt and grime out of the way so the mildew remover can get straight to work.
- Apply the Remover: Spray a dedicated mildew stain remover directly onto the mildew spots. It’s made to penetrate the vinyl and kill the mildew spores without using harsh bleach, which can wreck your vinyl and stitching over time.
- Let it Dwell: This is the most important part: let it sit. You have to give the product a few minutes to work its magic and break down the stain from the inside out. Be patient.
- Agitate Gently: After it has dwelled, grab a soft-bristle brush and gently agitate the area in small circles. This helps lift the loosened stain from the vinyl’s texture.
- Wipe and Repeat: Wipe everything clean with a damp microfiber towel. If you're dealing with deep-set, stubborn stains, you might need to repeat the process. Don't get discouraged; years of mildew buildup won't always disappear in 30 seconds.
For a complete walkthrough on this, check out our guide on how to remove mildew from boat seats. It's packed with even more detail to help you keep your upholstery spotless.
Banishing Oily Stains: Sunscreen and Food Grease
Few things are more frustrating than sunscreen or greasy food stains on beautiful white vinyl. These oily messes seep into the material, leaving behind a yellow or dark stain that seems to attract even more dirt. The key here is to act fast and use a method that lifts the oil out of the vinyl instead of just smearing it around.
- Blot, Don't Rub: The second you see the spill, grab a clean, dry microfiber towel and blot up as much of the excess oil as you can. If you rub, you’ll just push the grease deeper into the vinyl’s pores.
- Use a pH-Balanced Cleaner: Spray a quality interior cleaner directly onto the stain. A pH-balanced formula is a must because it’s strong enough to break down the oil without stripping the vinyl's protective top coat.
- Gentle Agitation is Key: Let the cleaner sit for a minute, then use a soft brush to gently work the area. You should see the cleaner start to emulsify, or break down, the oil.
- Wipe Clean and Dry: Use a fresh, damp microfiber towel to wipe away the cleaner and the lifted grease. Follow up immediately with a dry towel to get rid of all moisture and prevent any new water spots from forming.
Here's a personal trick I use for really stubborn grease spots: I apply the interior cleaner and let it sit for a few minutes, then I come back and spray a little more right before agitating with the brush. This two-step application gives the cleaner extra time to dissolve the oil, making it way easier to lift out.
Erasing Ink and Marker Mishaps
An accidental pen mark or a kid’s stray marker line can make your heart sink. These stains look permanent, but you can often remove them if you handle them the right way. The goal is to dissolve the ink pigment without damaging the vinyl's color or finish. For this job, your best friend is often simple isopropyl alcohol (rubbing alcohol).
Here’s the careful approach you need to take:
- Test in a Hidden Spot: Before you go after the stain, always test your method on an inconspicuous area, like under a seat cushion. This ensures it won’t discolor your specific type of vinyl.
- Apply Alcohol to a Cloth: Lightly dampen a clean microfiber cloth or a cotton swab with isopropyl alcohol. Never pour alcohol directly onto the vinyl—it will just make the ink run and create a bigger mess.
- Dab Gently: Press the cloth onto the ink spot and dab gently. The alcohol will start to dissolve the ink, transferring it from the vinyl to your cloth. Keep dabbing with a clean section of the cloth until the ink disappears.
- Clean and Neutralize: Once the ink is gone, immediately clean the area with your regular pH-balanced interior cleaner. This will remove any leftover alcohol residue that could dry out the vinyl.
- Finish with a Protectant: After cleaning, applying a UV protectant is a great final step. It helps restore the vinyl's sheen and adds a layer of defense against future mishaps.
Protecting Your Vinyl for the Long Haul
Getting your vinyl clean is a great feeling, but that’s really only half the job. Now we need to talk about the most important part of the whole process: protection. This is what keeps all that hard work from going to waste and prevents your seats from turning cracked, faded, and brittle after a season or two in the sun.
Think about it this way: clean vinyl is a blank canvas, totally exposed to the sun's harsh UV rays. Without a protective layer, those rays start breaking down the material, drying it out, and causing that irreversible damage we all want to avoid. A quality marine-grade protectant is basically sunscreen for your upholstery.

Applying a UV Protectant the Right Way
Putting on a UV protectant is a quick job that pays off big time. You'll want a product designed specifically for marine vinyl, which will have serious UV blockers without leaving that awful greasy, slippery film behind.
Grab a dedicated microfiber applicator or just a clean microfiber towel. Lightly spray a quality marine protectant onto the applicator itself, not directly onto the vinyl. Trust me, this gives you way more control and keeps you from getting overspray on your non-skid deck or windows.
Work the product into the vinyl with overlapping strokes, tackling one small section at a time just like you did when cleaning. You're aiming for a thin, even coat. Once you've covered an area, grab a second, dry microfiber towel and give it a quick buff. This picks up any excess and leaves you with a clean, dry finish that won't feel slick or sticky.
Your protectant is your shield against the sun. Skipping this final step is like winning the battle against grime but losing the war against the elements. A consistent protection routine is what truly preserves your investment.
The Power of a Good Boat Cover
Chemicals are great, but your best defense against vinyl damage is a physical one. A high-quality boat cover is an absolute game-changer. It shields your entire interior from sun, rain, bird bombs, and general dockside grime. Simply using it every time you leave the boat is one of the easiest and most effective habits you can build.
Aside from cleaning, another fantastic way to protect your boat's vinyl for the long haul is to check out different boat dock cover options. A solid cover stops the damage before it even starts, dramatically cutting down on wear and tear and adding years to the life of your vinyl.
A Simple Maintenance Calendar
Making vinyl care a regular part of your boating life is all about getting into a rhythm. Here’s an easy schedule you can follow to keep your vinyl pristine:
- After Every Trip: Do that 10-minute wipe-down. This is non-negotiable for preventing stains from setting in.
- Every 3-4 Weeks: Re-apply your UV protectant. If you're in a high-sun state like Florida or Arizona, you might want to do this every other week during the prime season.
- Twice a Year: Plan for a full deep clean and protection detail—once when you're getting the boat ready for the season and again before you put it away for the winter.
This simple routine keeps you way ahead of any potential problems. It's a big deal, especially when you consider there are 12 million recreational boats on the water in the U.S. alone. Without proper care, vinyl can lose 30% of its integrity in just 18 months of exposure to sun and salt.
Got Questions About Boat Vinyl Care?
Even seasoned boat owners run into questions. You're not alone. Let’s tackle some of the most common head-scratchers I hear about keeping vinyl looking sharp.
Can I Just Use a Household Cleaner or a Magic Eraser?
I know it's tempting to grab whatever is under the sink, but please, don't do it. Most household cleaners, especially anything with bleach or ammonia, are way too harsh for marine vinyl. They'll eat away at the protective topcoat and can even weaken the stitching over time, which is a one-way ticket to cracked and faded seats.
And the Magic Eraser? It might seem like a quick fix, but it's basically a superfine-grit sandpaper. Using one on your seats scuffs off that factory finish, leaving the vinyl exposed and more prone to getting stained in the future. Always, always stick to pH-balanced cleaners specifically designed for marine vinyl.
Expert Tip: Think of it this way: you wouldn't wash your car with dish soap, right? The same logic applies here. Use the right tool for the job.
How Often Should I Reapply a UV Protectant?
This is all about consistency. If your boat lives in the sun, think about applying a quality UV protectant every 3-4 weeks during the height of boating season. That simple habit is your absolute best defense against the sun.
Now, if your boat is stored uncovered outdoors, especially in a place like Florida or Arizona, you might want to bump that up a bit. You’re just trying to keep a constant shield against those UV rays that are notorious for causing yellowing, fading, and cracking.
What's the Best Way to Get the Grime Out of the Stitching?
Oh, the stitching. It’s a magnet for dirt and mildew. Those little crevices are the perfect spot for grime and moisture to hide, making them ground zero for mildew growth.
Your secret weapon here is a small, soft-bristled brush. Seriously, an old toothbrush is perfect for this. Just spray your vinyl cleaner right along the seams and give them a gentle scrub. You'll lift the gunk out from between the threads without fraying or damaging them. It makes a huge difference.
Help! My White Vinyl Seats Are Turning Yellow.
Yellowing is a classic problem, and it's almost always from one of two culprits: sun damage or a weird chemical reaction with sunscreen. The good news is you can often reverse it.
Start with a really good deep clean using a quality interior cleaner. That alone will usually knock out a lot of the discoloration. If it's being stubborn, a dedicated mildew stain remover can work wonders, since yellowing can be the first sign of mildew setting in. But the real fix is prevention—wiping seats down after each use and being religious with your UV protectant will stop most yellowing before it even starts.
Your next step is to put this plan into action. Start with the simple 10-minute wipe-down after your next trip out. To make it easy, grab a bottle of Boat Juice Interior—it’s the perfect all-in-one cleaner that will handle daily grime and leave behind powerful UV protection. You can find it and other essential boat care products at shopboatjuice.com.