


· By Boat Juice Team
How to Detail a Boat Like a Pro: A Step-by-Step Guide
Knowing how to detail a boat goes way beyond a quick spray-down at the dock. It's a process that, when done right, restores that deep, showroom shine you love. The secret is following a smart workflow: prep, deep clean, restore, and protect. Getting this order right is the key to professional-level results without making extra work for yourself.
Your Boat Detailing Game Plan
Let’s be honest, detailing your boat is a real project. Just like any big job, having a plan of attack makes all the difference. You wouldn't paint a room without taping the trim first, right? The same logic applies here, preventing you from washing the hull only to have grime from the deck run down and ruin your work.
This guide lays out the entire process in easy-to-follow stages, just like the pros use, so you can tackle this with confidence. Working methodically helps you sidestep common mistakes that can damage your boat's gelcoat—the outer protective layer of your hull—or fade your expensive vinyl seats.
Why the Order of Operations Is Everything
The sequence of your detailing steps is absolutely critical because it helps you work smarter, not harder. Washing the boat first gets rid of all the loose grit, so you aren't grinding it into the gelcoat when you start polishing. It also just makes sense to clean the interior before waxing the exterior—that way, you won’t lean over and smudge a freshly protected hull.
Here's the big-picture view of your game plan:
- Prep and Safety First: Get everything off the boat. Then, find a cool, shady spot to work. This prevents your products from drying on the hot surface and leaving frustrating streaks.
- The Big Wash and Decon: This is a top-to-bottom scrub to remove surface-level grime, followed by a deeper decontamination to lift out the stubborn stuff a simple wash leaves behind.
- Interior and Vinyl Revival: Now it's time to go deep on the seats, carpets, and storage lockers. You'll tackle mildew, sunscreen smudges, and all the general funk from a season on the water.
- Correction and Polishing: This is where the real magic happens. You'll take on oxidation, swirls, and light scratches in the gelcoat to bring back that deep, wet-looking shine.
- Lock It Down with Protection: Finally, you'll apply a tough sealant or wax to shield your boat from UV rays, salt, and water spots. This crucial step makes all your future cleanups a breeze.
This structured approach is the single biggest thing that separates an amateur wash from a true professional detail. Each step builds on the last, creating a finish that not only looks incredible but is built to last.
The 5 Core Stages of Boat Detailing
Here's a quick look at the essential steps for a complete boat detail. Think of this as your roadmap from a dirty boat to a protected, gleaming investment.
| Stage | Primary Goal | Key Action |
|---|---|---|
| Stage 1: Prep & Wash | Remove all loose debris and grime | Clear the boat, rinse thoroughly, and wash from top to bottom. |
| Stage 2: Interior Deep Clean | Restore all interior surfaces | Clean and treat vinyl, carpet, and hard surfaces. |
| Stage 3: Hull Correction | Remove oxidation and restore shine | Compound and polish the gelcoat to eliminate imperfections. |
| Stage 4: Glass & Hardware | Perfect the finishing touches | Clean all glass and polish metal fixtures for a crisp look. |
| Stage 5: Final Protection | Seal and protect all surfaces | Apply a long-lasting wax or sealant to the gelcoat and protectant to vinyl. |
By following this roadmap, you’re not just cleaning your boat; you’re performing a complete restoration that protects its value and boosts your pride. Now that you have the game plan, let's get the right tools for the job.
Your Boat Detailing Arsenal: Tools of the Trade
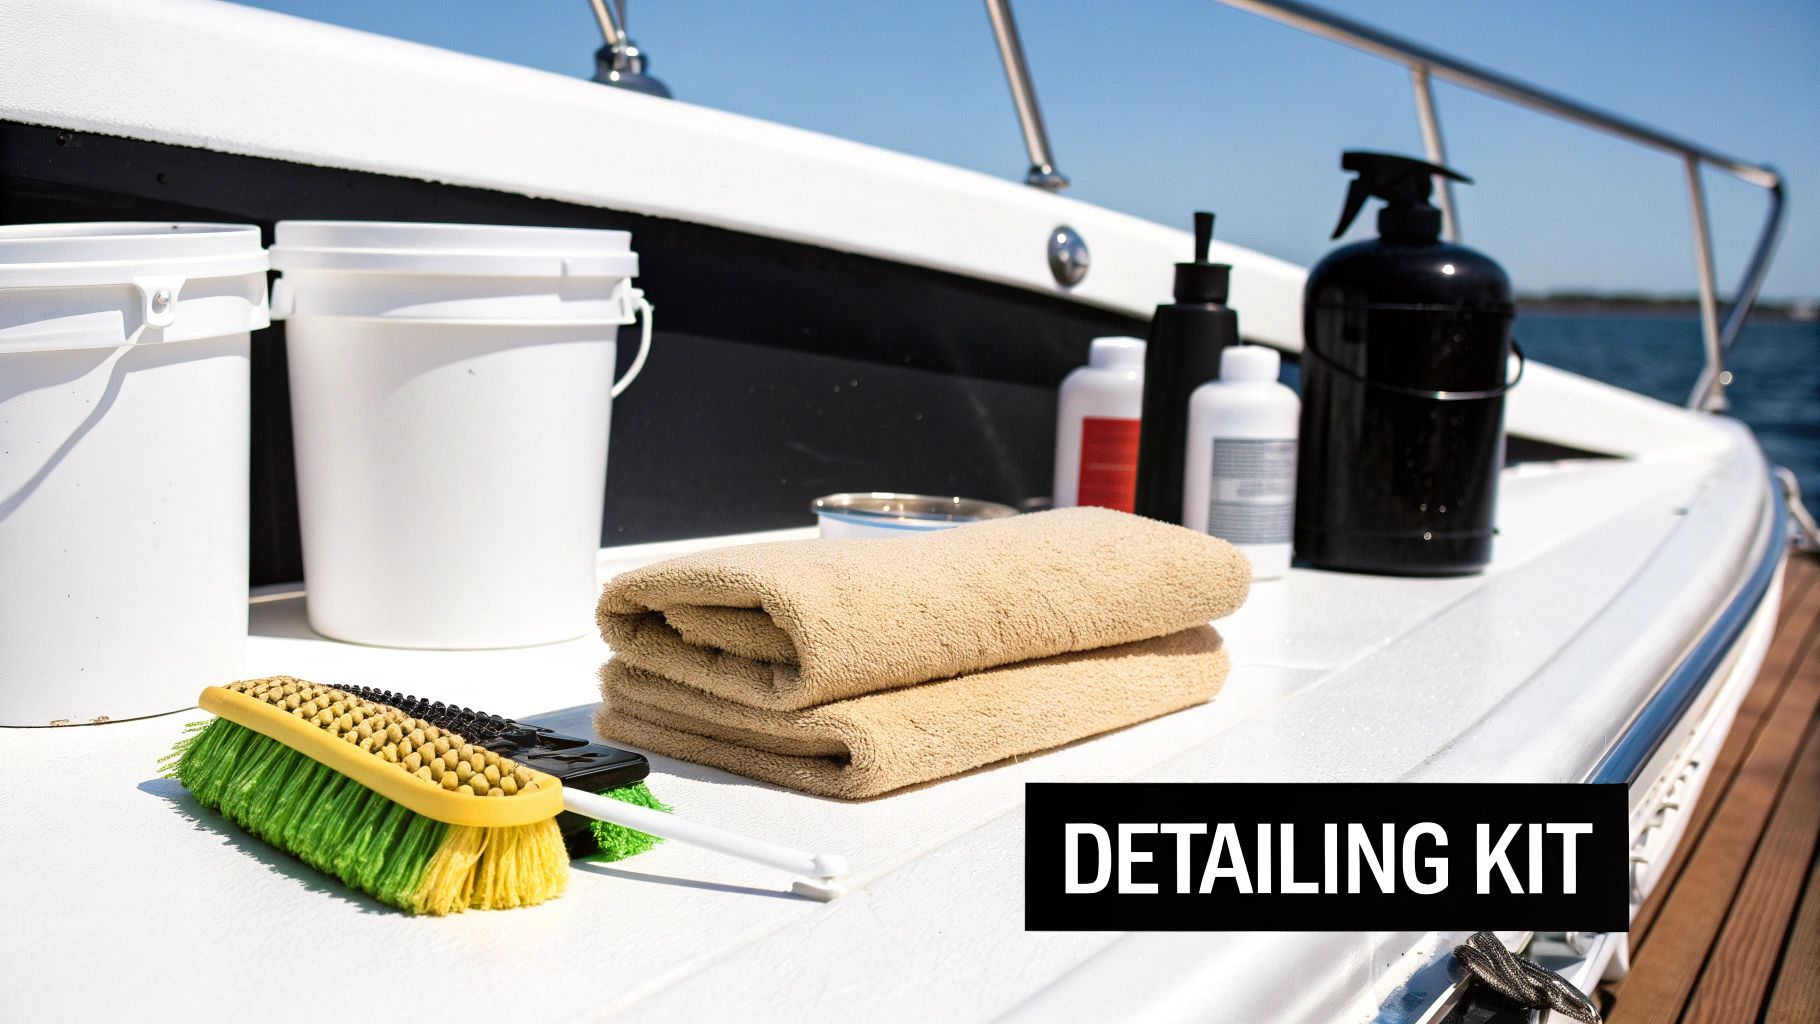
Walking into a marine supply store can be overwhelming. With aisles of specialized products, it’s easy to either overbuy or walk out without the one thing you actually need. Having the right tools ready before you start is the difference between a frustrating chore and a seriously satisfying project.
Think of it this way: you wouldn't try to paint a masterpiece with a house roller. Using the right gear not only protects your investment but also delivers that head-turning shine. Getting everything organized first saves you from that momentum-killing trip back to the store with a half-washed boat sitting in the sun.
Your DIY Boat Detailing Shopping List
| Category | Essential Item | Pro Tip |
|---|---|---|
| Washing & Drying | Two Buckets with Grit Guards | One for soap, one for rinse. Grit guards are non-negotiable; they trap dirt at the bottom. |
| Washing & Drying | Marine-Grade Boat Soap | A pH-balanced formula is key. It cleans grime without stripping your expensive wax. |
| Washing & Drying | Chenille Microfiber Wash Mitt | Incredibly gentle on gelcoat and paint, but tough on grime. Way better than old rags. |
| Washing & Drying | Medium-Soft Bristle Brush | Perfect for tackling stubborn dirt on non-skid deck surfaces without scratching them up. |
| Washing & Drying | High-Quality Microfiber Towels | You can never have too many. Use separate ones for washing, drying, and buffing. |
| Spot Treatment | Boat Juice Exterior Cleaner | Your go-to for wiping down seats after a day on the water and hitting stubborn spots. |
| Spot Treatment | Boat Juice Water Spot Remover | A must-have for hard water spots on the hull. It chemically breaks down mineral deposits. |
| Interior Care | Boat Juice Interior Cleaner | Specifically for vinyl, carpet, and upholstery. It’s gentle but effective. |
| Protection | Boat Juice Sealant & Wax | This is your final armor. Look for one with UV inhibitors to protect against sun damage. |
| Hardware & Glass | Glass Cleaner | An ammonia-free cleaner is best to avoid damaging any window tints. |
| Hardware & Glass | Metal Polish | Brings back the brilliant shine to stainless steel rails, cleats, and hardware. |
| Tools & Safety | Pressure Washer (Optional) | Speeds up the initial rinse immensely. Not required, but a huge time-saver. |
| Tools & Safety | Gloves and Eye Protection | Safety first. Cleaning chemicals and flying debris are no joke. |
Why The Right Products Matter
Choosing the right cleaning products can feel tricky, but starting with a curated kit often simplifies the process. A bundle like the Boat Juice Pro Kit packages several essentials together, ensuring all the products are designed to work as a system. This not only saves you guesswork but often a bit of money, too.
Remember, using products designed for boats is critical. They are formulated to handle the unique challenges of the marine environment—harsh sun, saltwater, and mildew—that car products simply aren't built for.
If you want to get really granular on what makes certain products stand out, check out our guide to the best boat cleaning products for a deeper dive.
Prepping Your Boat for the Deep Clean
Before you even grab a bucket and soap, a little prep work goes a long way. It’s tempting to skip this part and jump straight to washing, but taking a few minutes to set the stage properly prevents common headaches and makes every other step much easier.
First things first, clear the deck—literally. Get everything off the boat that isn’t bolted down. We’re talking life jackets, coolers, fishing gear, and towels. This gives you an open workspace and ensures you can clean every nook and cranny without anything getting in your way.
Choose Your Workspace Wisely
Now, think about where you're doing the work. One of the biggest mistakes you can make is trying to detail your boat in direct, scorching sunlight. When the gelcoat gets hot, your water and cleaning products evaporate in seconds, leaving behind nasty streaks and water spots that are a huge pain to remove later.
To avoid this, try to plan your detail for a cool, overcast day. If you have to work in the sun, get the job done early in the morning or later in the evening when the boat's surface is cool to the touch. This simple choice gives your products the time they need to work properly.
Why does this matter so much? A cool surface prevents what's called "flash drying." This ensures your soap can actually lift the dirt and your wax can bond correctly, giving you that perfect, even finish instead of a blotchy, frustrating mess.
The All-Important Initial Rinse
With the boat cleared and in a good spot, it's time for the initial rinse. This isn't the main wash; think of it as a pre-wash. The goal is to knock off all the loose stuff—surface dirt, sand, and salt spray—with a solid stream of water from a hose or a pressure washer on a low setting.
Always start at the top and work your way down. This step is non-negotiable because it removes the abrasive grit that could otherwise get ground into your gelcoat during the hand wash, causing the swirl marks and tiny scratches that dull your boat's finish.
Cleaning and Reviving Your Hull
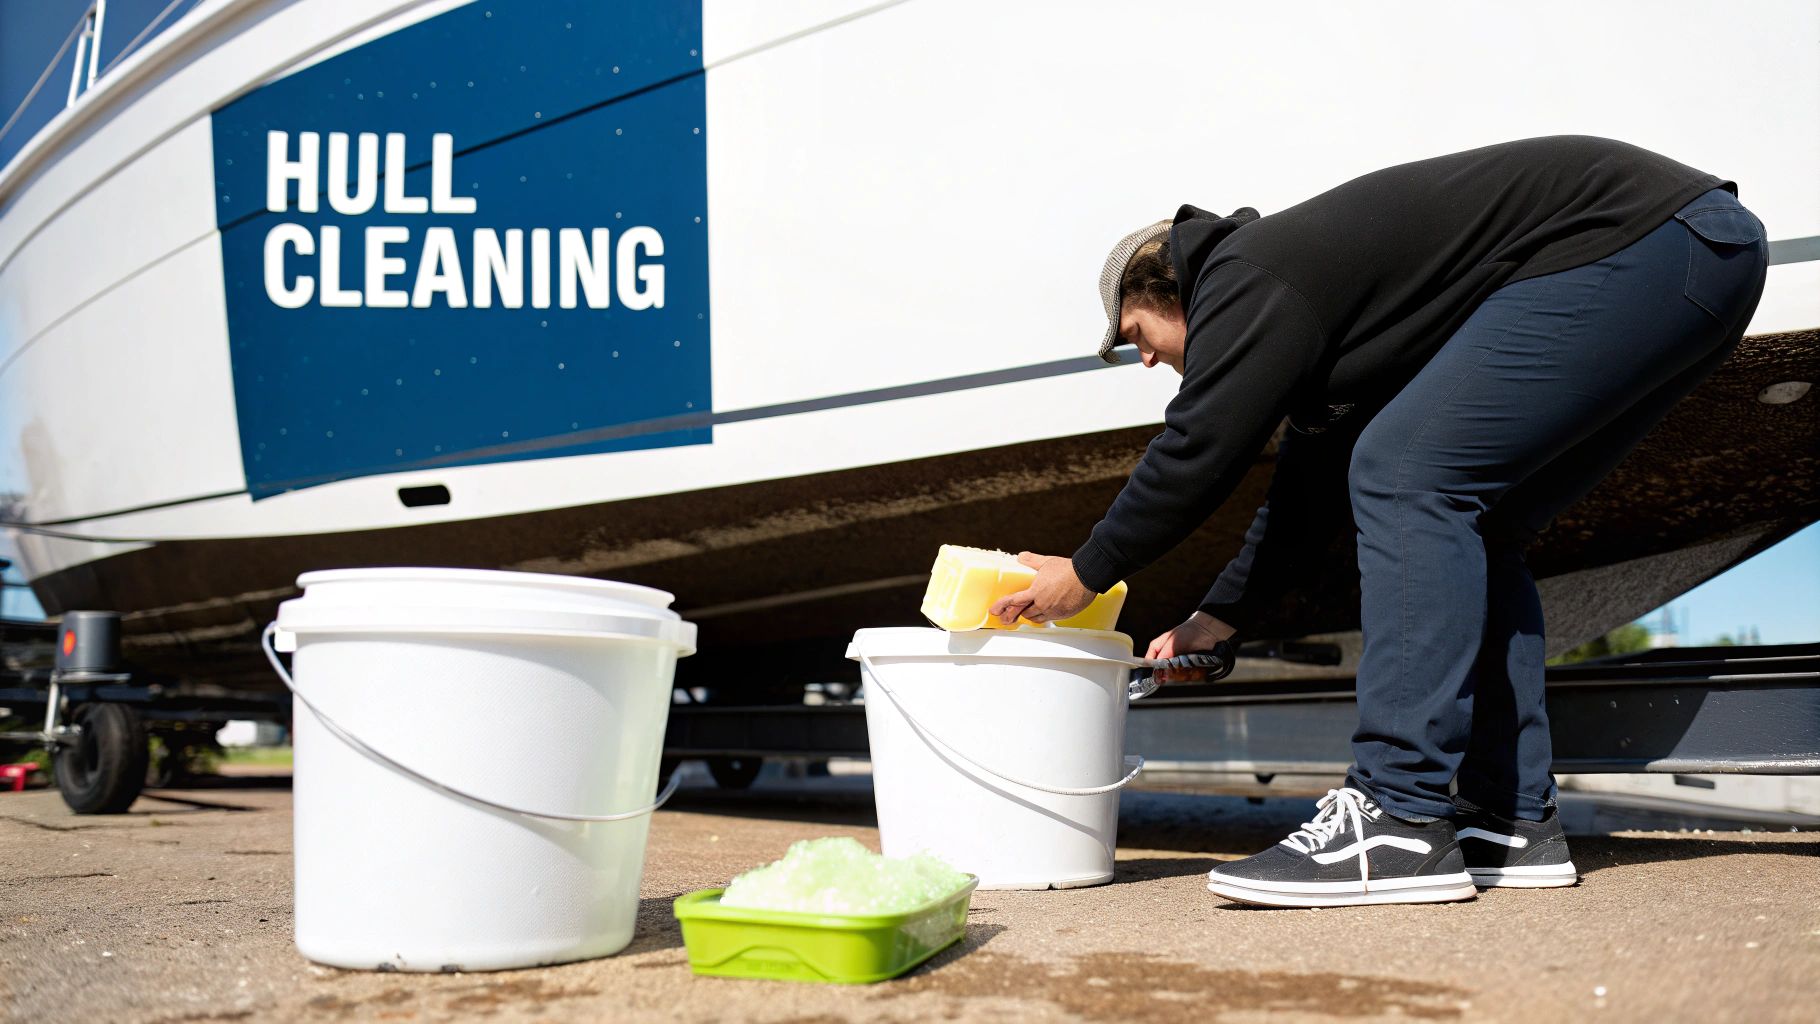
Alright, with your boat prepped, it's time to tackle the grime, algae, and salt that’s been dulling your boat’s shine. A good wash is the foundation for everything that follows. If you don't get this part right, your polish and wax won't perform nearly as well.
The first rule of washing is to let gravity do the work for you. Always start at the top and work your way down, hitting the tower or hardtop first, then the deck, and finally the hull. This simple method keeps dirty water from running over sections you just cleaned, saving you a world of streaky frustration.
The Two-Bucket Method: A Gelcoat’s Best Friend
Here’s one of the biggest rookie mistakes: using a single bucket. Every time you dunk a dirty wash mitt back into your soapy water, you’re reloading it with all the grit you just removed. You're essentially rubbing sandpaper all over your gelcoat, creating tiny scratches that dull the finish over time.
The two-bucket method is the simple trick that makes a huge difference.
- Bucket #1 (Wash): This one gets your marine soap and water.
- Bucket #2 (Rinse): This is just for clean, plain water.
The process is easy. Dunk your mitt in the soap bucket, wash a small section, then rinse the mitt thoroughly in the clean water bucket before going back for more soap. All that nasty grit gets left behind in the rinse bucket, keeping your soap water clean and your gelcoat safe.
Decontaminating Your Hull For a True Clean
After a good wash, your boat will look clean, but it's not. If you run your hand over the gelcoat, you’ll probably feel a slightly rough texture. Those are embedded contaminants—mineral deposits and stubborn waterline gunk that a normal wash won’t touch.
Removing these bonded contaminants creates a perfectly smooth surface. This allows your polishes and waxes to bond directly with the gelcoat, meaning they’ll look better and last much longer. A clay mitt or clay bar is your best friend here; it gently lifts those contaminants right off the surface without scratching.
Pro Tip: Whatever you do, don't let the boat air-dry after the final rinse. Grab a quality microfiber drying towel and get every drop of water off. This is the single best way to prevent water spots from etching into your gelcoat, especially if you’re dealing with hard water.
If you’re working on a fiberglass boat and want to get into the nitty-gritty, we have a whole guide on how to clean fiberglass boats for more detailed techniques.
Bringing Your Interior Back to Life
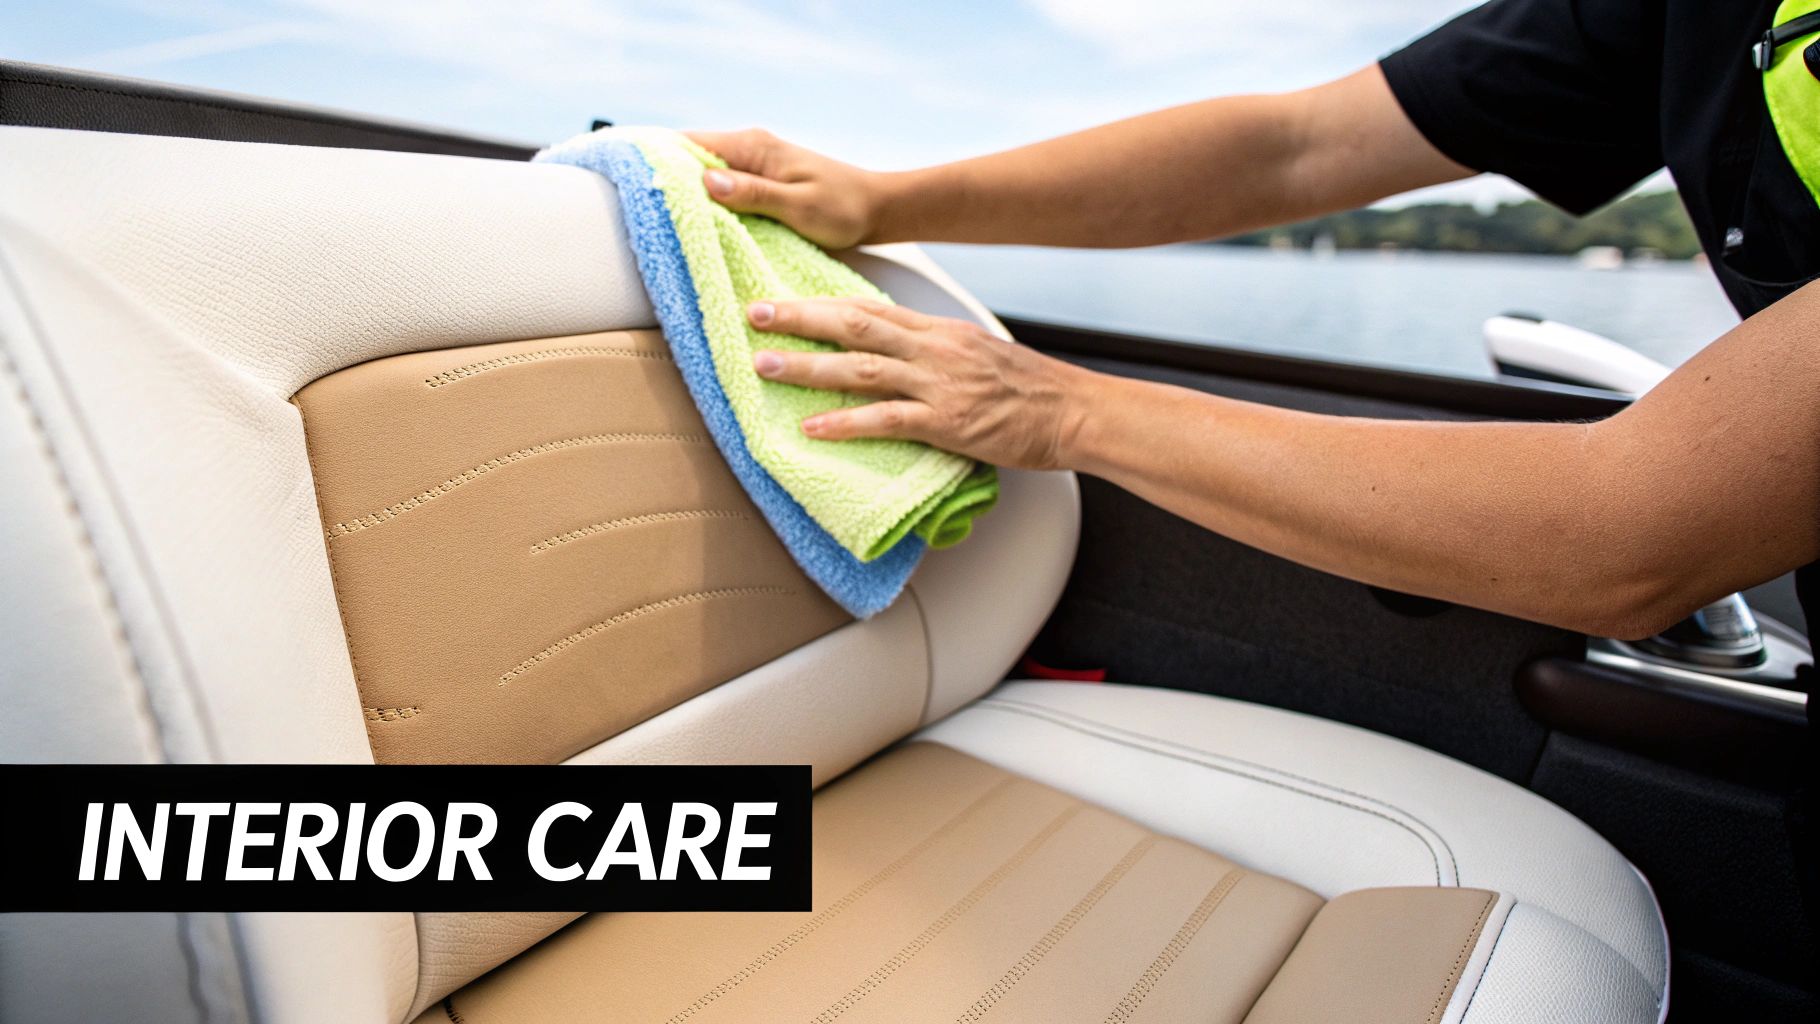
With the hull gleaming, let's turn our attention inside. A boat's interior takes a beating from sun, humidity, sunscreen, and spilled drinks. Restoring your vinyl seats and cushions is one of the most rewarding parts of a full detail.
The mission here is to deep clean safely. Many boat owners grab a harsh household cleaner, and that’s a huge mistake. Chemicals like bleach or ammonia will strip the essential oils from your marine vinyl, leading to cracking, fading, and that awful chalky texture.
Deep Cleaning Your Vinyl the Right Way
To get your vinyl looking new again, you need a gentle but effective touch. The trick is to lift grime out of the vinyl's texture without harming the material itself. First, vacuum everything. Use a crevice tool to get deep into the seams and under cushions where sand and snack crumbs hide.
With the vacuuming done, it's time for the real cleaning. A pH-balanced, marine-specific cleaner is your best friend here. For instance, a product like Boat Juice Interior Cleaner is made specifically to lift away dirt, body oils, and even mildew stains without those harsh chemicals that cause long-term damage.
Spray the cleaner on a small section and let it sit for a minute to break down the grime. Next, use a soft-bristle brush to gently agitate the surface in small circles, which helps pull dirt out of the vinyl’s grain. Immediately wipe the area with a clean, damp microfiber towel to pick up all the residue.
Conquering Tough Stains and Mildew
Every now and then, you'll run into stubborn stains like sunscreen or mildew. For these problem spots, letting your interior cleaner dwell a little longer can often do the trick. If you’re still seeing spots, you might need a dedicated mildew stain remover, but be sure to test it on a hidden spot first.
If you want to dive deeper into getting rid of these specific issues, check out our guide on how to clean your boat interior for some more targeted advice.
The Final Step: UV Protection
Alright, your vinyl is spotless—but now it's vulnerable. The sun's UV rays are the number one enemy of your boat's interior, constantly working to break down the material. The final and most crucial step is applying a high-quality UV protectant.
Think of it as sunscreen for your seats. A product like Boat Juice Protection Spray creates a barrier that shields the vinyl from harmful radiation and adds a layer of defense against future stains.
Apply the protectant with a clean microfiber applicator pad, working it into the vinyl using even, overlapping strokes. Give it a light buff with a separate, dry microfiber towel to wipe away any excess. This simple step is the single best thing you can do to keep your interior looking brand new all season.
Protecting Your Gelcoat for a Lasting Shine
You've put in the elbow grease. The boat is washed, decontaminated, and the interior is spotless. Now comes the most important part: protection. This step seals in all your hard work, shields your gelcoat from the harsh marine environment, and makes every future cleanup a breeze.
Think of your boat's gelcoat like your skin. After a good cleaning, it's exposed and vulnerable. A quality wax or sealant is the equivalent of a high-SPF sunscreen, creating a tough barrier against damaging UV rays, salt, and stubborn water spots. This is the single best thing you can do to protect your investment.
Polish vs. Wax: What's the Difference?
Many people use the terms "polish" and "wax" interchangeably, but they do completely different things. Getting this right is the key to achieving that jaw-dropping, mirror-like finish.
- Polish is for correction. Its only job is to fix imperfections. Polish contains fine abrasives that gently level the gelcoat, buffing out light scratches, swirl marks, and oxidation. It’s what brings back the gloss and clarity.
- Wax is for protection. Its job is to seal the deal. A wax or sealant has no abrasives. Instead, it lays down a sacrificial layer over that beautiful, polished surface to shield it from the elements.
Here’s the bottom line: Polishing makes your boat shiny, but waxing keeps it shiny. The biggest mistake you can make is trying to wax a dull, oxidized boat—all you're doing is sealing in the problems.
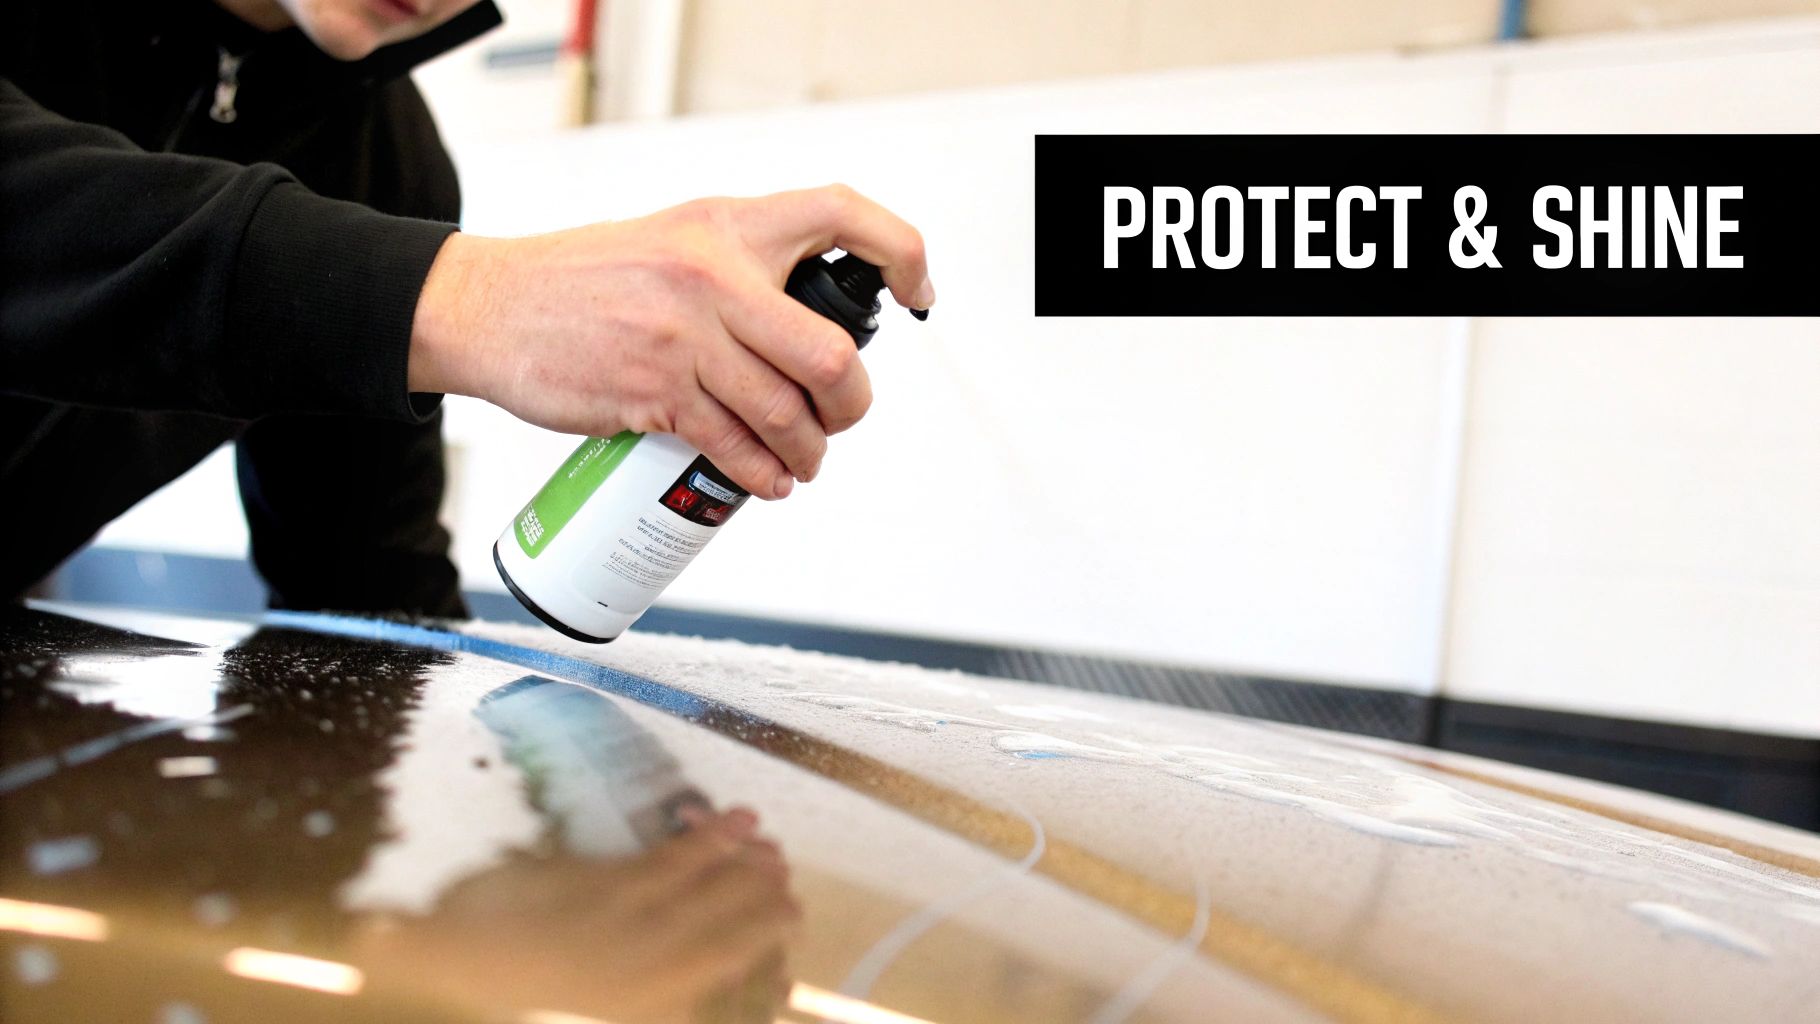
Applying Wax or Sealant for Long-Term Defense
Nothing beats the deep, wet look of a traditional wax or sealant. The trick is to work in small, manageable sections, maybe two feet by two feet, to keep the product from drying out before you can buff it off.
Use a foam applicator pad to spread a thin, even layer of your chosen wax. Let the product haze up according to the directions, then use a clean, plush microfiber towel to buff away the residue. Keep flipping your towel to a fresh side to ensure you're removing the wax, not just pushing it around.
The Quick and Easy Way to a Protected Finish
Let's be real—sometimes you just don't have a whole afternoon for a full wax job. This is where modern spray sealants are a game-changer. They offer an incredible balance of speed and performance, creating a seriously slick barrier in a fraction of the time.
After washing and drying your boat, just mist the spray onto a section of the hull and immediately wipe it off with a clean microfiber. That's it. No waiting for it to haze, no aggressive buffing—just spray on, wipe off.
This method is fantastic for topping up your protection between big details or for a quick application after a day on the lake. It makes water bead up and roll right off, taking dirt with it. Not only does this keep your boat looking cleaner for longer, but it makes your next wash way faster.
Common Boat Detailing Questions
Even with the best game plan, you're bound to have a few questions. Let's tackle some of the most common ones from other boat owners.
How Often Should I Detail My Boat?
For a full, deep detail—wash, polish, and wax—you should aim to do it twice a year. The best rhythm is once in the spring to get it ready for boating season, and again in the fall before you put it into storage for the winter.
The real secret, however, is the upkeep in between. A quick wash and wipe-down after every outing is a total game-changer, especially in saltwater. This simple habit keeps salt and grime from damaging your gelcoat and stops water spots from becoming permanent.
Can I Use Car Cleaning Products on My Boat?
It's tempting to grab the stuff you use on your car, but you should always stick to marine-specific products. Your boat's gelcoat and marine-grade vinyl are completely different from your car's clear coat and interior.
Marine products are built to handle relentless UV rays, corrosive salt, and constant moisture. Automotive products just aren't formulated for that fight and can actually damage your boat's surfaces over time, causing vinyl to crack and fade.
What Is the Biggest Detailing Mistake to Avoid?
If there's one mistake to avoid, it's washing your boat in direct sunlight on a hot day. The heat makes water and soap evaporate almost instantly, leaving behind stubborn water spots and a streaky mess that's incredibly frustrating to fix.
Another common mistake is using the wrong tool for the job, like a stiff-bristled deck brush on your glossy hull. That’s a surefire way to cover your gelcoat in a spiderweb of fine scratches. To avoid these headaches, always work in the shade on a cool surface and use soft, clean microfiber towels and appropriate brushes.
Your next step is to choose a good day, gather your supplies, and tackle the job one step at a time. A clean, protected boat isn't just about looks—it's about preserving your investment and maximizing your time on the water.
Shop the Boat Juice Pro Kit and get everything you need in one box.