


· By Boat Juice Team
How to Remove Decals From Your Boat Without Damaging It
Before you can learn how to get those old decals off, you need to have the right tools ready to go. The best way to tackle this is usually with either a heat gun to soften up the vinyl or a special eraser wheel to gently grind it off. After that, you'll need a good adhesive remover to get rid of any sticky mess left behind. Honestly, getting your gear set up properly from the start is the secret to a clean, damage-free finish.
Gathering Your Decal Removal Toolkit
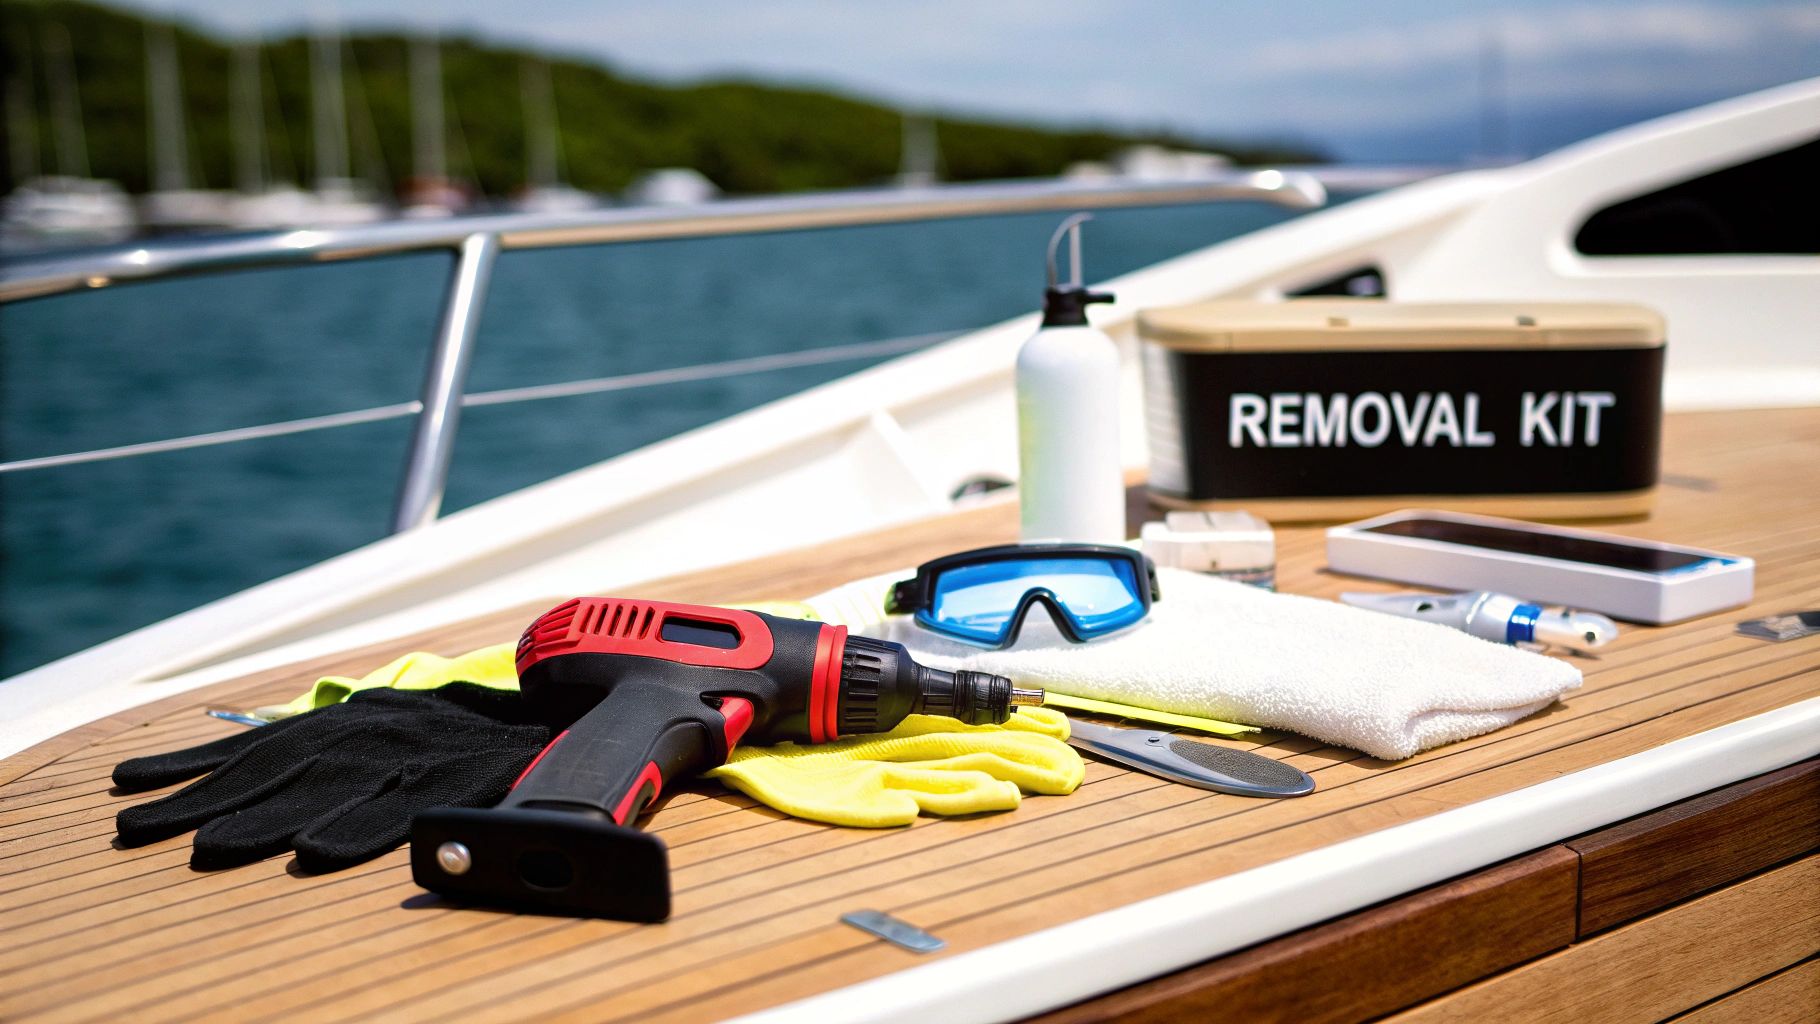
Before you even think about picking at that faded boat name or cracked graphic, spend a few minutes getting your supplies together. I promise, this little bit of prep will save you hours of frustration later. Having everything you need within arm's reach means you won't have to stop halfway through to hunt down a scraper or a bottle of cleaner.
Your exact toolkit will shift a bit depending on which removal method you go with. It also doesn't hurt to know what you're up against; understanding the specific types of decals you're dealing with can give you a heads-up on how tough the adhesive might be.
The Two Main Approaches
You’ve really got two main ways to get those decals off your gelcoat. The one you pick will depend almost entirely on the condition of the decal itself.
-
Heat Gun & Scraper: This is your go-to for most decals that are still in one piece. The heat makes the vinyl and the glue underneath pliable, letting you peel it away pretty easily. It's a controlled and super-effective method that works on everything from tiny registration numbers to massive hull graphics.
-
Eraser Wheel: This thing is a lifesaver for decals that are hopelessly cracked, baked on by the sun, or just plain ancient. When a decal is so brittle it just flakes off in tiny, frustrating pieces, an eraser wheel (sometimes called a caramel wheel) uses friction to lift the vinyl and adhesive without hurting the gelcoat underneath.
Essential Gear for Either Method
No matter which route you choose, some tools are absolute must-haves. Don't even start the job without these items on hand—they’re crucial for both your safety and for protecting your boat’s finish.
Pro Tip: Whatever you do, never use a metal scraper or a razor blade on your boat's gelcoat or paint. It’s guaranteed to dig in and leave deep scratches that are a real pain to fix. Always, always stick with plastic.
Here’s your list of essential safety and prep gear:
- Safety Glasses: Protects your eyes from flying bits of vinyl or splashes of chemicals.
- Gloves: A good pair of nitrile or chemical-resistant gloves will keep that sticky adhesive remover off your skin.
- Plastic Razor Blades or Scrapers: They're firm enough to get under the edge of a decal but won't gouge your gelcoat.
- Adhesive Remover: You’ll definitely need something to dissolve the gummy residue left behind. A citrus-based remover is usually a great place to start.
- Microfiber Towels: You can't do the job without them. They're perfect for applying remover and wiping the surface clean. You can check out other must-have items in our guide to the best boat cleaning products to fill out the rest of your detailing arsenal.
Using Heat to Gently Lift Old Vinyl
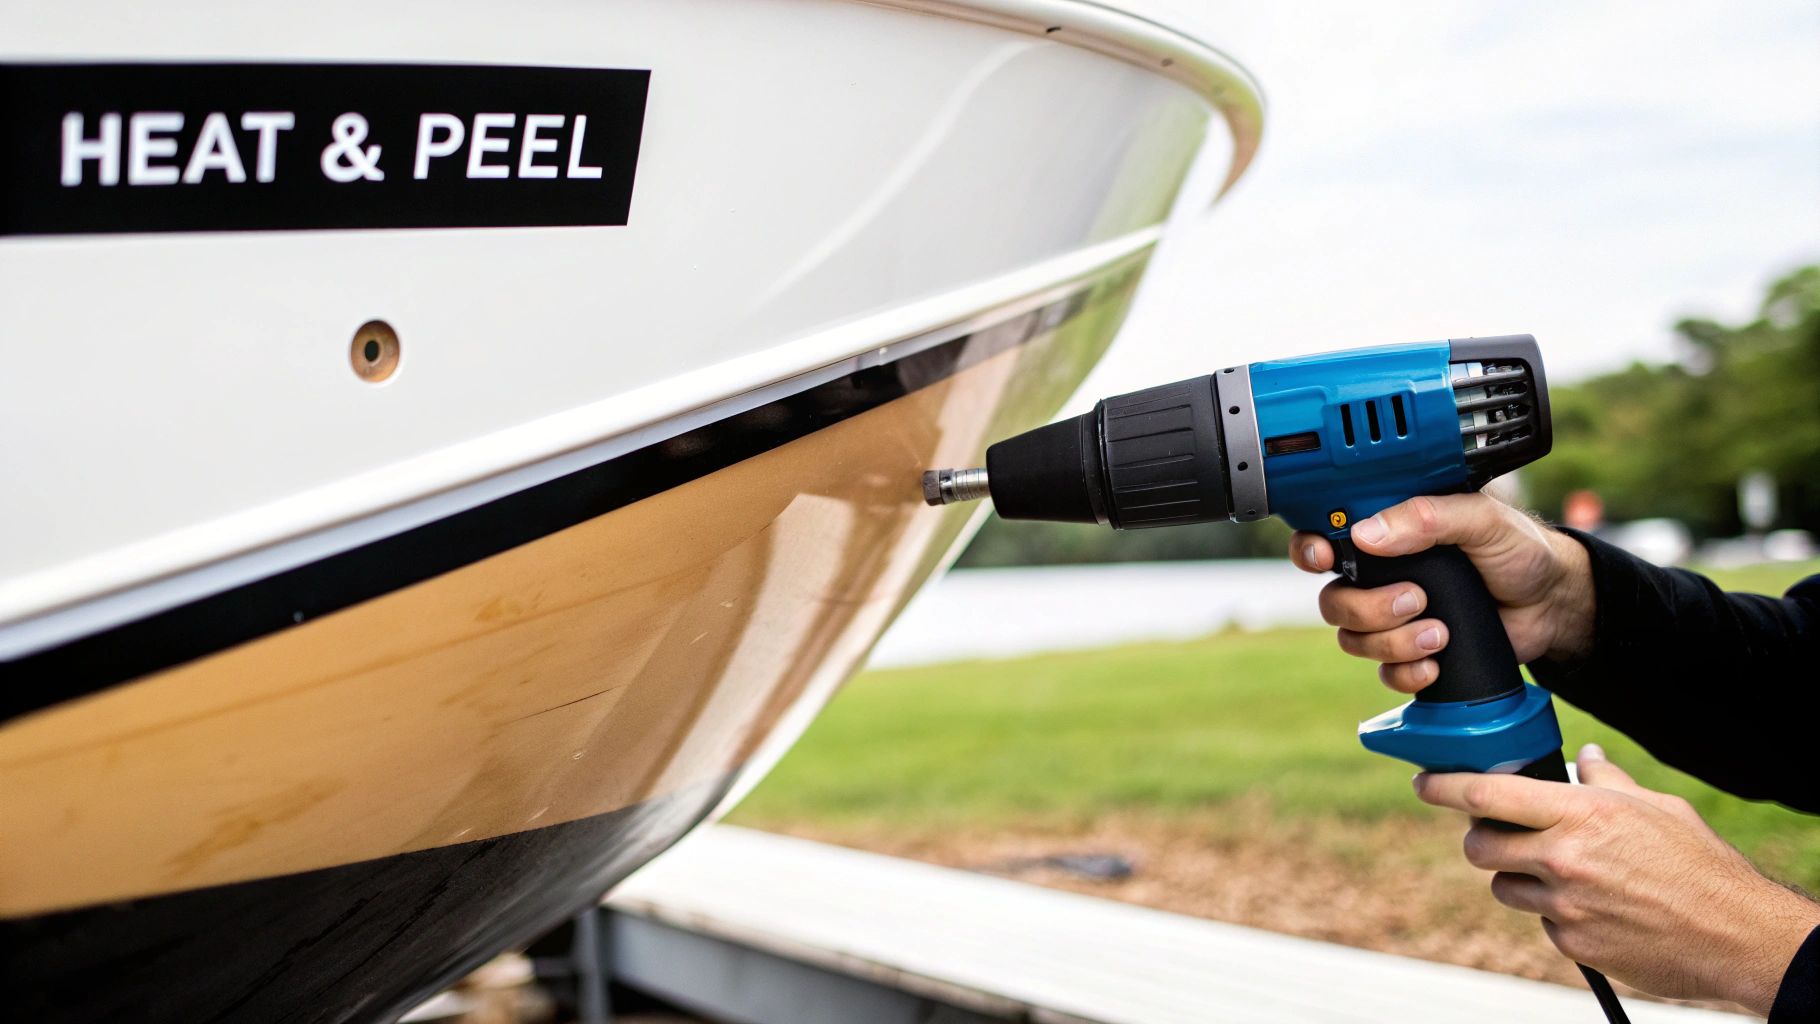
When you’re staring down a decal that's mostly in one piece, the classic heat-and-peel method is your absolute best friend. There’s a good reason it’s the go-to technique for boaters and pros alike: it works like a charm and, when you do it right, it’s one of the safest ways to protect your boat's gelcoat or paint.
So, why does this work? Years under the sun essentially bake the vinyl, making it dry and brittle. At the same time, the adhesive underneath morphs into something that feels like cement. A little controlled heat works to reverse that damage, softening both the vinyl and that stubborn glue. This is the secret to peeling the decal off in large, satisfying sections—or even in one shot—instead of chipping away at a million tiny flakes.
Finding the Sweet Spot with Temperature and Technique
The key here is to warm the decal, not cook it. Go in too hot, and you can scorch the vinyl, making it even harder to remove, or worse, damage the finish underneath. But if you don't use enough heat, the adhesive just won't let go, and you’ll be left with a sticky, frustrating mess.
Gentle, continuous heat is the name of the game. If you're using a heat gun, always start on its lowest setting. Using a hairdryer? Crank it up to high.
Hold the nozzle about 2-4 inches from the surface and keep it moving in a constant, sweeping motion, just like you’re spray painting. This back-and-forth movement is crucial for preventing hot spots that can bubble your gelcoat. After a minute or two of this, the vinyl should be ready to cooperate.
Pro Tip: Look for a visual cue. You’ll know the decal is ready when its texture starts to change. It might get a slight sheen or you may see tiny bubbles forming as the adhesive begins to melt. That’s your signal to stop heating and start peeling.
The Art of a Clean Peel
Once a section is warmed up, it's time for the main event. Patience is everything at this stage. If you rush it, the old vinyl will tear, and you’ll find yourself constantly reheating and trying to pick at a new edge.
Here’s how you can get it right:
- Get a good start: Use a fingernail or a plastic razor blade to gently lift a corner of the heated decal. Just be careful not to dig into the surface of your boat.
- Pull at a low angle: Once you have something to grab onto, pull the decal back on itself. You want a low, sharp angle—ideally less than 45 degrees. Pulling straight out (at 90 degrees) is a recipe for tearing the vinyl and leaving a ton of glue behind.
- Work in sections: Don't try to conquer the whole thing at once. Focus on a manageable area, maybe a foot at a time. Heat it, peel it, and then move on. This keeps the whole process under control.
If you feel the decal starting to fight back or hear that dreaded tearing sound, just stop pulling. It simply means that spot needs a little more heat to loosen up. A few more passes with the heat gun will usually do the trick. While we're focused on boats, the same principles apply elsewhere; for example, you can find great advice on how to remove decals from walls using heat, too.
Keep Your Workspace Tidy
As you peel the vinyl away, remember that it's going to be hot and incredibly sticky. The last thing you want is to drop it on your deck or, even worse, into the water.
Keep a trash bag nearby and toss the pieces in as soon as they’re off the hull. This simple step will stop the sticky side from grabbing onto another part of your boat, your clothes, or your tools, saving you from a whole other cleanup job.
When the Heat Gun Fails: Bringing in the Eraser Wheel
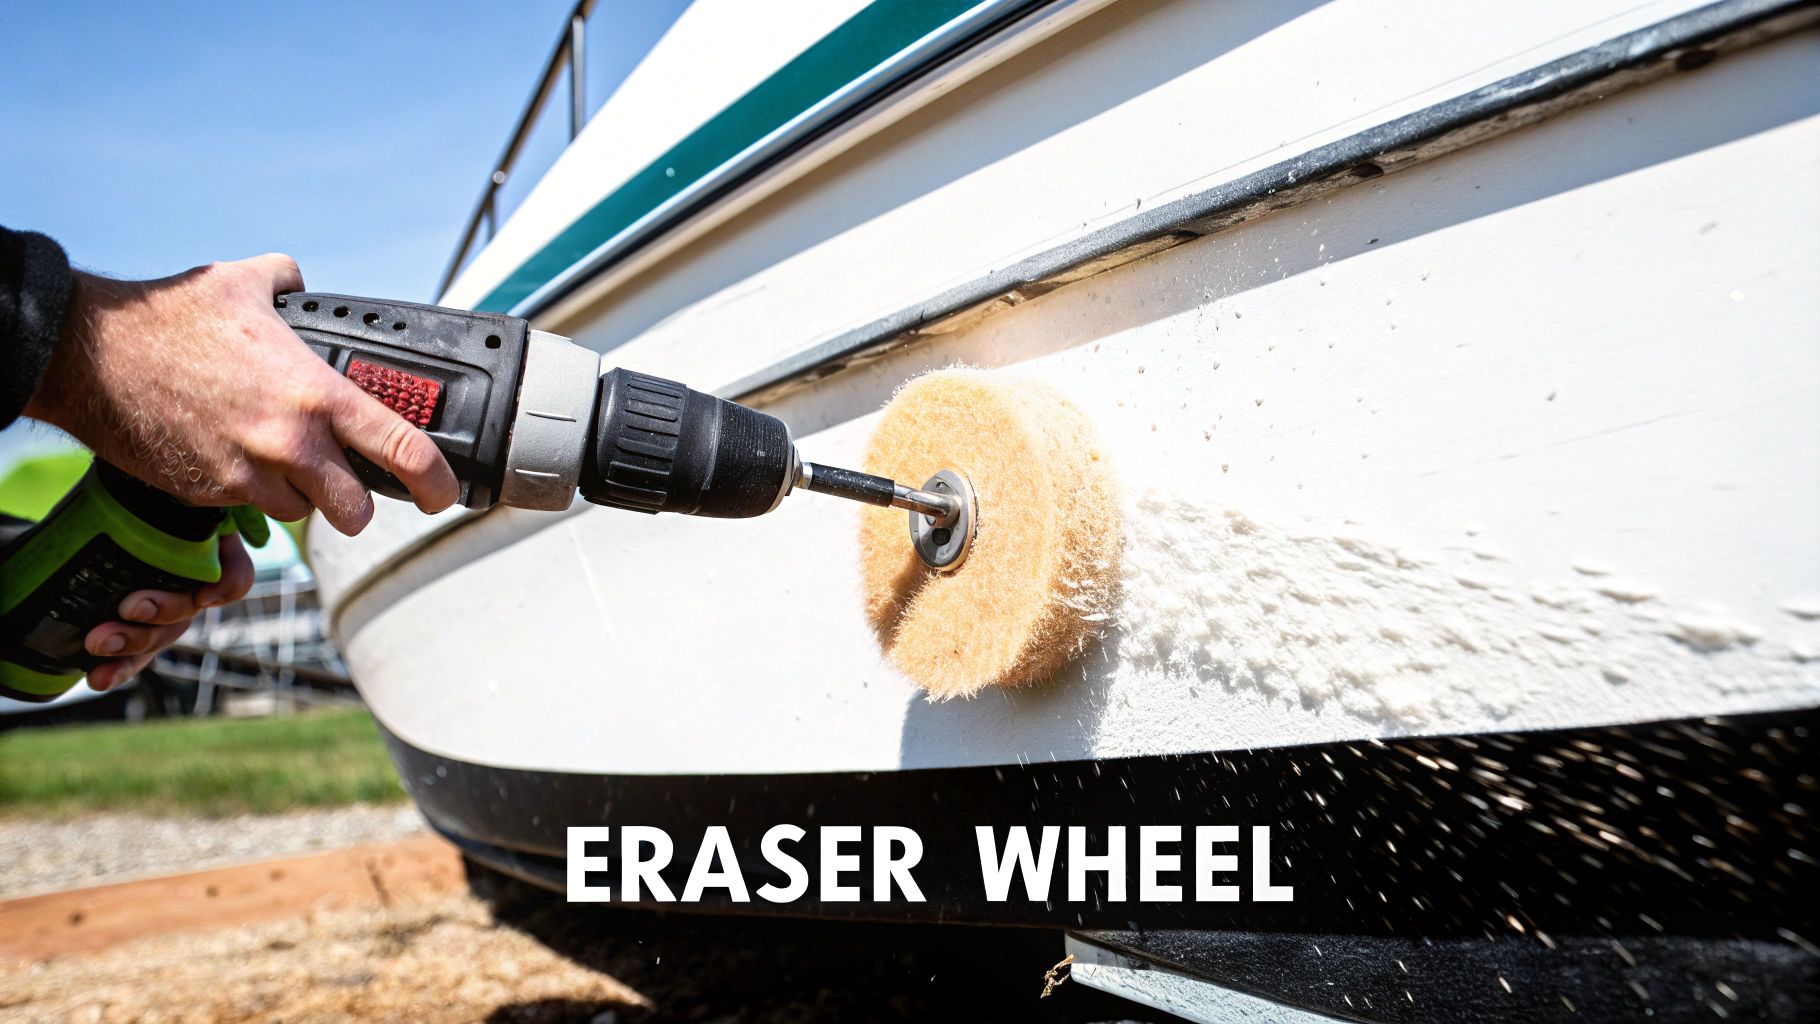
Let’s be honest, sometimes heat just isn’t enough. You’ll inevitably run into those stubborn old decals—especially sun-baked registration numbers or ancient hull graphics—that have become so brittle they practically laugh at your heat gun. Instead of peeling off, they just crack, flake, and explode into a confetti of vinyl frustration.
This is the exact moment you put down the heat gun and reach for a more serious tool. An eraser wheel, often called a caramel wheel, is a game-changing attachment for your drill that can turn an all-day nightmare into a manageable afternoon job.
The real magic is in how it works. It’s a soft, rubbery wheel that uses friction, not harsh abrasion, to grab and lift the vinyl and its adhesive right off the surface. It literally "erases" the decal without digging into your boat's gelcoat. It’s a surprisingly gentle, yet incredibly effective, solution for the toughest jobs.
Getting the Technique Down
Using an eraser wheel isn't hard, but the right technique is what separates a clean, damage-free removal from a costly mistake. The whole idea is to let the tool do the work with finesse, not brute force. Rushing the job or leaning on it too hard is where things can go wrong.
First things first, make sure the wheel is securely chucked into your drill. And definitely grab your safety glasses—this process kicks up fine rubber dust and can send little bits of vinyl flying.
Pro Tip: Always, always test the eraser wheel on a small, hidden spot first. This gives you a feel for how it handles and confirms it plays nice with your specific gelcoat or paint finish.
Nailing the Speed and Pressure
The two keys to your success are drill speed (RPMs) and how much pressure you apply. Get this balance right, and you’ll strip those decals off efficiently without building up dangerous levels of heat.
- Mind Your RPMs: You want to keep your drill speed in the 1,500 to 2,500 RPM range. Most drills have variable speed triggers, making this easy to control. Too fast, and you risk generating enough heat to burn the gelcoat. Too slow, and the wheel just won't be effective.
- A Light Touch is Everything: Let the edge of the wheel do the work. Apply just enough pressure for the rubber to bite into the decal. Pushing hard won't speed things up; it will just risk damaging the surface and wear out your wheel in record time.
- Keep It Moving: Never hold the spinning wheel in one spot. Use a steady, sweeping motion, working back and forth across a small section at a time. Think of it like coloring with a big crayon—use the edge and keep it moving across the graphic.
This tool is a massive time-saver. In fact, using a drill-powered eraser wheel can slash your decal removal time by as much as 1,000% compared to just using a heat gun and scraper. A job that could take hours can often be done in minutes because the wheel yanks up both the vinyl and the adhesive simultaneously. You can see for yourself how effective it is and why it’s a go-to for professionals.
Managing the Mess and Working Smart
An eraser wheel is a beast, but it does make a bit of a mess. As it works, it sheds a fine dust of rubber, just like a pencil eraser. This is totally normal, but you'll want a plan to deal with it.
It's best to work in manageable, two-foot-by-two-foot sections. Erase the decal in that area, then stop and wipe away the dust with a clean microfiber towel. This keeps your workspace from getting out of control and prevents all that rubber residue from getting ground into other parts of your boat.
After the decal is gone, you'll probably see a thin, hazy film of adhesive left behind. Don't sweat it—that’s expected. The next step is a pass with a good adhesive remover to get that surface perfectly clean and prepped for whatever comes next.
Getting Rid of That Last Sticky Residue
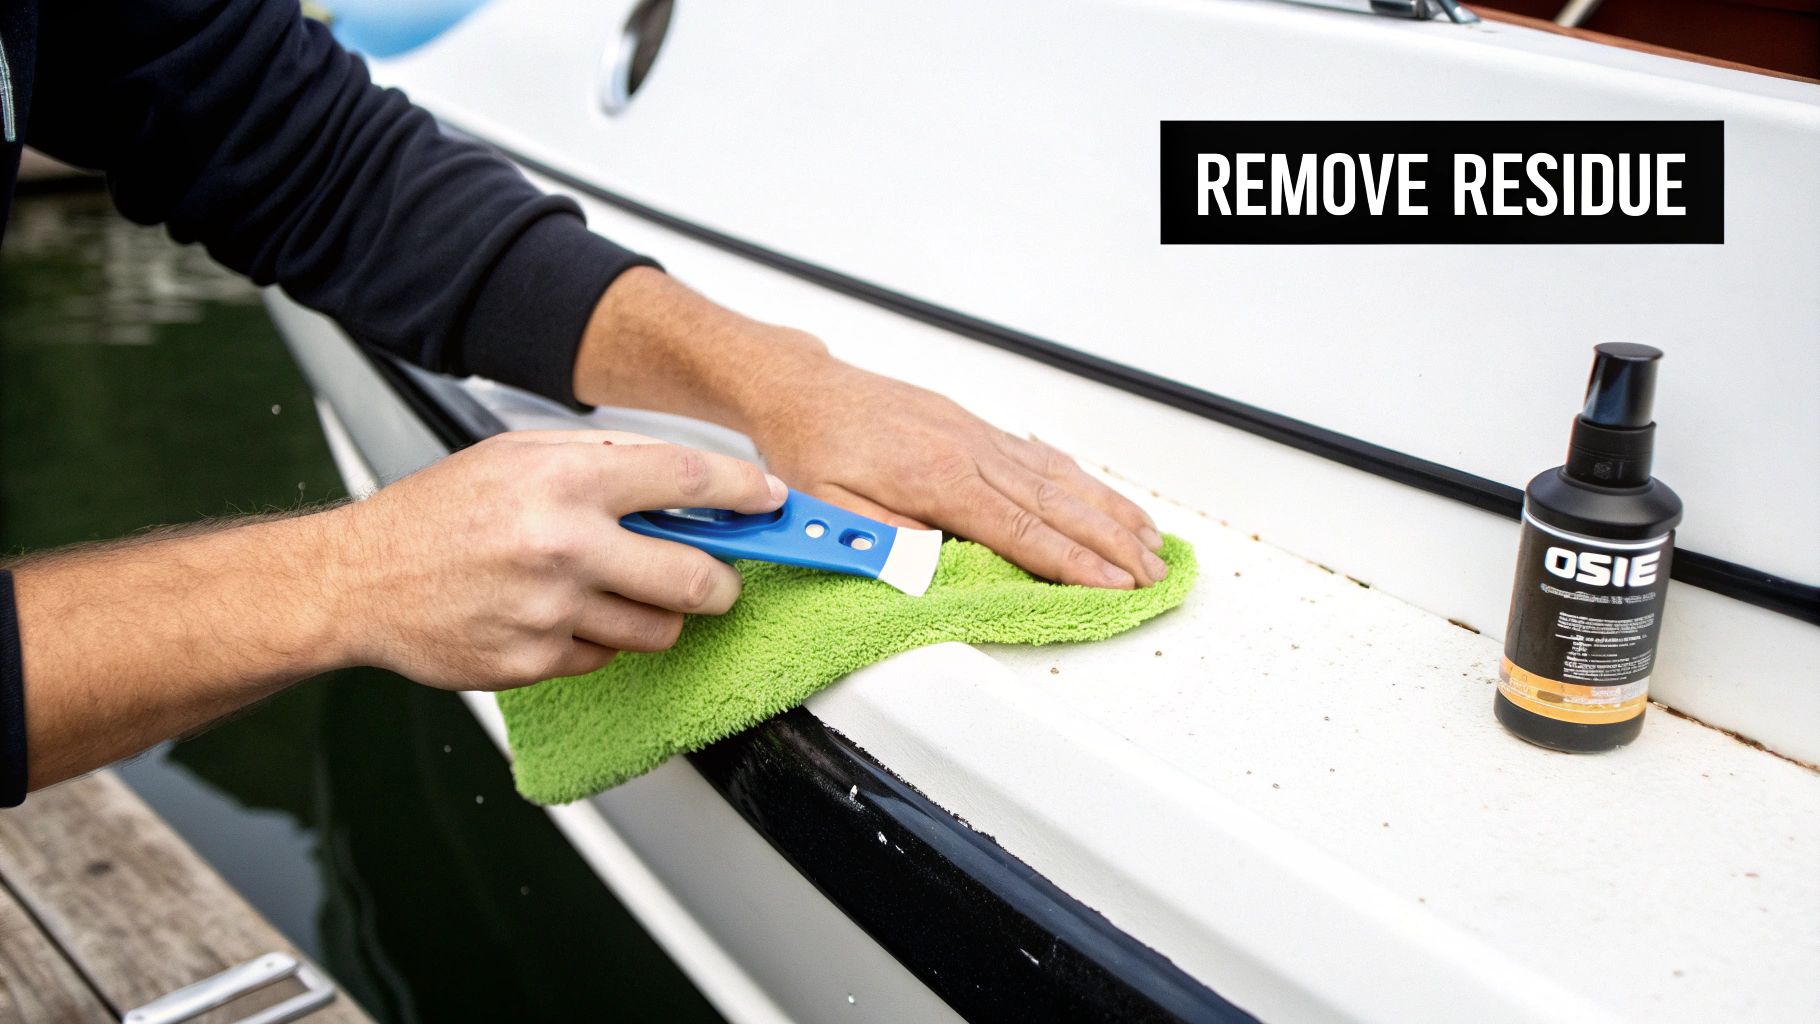
You’ve finally peeled off that old, cracked vinyl. Victory! But then you run your hand over the surface and… ugh. You feel that tacky, gummy, dirt-collecting layer of adhesive that’s been left behind.
Getting the vinyl off is only half the battle. Dealing with this sticky mess is what truly brings the job to a clean, professional finish. The secret is using a chemical remover to do the heavy lifting for you, breaking down that stubborn film into a soft, manageable gel.
Choosing Your Adhesive Remover Wisely
Not all adhesive removers are created equal, and grabbing the wrong one can be a costly mistake for your boat’s finish. Aggressive industrial solvents can be way too harsh, potentially dulling or even permanently damaging the gelcoat. You need something strong enough to dissolve the glue but gentle enough for sensitive marine surfaces.
Here are a few go-to options that get the job done right:
- Citrus-Based Cleaners: These are a fantastic first line of defense. They use natural citrus oils to break down adhesive and are typically very safe for gelcoat and paint.
- Mineral Spirits: For thicker, more stubborn gunk, mineral spirits can be a great step-up. Just be sure to test it on a small, hidden spot first to make sure it plays nice with your boat's finish.
- Dedicated Marine Cleaners: Sometimes, the best tool is the one made specifically for the job. You might be surprised how effective a high-quality exterior boat cleaner can be on moderate adhesive residue.
A two-in-one approach can save you a ton of time. For example, our Boat Juice Exterior is formulated to be tough on grime but completely safe on gelcoat, and it does a fantastic job breaking down that leftover tackiness while you clean the area. This lets you tackle the residue and prep the surface for polishing all in one step.
The Proven Soak-and-Scrape Method
Once you've picked your product, the technique is pretty straightforward, but it does require a little patience. The real key here is giving the remover time to work its magic.
Start by spraying a generous amount of your chosen cleaner directly onto the sticky residue. You want to completely saturate it. Don't be shy; a light mist just isn't going to cut it.
Next, here’s a pro tip: lay a microfiber towel over the saturated area. This simple trick keeps the cleaner from evaporating too quickly, especially on a warm, sunny day. It effectively holds the solvent against the adhesive, giving it the time it needs to fully dissolve the glue. Let it sit and soak for at least 5-10 minutes.
After letting it dwell, you’ll see the adhesive has turned into a soft, gooey mess. Perfect. Now, grab your plastic razor blade, hold it at a low angle, and gently scrape the residue away. It should come right off, rolling up into little gummy balls with hardly any effort.
To finish up, give the area one last spray and wipe it all down with a fresh, clean microfiber towel to pick up any final traces. This method will leave you with a perfectly clean, smooth surface that’s ready for the final step of polishing and protection. To see how this fits into your overall maintenance routine, check out our guide on choosing the right boat cleaner for every task you'll face.
Bringing Your Boat's Finish Back to Life
Alright, you did it. The stubborn old decal is gone, and you’ve conquered that sticky adhesive mess. But when you step back to admire your work, you see it—the faint but undeniable outline of where the decal used to be.
Don't sweat it. This "ghost image" is completely normal. For years, that decal acted like sunscreen for the gelcoat underneath, protecting it from UV rays. The surrounding area, however, was exposed and slowly oxidized. Your mission now is to blend these two areas together for a seamless, factory-fresh shine.
Erasing the Outline with Compound
The secret to making that ghosted area disappear is gently removing the thin, oxidized layer from the surrounding gelcoat. That’s precisely what a good polishing compound is for. It’s like a high-tech exfoliant for your boat, buffing away the dull, weathered surface to reveal the vibrant finish hiding beneath.
Picking the right compound is key. You're not trying to sand the boat, so avoid anything too aggressive that could leave swirl marks. For this kind of work, a light-to-medium cut compound is almost always the perfect tool for the job—it has just enough cutting power to eliminate the oxidation without being harsh.
Your best friend for this task is a dual-action (DA) polisher. While you can tackle a tiny spot by hand, a DA polisher gives you smooth, professional results without the elbow grease.
- Start with a foam cutting or polishing pad on your polisher.
- Squeeze a few pea-sized dots of compound onto the pad. A little really does go a long way here.
- Focus on a small, two-foot-by-two-foot area at a time. This keeps you in control and ensures you get even results.
Move the polisher over the surface with light, steady pressure. Use overlapping passes, going side-to-side and then up-and-down, and just let the machine do the heavy lifting. After a couple of passes, wipe the area with a clean microfiber towel to check your progress. If you want to dive deeper into the technique, check out our complete guide on boat compounding and polishing.
Polishing for That Perfect Shine
After compounding, you’ll notice the area looks much better, but it might have a slight haze. That's perfectly fine. Compounding can leave behind microscopic imperfections. The next step is to use a finishing polish to clear up that haze and bring out a deep, wet-looking gloss.
Swap out your pad for a soft foam finishing pad. A good finishing polish contains much finer abrasives than a compound, designed specifically to refine the surface and create that mirror finish. The process is the same: a few dabs of polish on the pad, working in small sections with overlapping passes. When you're done, the line between the old decal spot and the rest of the gelcoat should be totally invisible.
Lock in the Look and Protect Your Work
You've just exposed a fresh layer of gelcoat to the elements for the first time in ages. This new surface is vulnerable and needs to be protected immediately from sun, salt, and dirt. Skipping this final step is like washing your car and leaving it out in a dust storm.
Applying a high-quality sealant isn't just a suggestion—it's essential. This is the perfect job for a product like Boat Juice Protection. It’s a super simple spray sealant that lays down a tough, slick barrier on your gelcoat.
This protective layer accomplishes a few critical things:
- Blocks UV rays: It prevents the sun from fading and oxidizing your freshly polished surface all over again.
- Seals the gelcoat: It closes up the microscopic pores, keeping water and grime from getting a foothold.
- Makes cleaning easier: Water will bead up and roll right off, taking dirt along for the ride.
Just spray it on, wipe it evenly across the surface with one microfiber towel, and buff it to a brilliant shine with a second, dry towel. This quick five-minute step locks in your hard work, protects your boat, and makes future cleanups a breeze.
Answering Your Top Questions About Boat Decal Removal
After helping countless boat owners through this process, I’ve heard just about every question you can imagine. If you’re squaring up to this project for the first time, you probably have a few of these same questions floating around in your head. Let’s tackle them head-on.
Can I Just Use a Metal Scraper on My Boat?
Please, don't even think about it. If there's one piece of advice you take away from this guide, let it be this: never let a metal scraper or razor blade touch your boat's gelcoat. It will instantly dig in, leaving deep, ugly scratches and gouges.
Fixing that kind of damage is a whole other project—one that's expensive and frustrating. Stick with plastic razor blades. They're designed for this exact job, offering enough of an edge to get under the decal without any risk to the surface. It's the only way to go.
What's the Best Temperature for This Job?
The weather is a huge factor here. You're looking for a "Goldilocks" day—not too hot, not too cold. The sweet spot is somewhere between 60-80°F (15-27°C).
If you try this on a cold day, the old vinyl gets super brittle and will just crack and splinter into a million tiny pieces. But if it's blazing hot and the sun is beating down, the adhesive turns into a stringy, gooey mess that smears all over the place.
Pro Tip: My best advice is to work in the shade on a warm day. This little trick gives you total control over the heat from your heat gun and keeps the adhesive pliable enough for a clean lift.
Is an Eraser Wheel Safe to Use on Any Surface?
An eraser wheel can feel like a magic wand for adhesive removal, but you've got to respect its power. It’s generally safe and incredibly effective on factory gelcoat and most high-quality marine paint jobs.
Where you need to be careful is on custom paint, areas that have been repaired before, or on softer plastics and plexiglass. The friction from the wheel generates a surprising amount of heat, which can easily burn or warp those more delicate surfaces.
Always live by these two rules:
- Test in a hidden spot first. Never go straight to a highly visible area without trying it somewhere inconspicuous.
- Keep the wheel moving. Use light, even pressure and sweep back and forth. Never let it sit in one spot, or you’ll create a burn mark.
Will I Be Left with a Permanent Outline Where the Decal Was?
It's super common to see a "ghost" of the old decal after you've removed it, but don't panic! It’s almost never permanent. What you're seeing is the fresh, protected gelcoat that was hiding under the vinyl, surrounded by gelcoat that's been slowly oxidizing in the sun for years.
The fix is straightforward. A light-to-medium cut polishing compound and a machine polisher will gently remove that top layer of oxidation, blending the "ghosted" area seamlessly with the rest of the hull. Once you're done compounding, follow up with a good polish and a sealant to restore that deep, uniform shine.
Now that you know how to get the old decals off and bring back that gloss, your next step is to lock in that finish. A quick coat of Boat Juice Protection will seal your hard work from UV rays and the elements, making sure your boat looks amazing all season long.