


· By Boat Juice Team
Your Ultimate DIY Guide: 8 Essential Boat Trailer Maintenance Tips
Your boat trailer is the unsung hero of every adventure on the water. It gets you to the launch and brings you home safely, yet it's often overlooked until something goes wrong. A breakdown on the side of the highway isn't just an inconvenience; it can be a dangerous and costly disaster, ending your day before it even begins. That's why a little proactive care goes a very long way.
This guide is for recreational boat owners like you who want to handle maintenance without calling a professional. We'll give you simple, effective checks and preventative tasks to keep your trailer in prime condition. We've compiled a list of actionable boat trailer maintenance tips covering everything from wheel bearings to corrosion prevention, explaining why each step is critical for your safety and your trailer's longevity.
By following these straightforward steps, you'll not only extend the life of your trailer but also ensure every trip to the water is smooth and stress-free. You'll learn exactly what to look for and how to perform routine checks. Let's dive into the essential maintenance that will protect your investment and keep you on the road.
1. Inspect and Lubricate Your Wheel Bearings
Of all the boat trailer maintenance tips, this is the most critical for your safety. Your trailer's wheel bearings allow the wheels to spin freely. If they fail, a wheel could seize up or detach from the trailer entirely while you're driving—a truly catastrophic event. Because your trailer is frequently submerged in water, regular inspection and lubrication are non-negotiable.
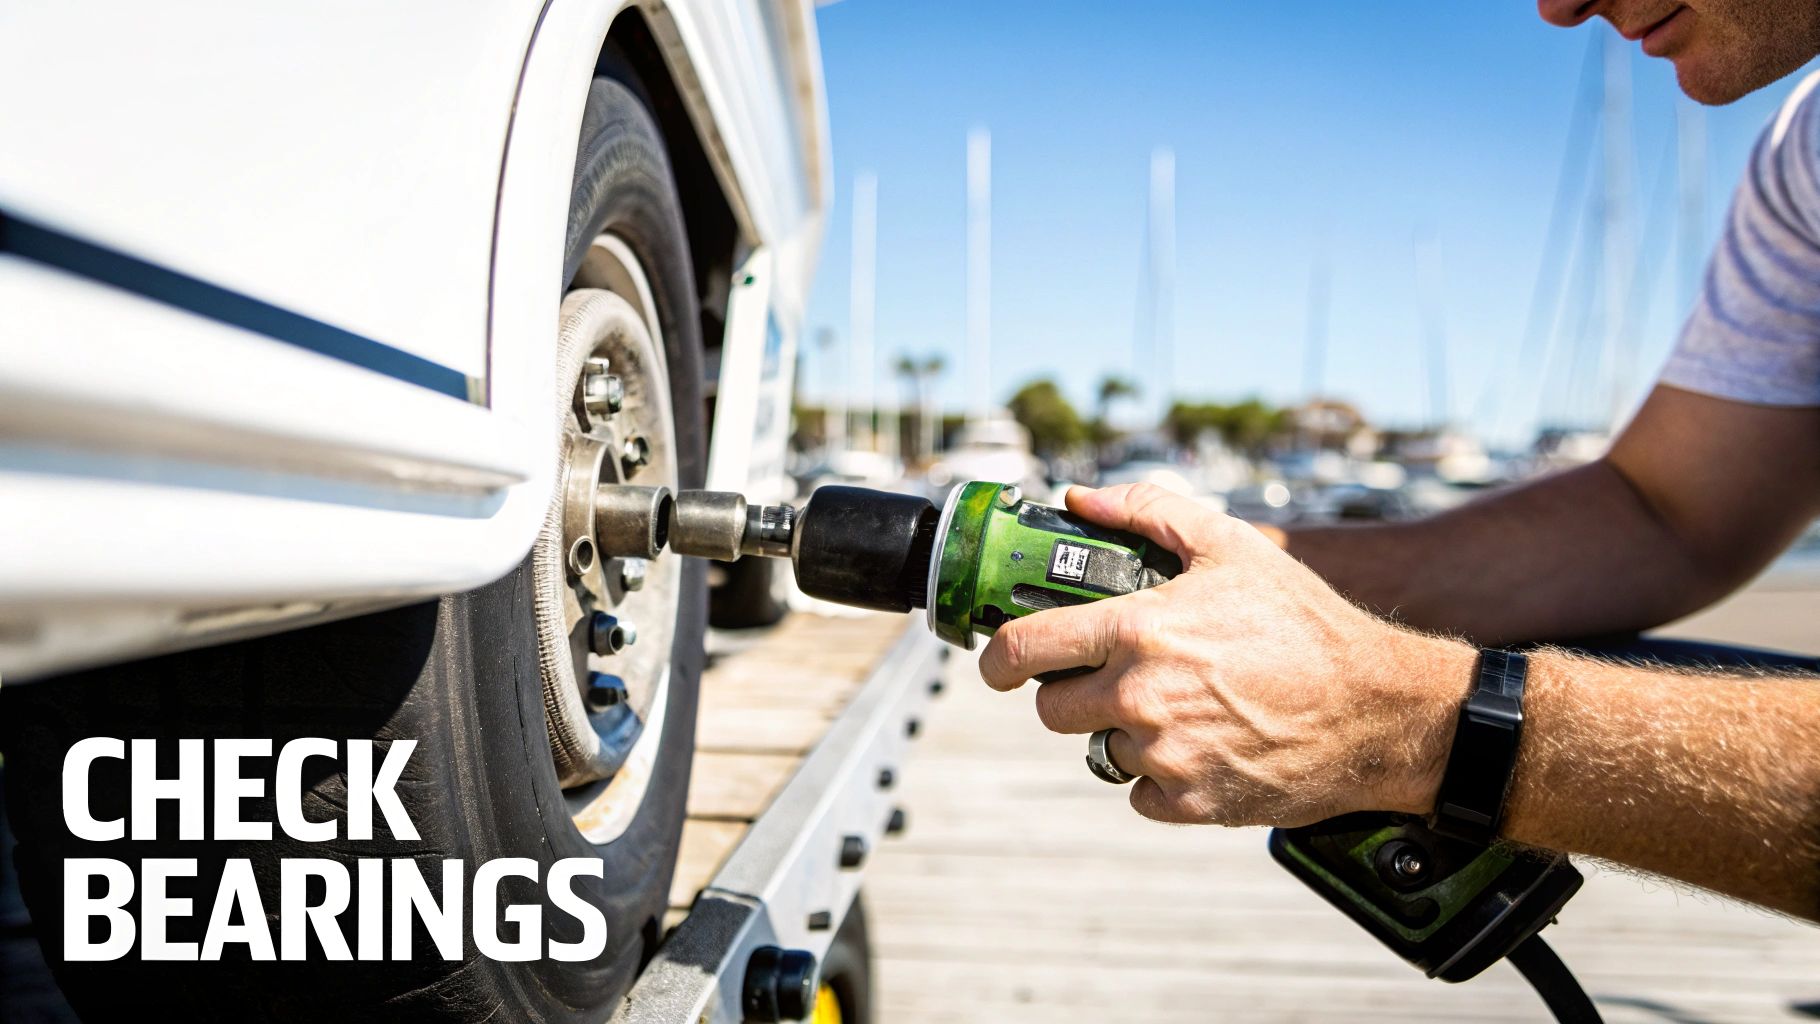
This maintenance is especially vital if you boat in saltwater, which aggressively corrodes metal. Dunking hot hubs into cool water creates a vacuum effect that can suck water past the seals and directly into your bearings, causing them to rust and fail quickly. Think of this check as cheap insurance against a very expensive and dangerous roadside breakdown.
How to Inspect and Maintain Your Bearings
Properly checking and greasing your bearings is a task you can tackle at the beginning of every boating season.
- Schedule It: Make bearing maintenance a key part of your spring prep checklist before your first trip of the year.
- Use the Right Grease: Always choose a high-quality, marine-grade waterproof grease. It's specifically formulated to resist water washout and protect against corrosion, unlike standard automotive grease.
- Check the Seals: While you're there, carefully inspect the grease seals on the inner side of the hub. If they are cracked, brittle, or leaking, they must be replaced to keep water out and grease in.
- Look for Trouble: If you find any signs of rust, pitting, or a burnt smell when you open the hub, it’s time to replace the bearings entirely. Don't wait for them to fail.
Pro Tip: Keep a simple log on your phone or in a notebook of when you service your bearings. This helps you stay on a consistent schedule and catch potential issues before they become major problems.
2. Monitor Tire Pressure and Condition
After wheel bearings, your tires are the next most critical component for safe towing. Underinflated tires generate excessive heat and wear unevenly, leading to blowouts. Overinflated tires reduce traction and create a bouncy, unstable ride. Since boat trailer tires face heavy loads and long periods of sitting, they require your consistent attention.
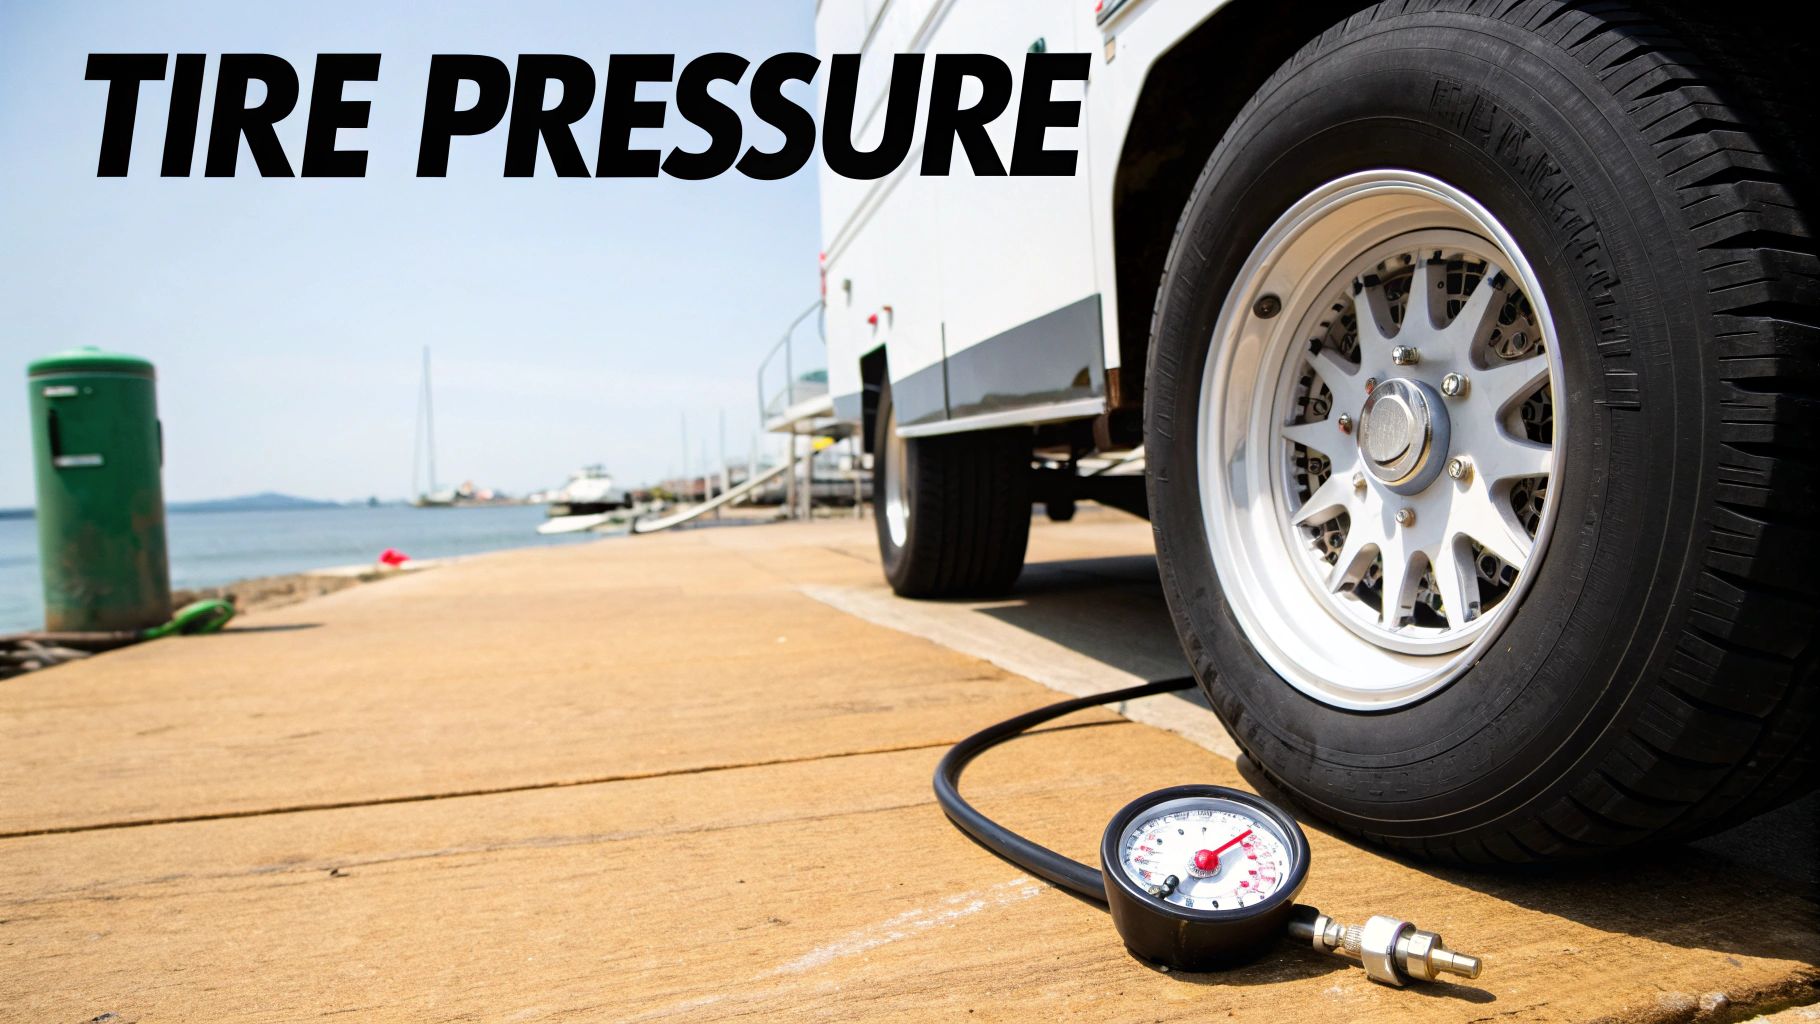
Tires degrade faster in extreme climates. Intense summer heat accelerates rubber breakdown, while constant UV exposure from the sun causes dry rot and sidewall cracking, even if the trailer isn't moving. That's why a quick check before every single trip is your best defense against a trip-ending tire failure.
How to Inspect and Maintain Your Tires
Making tire checks a non-negotiable part of your pre-trip routine is the easiest way to stay safe on the road.
- Check Pressure Cold: Always check the tire pressure before you start driving, when the tires are cold, to get an accurate reading. Use a quality digital or dial pressure gauge.
- Follow the PSI: Inflate tires to the maximum pressure indicated on the tire's sidewall. Special Trailer (ST) tires are designed to run at higher pressures than your car's tires to handle heavy loads safely.
- Inspect Sidewalls: Before every trip, do a quick visual inspection. Look for any cracks, bulges, or signs of dry rot on both the inner and outer sidewalls. Any visible damage means the tire needs immediate replacement.
- Replace by Age: Rubber deteriorates over time, regardless of tread depth. Plan on replacing your trailer tires every 3-5 years, even if they look okay. The manufacturing date is stamped on the sidewall.
Pro Tip: When storing your trailer for an extended period, use tire covers to protect them from damaging UV rays. This simple step can significantly extend the life of your tires and prevent premature cracking.
3. Inspect and Maintain the Brake System
Your trailer's brakes are just as important as your tow vehicle's, but they live a much harder life. They're repeatedly dunked in water and exposed to road grime, making them prone to corrosion and failure. A functional brake system is a non-negotiable safety feature; neglecting it can lead to dangerous situations where you can't stop your rig effectively.
This is especially true in saltwater environments. Salt can seize calipers, rust brake lines, and contaminate brake fluid, rendering the system useless. Rinsing your trailer after a saltwater dip isn't just for looks—it's a critical step to preserve your brake system's function and prevent a catastrophic failure.
How to Inspect and Maintain Your Brakes
Making brake checks a routine part of your pre-season and post-trip process will give you peace of mind on the road.
- Flush the Fluid: Brake fluid is hygroscopic, meaning it absorbs moisture from the air. In a marine environment, this happens quickly. Flush and replace your brake fluid every 2-3 years, or annually if you frequently launch in saltwater, to prevent internal corrosion.
- Rinse After Use: Always rinse your brake components with fresh water after every trip, especially after saltwater exposure. This simple step washes away corrosive salt residue before it can do damage.
- Inspect Lines and Pads: Carefully check brake lines for signs of rust, cracks, or leaks. Inspect your disc brake pads or drum brake shoes for wear. If they're worn down, it’s time for a replacement.
- Test Them Out: Before hitting the highway, find a safe, empty parking lot to test your trailer's brakes. This ensures they are engaging smoothly and effectively before you get into traffic.
Pro Tip: If you have drum brakes, consider a professional inspection annually. Internal components like springs and wheel cylinders can corrode and fail without obvious external signs. Catching this early prevents a total brake failure when you need them most.
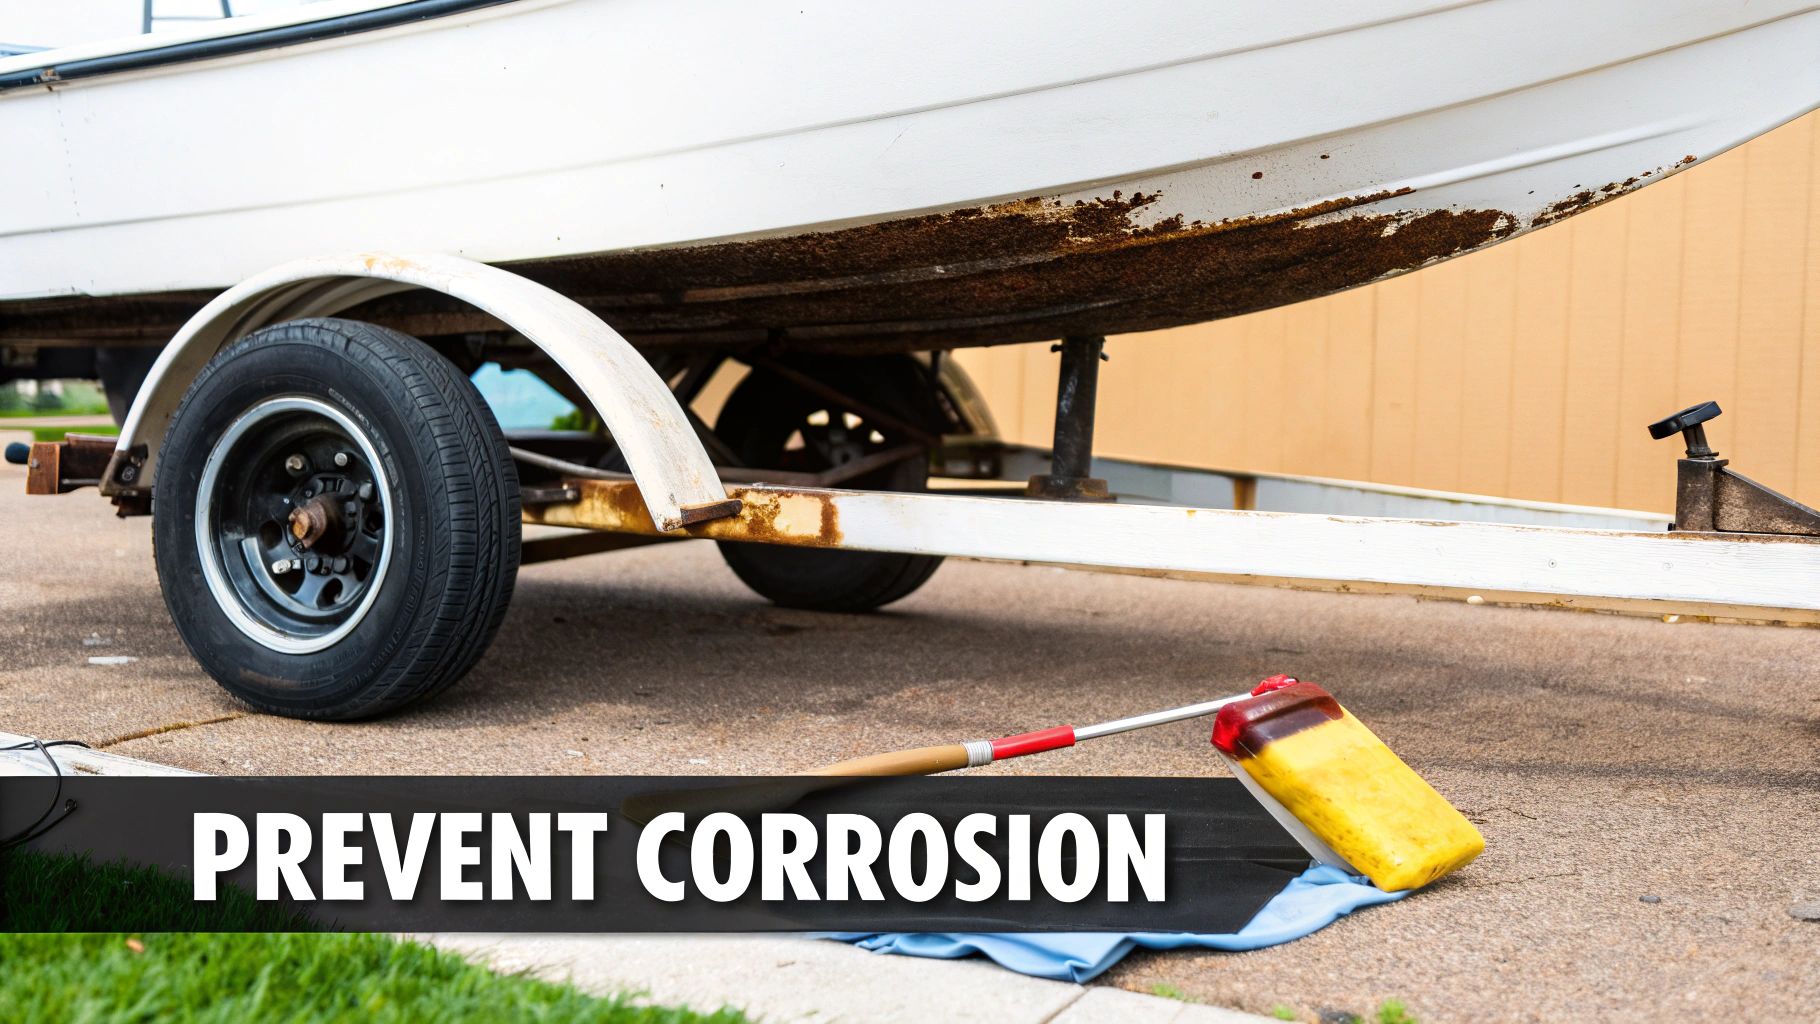
4. Prevent Corrosion and Protect Metal
Fighting corrosion is a constant battle, especially if you boat in saltwater. Your trailer's metal frame, springs, and hardware are all susceptible to rust, which compromises structural integrity and leads to costly repairs. A proactive approach is one of the most effective boat trailer maintenance tips for extending the life of your equipment.
Salt deposits attract and hold moisture against metal, dramatically accelerating rust. Think of regular cleaning and protection not as a chore, but as an essential defense against the elements that are constantly trying to break down your trailer. This is why you see old trailers with rusted-out frames—the fight against corrosion was lost.
How to Protect Your Trailer from Corrosion
A consistent cleaning and protection routine is your best weapon against rust. Make these steps a habit.
- Rinse Immediately: The moment you pull your boat out of the water, thoroughly rinse the entire trailer with fresh water. Pay special attention to leaf springs, axles, and brake components where salt and grime can easily get trapped.
- Apply a Protective Coating: Use a quality corrosion-inhibitor spray on the frame, winch, and other exposed metal parts. This creates a barrier that repels water and prevents rust from forming in the first place.
- Spot-Treat Rust: Inspect your frame monthly for any bubbles in the paint or surface rust. If you find any, address them immediately with a rust converter and touch-up paint to stop the spread. You can learn more about how to tackle this with an aluminum corrosion cleaner.
- Use a Reliable Cleaner: For stubborn grime and salt spray, a product like Boat Juice Exterior Cleaner is formulated to safely remove corrosive elements without harming your trailer's finish. It makes the post-trip rinse more effective.
Pro Tip: When replacing bolts or fasteners, upgrade to stainless steel hardware whenever possible. While the initial cost is higher, their superior corrosion resistance will save you from seized or failed hardware down the road.
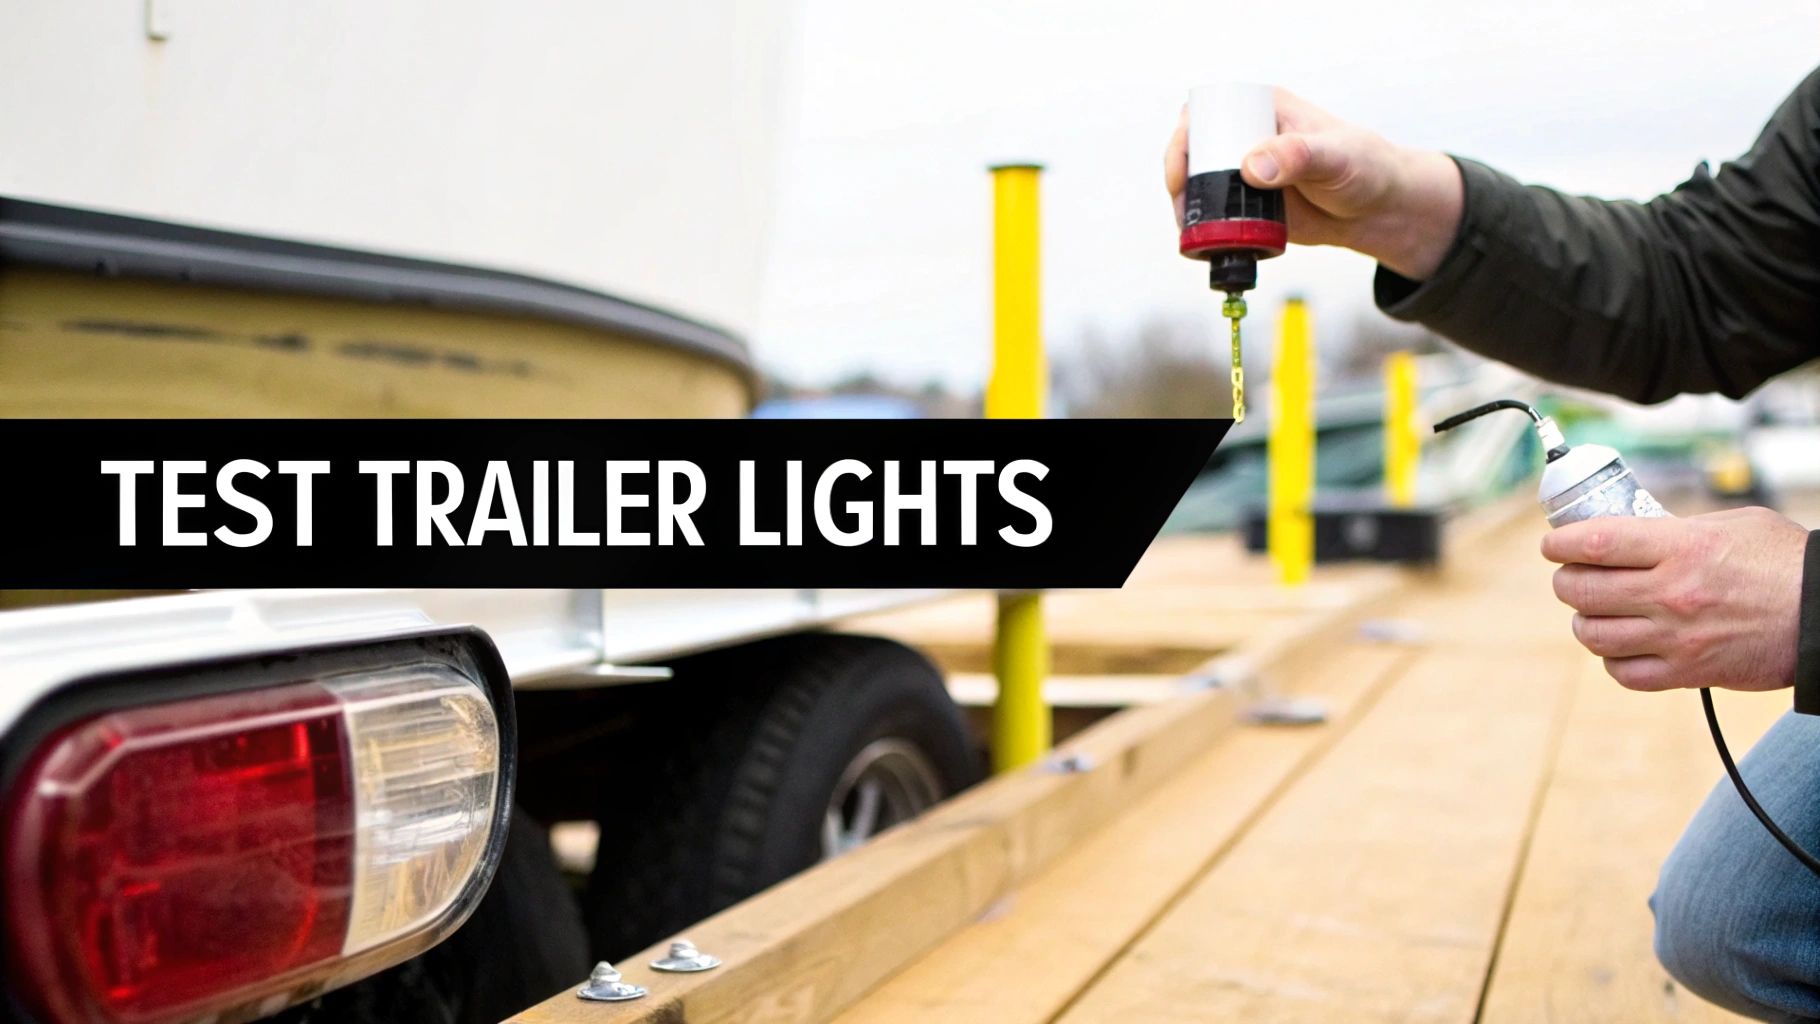
5. Maintain Trailer Lights and the Electrical System
Your trailer's electrical system is one of its most vulnerable components, constantly battling moisture and vibration. Functioning brake lights and turn signals are a legal requirement and crucial for your safety. A failed light or bad connection can lead to a dangerous accident or a costly ticket, making this a vital part of your maintenance checklist.
The primary cause of light failure is a bad ground connection, which happens when the ground wire loses solid contact with the trailer frame due to rust or corrosion. A few minutes of inspection before you leave home can prevent hours of frustration and serious safety hazards on the road.
How to Inspect and Maintain Your Electrical System
A quick electrical check should be part of your pre-trip routine every single time you tow.
- Test Before You Tow: Hook up your trailer to your tow vehicle and have a helper confirm your running lights, brake lights, and both turn signals are working correctly.
- Protect Your Connections: The plug connecting your trailer to your vehicle is a common failure point. Inspect the prongs for corrosion and apply a thin layer of dielectric grease. This waterproofs the connection and prevents corrosion.
- Check the Ground: Locate where the white ground wire is bolted to the trailer frame. Ensure this connection is clean, tight, and free of rust. This single step solves most trailer light problems.
- Trace the Wires: Periodically inspect all visible wiring. Look for any cracks, chafing, or bare spots. Secure any loose or dangling wires with zip ties to prevent them from getting snagged or damaged.
Pro Tip: Keep a small "trailer emergency kit" in your tow vehicle with spare bulbs, fuses, and a small tube of dielectric grease. This simple kit can turn a trip-ending electrical problem into a quick five-minute fix.
6. Maintain Bearing Buddy and Hub Protection Systems
For those who frequently launch their boats, a Bearing Buddy or similar hub protection system is a game-changer. These devices replace the standard dust cap and use a spring-loaded piston to maintain slight positive pressure inside the hub. This pressure effectively keeps water out while ensuring grease stays packed around the bearings.
This simple upgrade is one of the most effective ways to prevent premature bearing failure. By constantly pushing grease outward, these systems create a reliable barrier that prevents corrosive saltwater from seeping into a warm hub after launching, which can quickly destroy standard bearings. They are a must-have for saltwater boaters.
How to Maintain Your Hub Protection System
Maintaining these systems is straightforward and should be part of your regular pre-trip checklist.
- Check the Pressure: Gently press on the edge of the piston. If it rocks or moves slightly, the hub is properly filled. If it's solid and doesn't move, it's time to add more grease.
- Add Grease Carefully: Using a standard grease gun, add high-quality marine-grade grease through the zerk fitting until the piston just begins to move outward. Stop immediately to avoid over-pressurizing and blowing out the rear seal.
- Inspect Seals Monthly: Look for any grease leaking from the rear seal on the inside of your wheel. A leaking seal means the system can't hold pressure and must be replaced immediately to protect the bearings.
- Clean and Inspect: At the start of each season, remove the Bearing Buddy units, clean them thoroughly, and check for any signs of damage or wear.
Pro Tip: Never use a high-pressure, powered grease gun to fill a Bearing Buddy system. The excessive pressure can instantly blow out the rear grease seal, leading to a major failure on the road. Use a simple, hand-pump grease gun.
7. Inspect the Frame and Coupler for Damage
Your trailer’s frame is its backbone, and the coupler is the critical joint connecting it to your vehicle. These components endure immense stress and constant exposure to the elements. A compromised frame or a faulty coupler isn't a minor issue; it's a critical safety failure waiting to happen.
A small crack in a weld or a patch of deep rust can quickly weaken the entire structure, leading to dangerous swaying or even a complete separation from your tow vehicle. This inspection is especially important at the beginning of the season, after the trailer has been sitting through freeze-thaw cycles that can worsen small cracks.
How to Inspect Your Frame and Coupler
Make a habit of giving your trailer's frame a thorough once-over at the beginning and end of each boating season.
- Walk the Frame: Perform a slow, careful visual inspection of the entire frame. Look for cracks, especially around welds and joints where stress is highest. Check for any signs of bending or twisting.
- Check the Coupler: Examine the coupler mechanism. Ensure the latch moves freely and locks securely onto the hitch ball. The safety pin should fit snugly. Lubricate the moving parts to prevent them from seizing.
- Hunt for Rust: Pay close attention to any spots where the protective paint or galvanized coating has been compromised. This is where damaging corrosion can take hold and weaken the metal.
- Tackle Grime: A clean frame is much easier to inspect. Before you start, a thorough cleaning can reveal hidden cracks or rust spots. Find out how to properly pressure wash your boat and trailer for the best results.
Pro Tip: If you notice your trailer tires are wearing unevenly, it could be a sign of a bent or misaligned frame or axle. Don't ignore it. Take your trailer to a professional for an alignment check.
8. Use Proper Trailer Cover and Storage Practices
Where you park your trailer between trips matters more than you think. Proper storage is a powerful, passive form of maintenance. The sun’s UV rays, rain, and snow constantly attack your trailer’s components when it's left exposed, degrading paint, cracking tires, and accelerating rust. Using a cover and choosing a smart storage spot is a simple way to extend your trailer's life.
This is especially true for boaters in areas with harsh weather. Protecting your investment from the elements means fewer repairs, a higher resale value, and more peace of mind. Why let your trailer age prematurely when a little shelter can keep it in prime condition?
How to Properly Cover and Store Your Trailer
Integrating proper storage into your routine, especially during the off-season, will pay dividends for years to come.
- Choose the Right Cover: Invest in a breathable, marine-grade trailer cover. These block UV rays and rain while allowing air to circulate, which prevents moisture from getting trapped underneath and causing mildew or corrosion.
- Clean Before Storing: Always give your trailer a thorough wash to remove salt, grime, and other debris before putting it away for an extended period. A clean surface is less likely to corrode.
- Seek Shelter: If possible, store your trailer in a garage, carport, or covered storage facility. Any barrier between your trailer and the elements is a major advantage.
- Protect Your Finish: Before covering for the winter, applying a protective coating like a quality spray wax provides an extra layer of defense against moisture that gets under the cover. Learn more about the best spray wax for boats and trailers to shield your trailer's finish.
Pro Tip: For long-term winter storage, consider putting the trailer on jack stands to take the weight off the tires and suspension. This helps prevent flat spots on the tires and reduces stress on the springs.
Your Next Step: Create a Simple Maintenance Checklist
You've just learned the key maintenance tasks that keep your trailer rolling safely. But knowledge is only powerful when you apply it consistently. The difference between a trailer that lasts a few seasons and one that supports your adventures for decades often comes down to one simple thing: a routine.
Small issues like a soft tire, a flickering light, or a spot of rust can quickly escalate into trip-ruining headaches. By creating a personalized checklist, you transform these tips into a manageable, repeatable process. This is the single most effective action you can take to protect your investment and ensure your safety on the road.
Building Your Actionable Checklist
Your goal is to build simple habits that catch problems early. Grab your phone's notes app or a notepad and create three distinct checklists:
-
Before Every Trip (The 5-Minute Walk-Around):
- Check tire pressure.
- Confirm all lights (brake, turn, running) work.
- Ensure the coupler is latched and safety chains are crossed.
- Visually inspect the winch strap for frays.
-
Monthly Check-Up (The 30-Minute Inspection):
- Inspect tire sidewalls for cracks.
- Check brake fluid level (if applicable).
- Examine the trailer frame for new rust or cracks.
- Add grease to Bearing Buddies if needed.
-
Seasonal Deep Dive (Spring Prep & Winterization):
- Spring: Repack or grease wheel bearings, inspect brake pads, and thoroughly clean the frame.
- Winter: Perform a deep clean, apply a corrosion inhibitor, and store with tires covered and weight off the axles if possible.
By turning these boat trailer maintenance tips into a schedule, you build peace of mind. You'll launch your boat with the confidence that the journey there and back will be as smooth as the water itself.
Ready to make corrosion prevention the easiest part of your new routine? Grab a bottle of Boat Juice Exterior Cleaner. It’s the perfect solution for quickly rinsing away corrosive salt and road grime after every trip, protecting your trailer's frame and components. Keep your rig fighting rust with a simple spray and rinse from Boat Juice.