


· By Boat Juice Team
Polishing Aluminum Boats for a Mirror-Like Shine
Polishing your aluminum boat isn't just about making it look good for the next trip out on the water. It's a critical maintenance job that directly removes damaging oxidation and restores the metal's natural protective layer. The process is straightforward: you'll clean the hull, use a polishing compound to smooth the surface, and then seal it to keep it looking great and prevent future damage.
Why Bother Polishing Your Aluminum Boat?
I get it. Giving up a whole weekend to polish your boat might sound like a serious chore. But this process is about much more than just getting a mirror-like shine at the dock. Think of it as a crucial part of protecting your investment and preventing expensive headaches down the line.
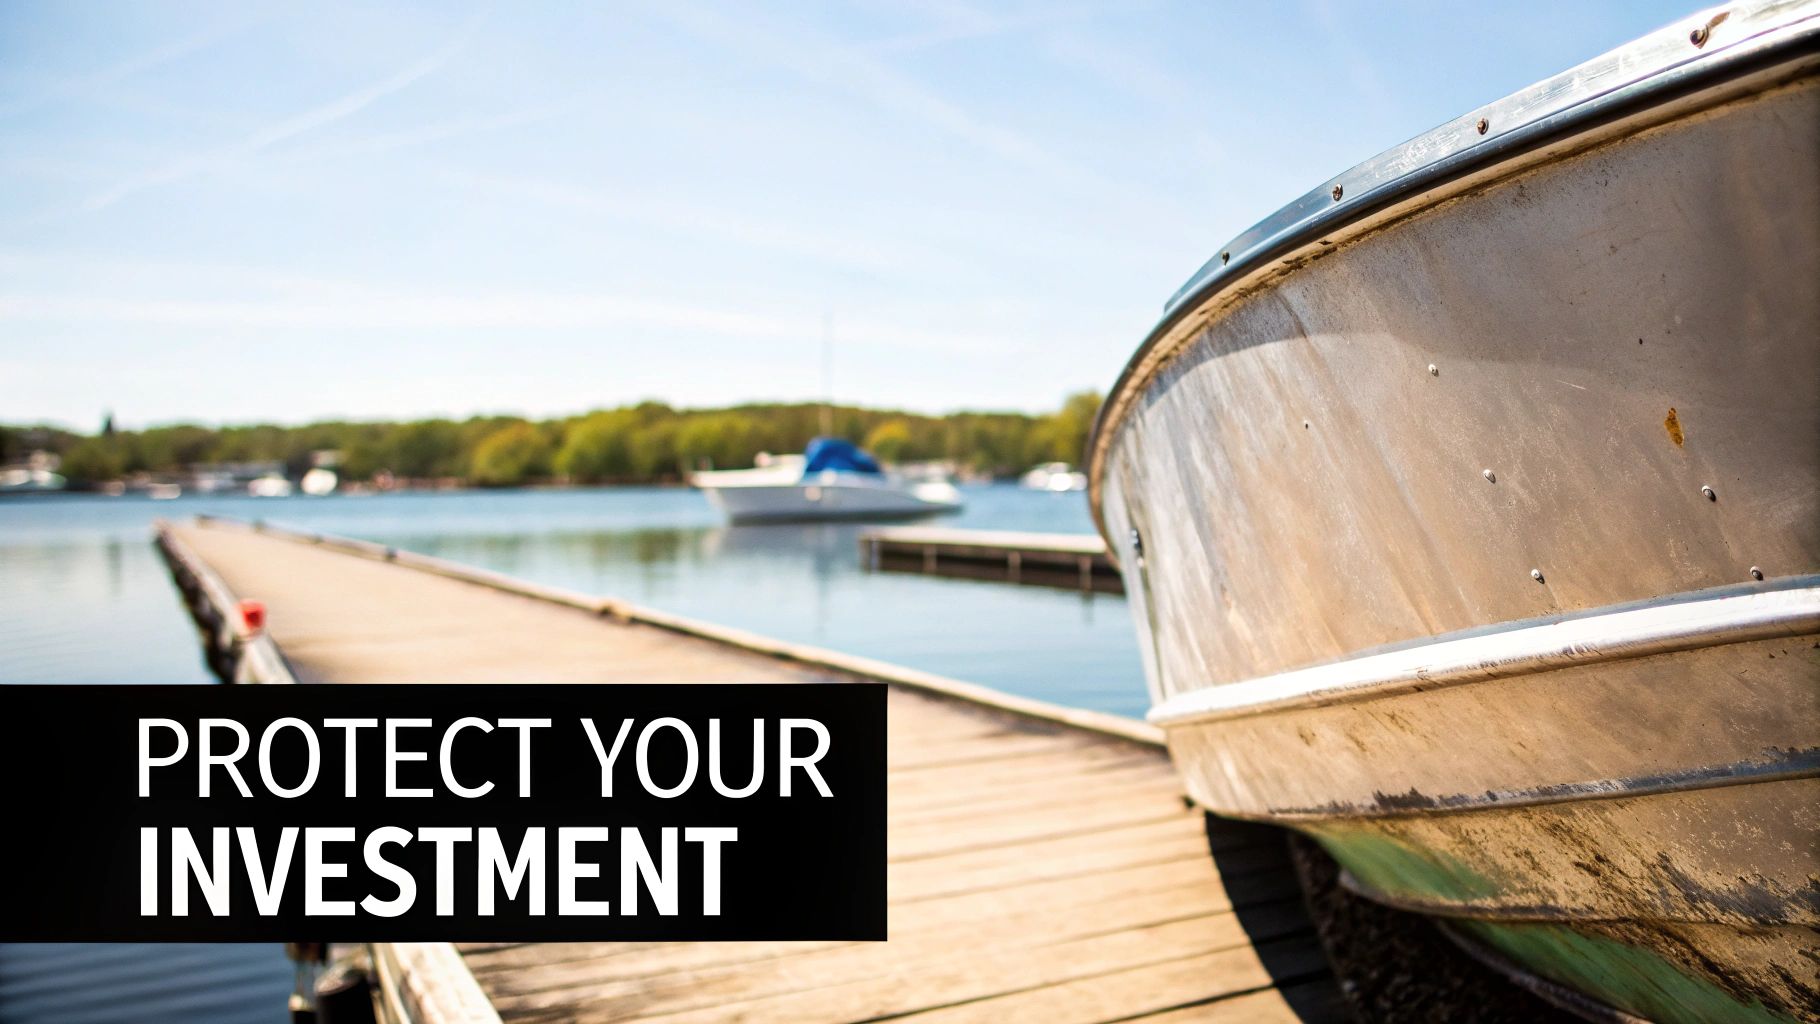
That dull, chalky film you see on an older hull isn't just a layer of grime—it's oxidation. This is aluminum's version of rust, and it's the first sign of corrosion. If you let it sit, you’re inviting moisture, salt, and other contaminants to eat away at the metal. Eventually, this leads to pitting and can even weaken your boat's structure. Polishing physically buffs away that compromised layer to get back to the fresh, solid aluminum underneath.
The Real Value Behind the Shine
A freshly polished boat doesn't just look new; it also performs better and lasts longer. Here’s why putting in the work now pays off big time:
- Preventing Corrosion: Polishing creates a smooth, non-porous surface. This makes it much harder for corrosive elements like saltwater and acid rain to get a grip on the metal.
- Making Cleaning Easier: A polished hull is slick, which means grime, algae, and water spots slide right off. Your future wash-downs will be quicker and involve a lot less scrubbing.
- Boosting Resale Value: A gleaming, well-cared-for boat will always fetch a higher price. It’s a clear signal to potential buyers that you’ve looked after your investment.
- Adding UV Protection: Following up your polish with a good sealant adds a shield against the sun's harsh UV rays, which can speed up the whole oxidation process.
The consequences of skipping this job are pretty stark. A 2022 marine industry survey revealed that 65% of aluminum boat owners cited oxidation as their number one maintenance headache. This is more than just a visual annoyance—regular polishing can extend the life of your boat's alloy by up to 20 years and significantly cut down on potential repair costs. For more insights, you can find a ton of info in aluminum boat market industry reports.
At the end of the day, polishing your aluminum boat is a proactive move that pays you back in longevity, value, and pride in ownership. Every hour you spend bringing back that shine is a direct investment in your boat’s future.
Getting Your Gear Ready For A Mirror Shine
Have you ever started a project only to realize halfway through that you're missing a crucial tool? We’ve all been there. When it comes to polishing your aluminum boat, having everything you need laid out beforehand is the secret to a successful and rewarding job.
Getting that professional-grade shine isn't just about the polish itself; it's about the entire process, and that starts with the right gear. Prepping properly ensures you get the best results without any frustrating delays.

Your Polishing Supply Checklist
Think of this as your pre-flight checklist. Don't touch the polish until you have these items ready to go. Skipping the initial cleaning, for instance, just means you'll be grinding dirt right into the aluminum, which is the exact opposite of what you want.
Here’s your must-have list:
- Safety Gear: Don't skip this part. Safety glasses will protect your eyes from flying polish, and nitrile gloves are essential for keeping that grimy black residue off your hands. An N95 dust mask is also a smart move to avoid inhaling fine particles.
- Cleaning Crew: You'll need a solid degreasing soap or a dedicated marine cleaner to get rid of all the gunk. A product like Boat Juice Exterior Cleaner is ideal for this job, as it's formulated to cut through old wax, lake scum, and road film.
- Microfiber Towels: You can never have too many. Seriously, grab a big pack. Keep separate piles for wiping away used polish and for the final buffing—you don't want to cross-contaminate your clean towels with abrasive residue.
- Applicator Pads: Whether you choose to polish by hand or use a machine, you need the right pads to apply the compound and do the work.
The Big Question: Hand Or Machine Polishing?
This is probably the most important decision you'll make before you start. There isn't a single correct answer; it really boils down to the size of your boat, how bad the oxidation is, and how much elbow grease you're willing to put in.
Hand Polishing vs Machine Polishing Your Boat
Here's a quick comparison to help you decide which polishing method is right for your aluminum boat and your goals.
| Factor | Hand Polishing | Machine Polishing (Rotary/DA) |
|---|---|---|
| Best For | Small boats (jon boats), tight spaces, light touch-ups | Medium to large boats, pontoons, heavy oxidation |
| Speed | Very slow and labor-intensive | Significantly faster, covers large areas quickly |
| Effort | High physical effort, can be exhausting | Low physical effort, the machine does the work |
| Finish Quality | Can be inconsistent, harder to get a uniform look | Consistent, even, professional-looking shine |
| Control | Excellent for intricate areas like cleats and railings | Good, but can be tricky in tight spots |
| Cost | Low initial cost (just pads and polish) | Higher initial cost (polisher, pads, polish) |
While hand polishing has its place for small jobs or hitting tricky spots around hardware, a machine is a total game-changer for anything larger.
For most boat owners, especially those with pontoons or larger fishing boats, a machine polisher isn't a luxury—it's a necessity. It delivers a far more uniform and brilliant finish in a fraction of the time. You have two main options: a dual-action (DA) polisher, which is super user-friendly for beginners, or a rotary polisher, which has more muscle for tackling seriously neglected surfaces.
Of course, none of this matters if you're trying to polish over a layer of lake scum. A squeaky-clean surface is the real first step. If your boat needs a serious bath, our guide on how to pressure wash a boat has some great pointers for getting it done right.
From Grime to Gleam: Your Step-by-Step Polishing Method
Alright, with your boat clean and your tools ready, it's time for the main event—turning that dull, chalky aluminum into a gleaming surface. This is where the magic happens, but it’s a process that rewards patience and a steady hand. Don't rush it. If you focus on being methodical, you’ll be blown away by the results.
Let's break this down into manageable phases, from that first pass with the polisher to the final inspection. Think of it less like a sprint and more like painting a room—good prep and methodical work are everything.
The Foundation: A Deep Clean
You wouldn’t wax a dirty car, and the same logic applies here. Polishing an aluminum boat without washing it first is a recipe for disaster. You'll just grind existing dirt and salt into the surface, creating more scratches than you remove. Your goal is a perfectly clean slate.
A pressure washer is great for knocking off heavy mud and algae, but the real work is in the details. Grab a quality marine cleaner—Boat Juice Exterior Cleaner works great for this—and a soft-bristled brush to scrub down every inch of the aluminum. Pay extra attention to the waterline, where scum and mineral deposits always put up the biggest fight.
Once it's scrubbed, rinse the entire surface thoroughly with fresh water to remove any soap residue that could interfere with the polish. Finally, dry the boat completely with clean microfiber towels. Polishing a wet surface is just a messy, ineffective waste of time, so make sure it's bone-dry before you begin.
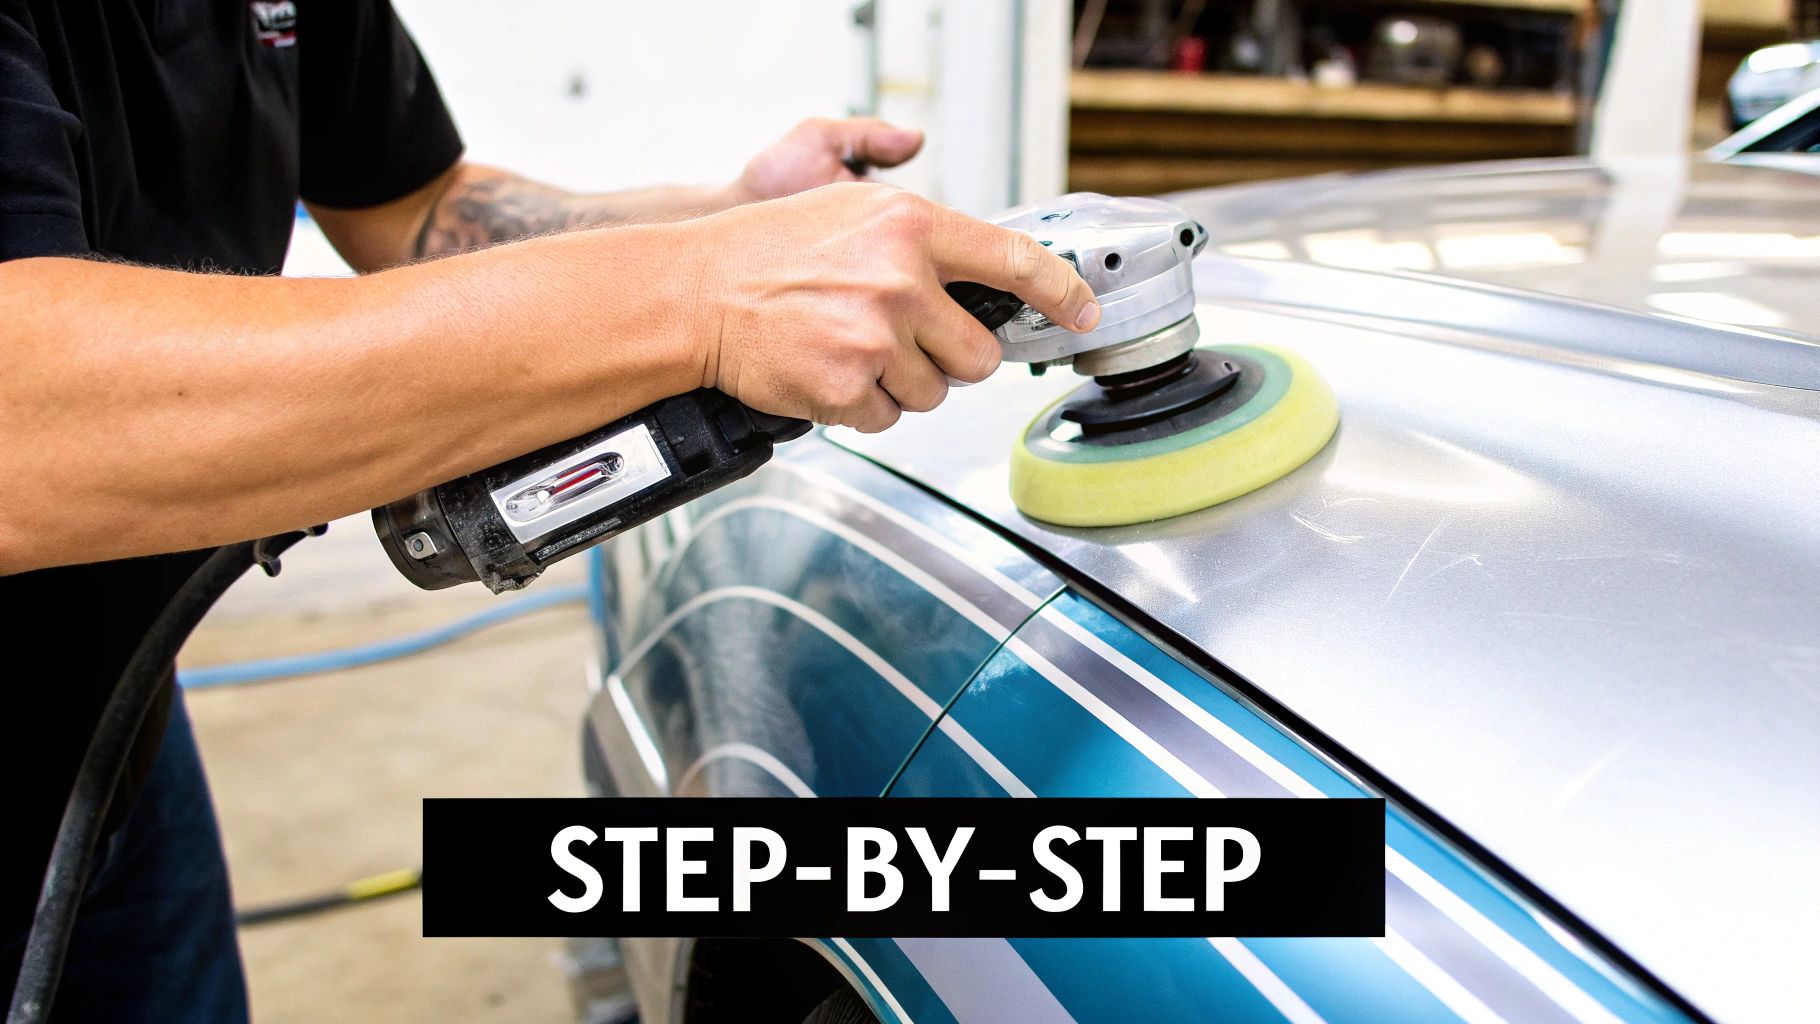
Your Polishing Technique
This is where your technique makes or breaks the final look. The secret is to work in small, manageable sections, about 2x2 feet at a time. This approach ensures you can work the polish effectively before it dries out and helps you maintain consistent pressure and coverage for a uniform finish.
Here’s the step-by-step process for each section:
- Load the Pad: Squeeze a few dime-sized drops of your aluminum polish directly onto your wool or foam pad. Don't apply it to the boat, as it can start to dry unevenly.
- Spread It Out: Before turning on the machine, dab the pad onto your 2x2 section to distribute the polish. Set your polisher to its lowest speed and make one quick pass to spread the compound evenly without slinging it everywhere.
- Work the Area: Now, bump the speed up to a medium setting (around 3-4 on most dual-action polishers). Move the machine in a slow, overlapping cross-hatch pattern—go side-to-side, then up-and-down over the same area. Keep the pad flat against the surface and let the machine's weight provide the pressure.
- Wipe and Inspect: After a few passes, you'll see the polish turn clear or become a hazy residue. Stop the machine, grab a clean microfiber towel, and wipe away all the black residue. Inspect your work under good light. You should see a huge improvement in shine and a serious reduction in oxidation.
This methodical approach isn't just for looks; it's a crucial defense against corrosion. Research shows untreated aluminum can oxidize at 0.1-0.5 microns per month in saltwater. Over time, that leads to a significant drop in both visual appeal and structural integrity. Properly polishing your aluminum boat isn’t optional—it’s essential maintenance. You can find more on how this impacts the industry by reading global aluminum boat market reports.
Tackling Tricky Spots
Your boat isn't a flat box, so you’ll need to deal with curves, welds, and hardware. For tight areas around cleats, railings, or welded seams, a machine polisher is often too bulky. This is where hand polishing shines. Just apply a small amount of polish to a microfiber applicator and work it in with firm, circular motions.
For pontoon logs, the same 2x2 section method works perfectly. Just be mindful of the curved surface and slightly tilt the polisher as needed to maintain good pad contact. The goal is a uniform, blended finish, so make sure each section flows seamlessly into the next.
Choosing Your Polishing Compounds and Pads
Walking into the detailing aisle and seeing a wall of polishes can feel overwhelming. Let's cut right through the noise. When polishing an aluminum boat, you’re using a liquid abrasive to smooth out the metal, and picking the right one is simpler than you think. It all boils down to how much "cutting" power you need.
Think of it like sandpaper. You wouldn't use ultra-fine paper to remove a deep gouge; you'd start with a coarser grit and work your way up. Polishing compounds use the same principle. An aggressive cutting compound has larger abrasives designed to remove heavy oxidation and pitting. A lighter finishing polish uses tiny, gentle abrasives to refine the surface into that brilliant, mirror-like shine.
For most DIY projects, a two-step approach is perfect: a cutting stage for the heavy lifting, followed by a finishing stage to really make it pop. If your boat is just looking a little tired but not heavily oxidized, you might even get away with just a finishing polish.
Matching the Right Pad to the Job
The pad you use is just as crucial as the polish. The pad works the polish onto the aluminum, and different materials produce drastically different results. Using the wrong one can leave you with a hazy finish or make the job take ten times longer than it should.
Here’s a quick rundown of your pad options:
- Wool Pads: These are your heavy hitters. The natural fibers are aggressive and generate a bit of heat, which makes them fantastic at knocking down deep oxidation quickly. Pair a wool pad with a cutting compound for your first pass on a neglected boat.
- Microfiber Pads: These are versatile all-rounders. Microfiber pads offer a great balance—they can cut through moderate defects but also finish down quite nicely. They're a solid choice for a one-step polish on a boat that's already in decent shape.
- Foam Pads: These come in a range of densities, from firm cutting pads to ultra-soft finishing ones. A soft foam finishing pad paired with a fine polish is your secret weapon for achieving that flawless, swirl-free final gloss.
Pro Tip: Whatever you do, don't cross-contaminate your pads! Keep one wool pad dedicated to your cutting compound and a separate, clean foam pad for your finishing polish. Mixing them will drag coarse cutting particles into your final step, completely ruining that mirror finish you've worked so hard for.
By starting with a more aggressive combo (like a wool pad and a cutting compound) and stepping down to a finer one (like a foam pad and a finishing polish), you systematically refine the aluminum from dull to dazzling. This strategy saves you a ton of time and frustration.
You can find more detail on this process in our comprehensive guide to selecting the best aluminum polish for boats.
How to Protect Your Hard-Earned Shine
You did it. You put in the elbow grease, fought back the oxidation, and now your boat has a brilliant, mirror-like finish. But don't celebrate just yet. All that hard work can disappear in a flash if you don't protect it.
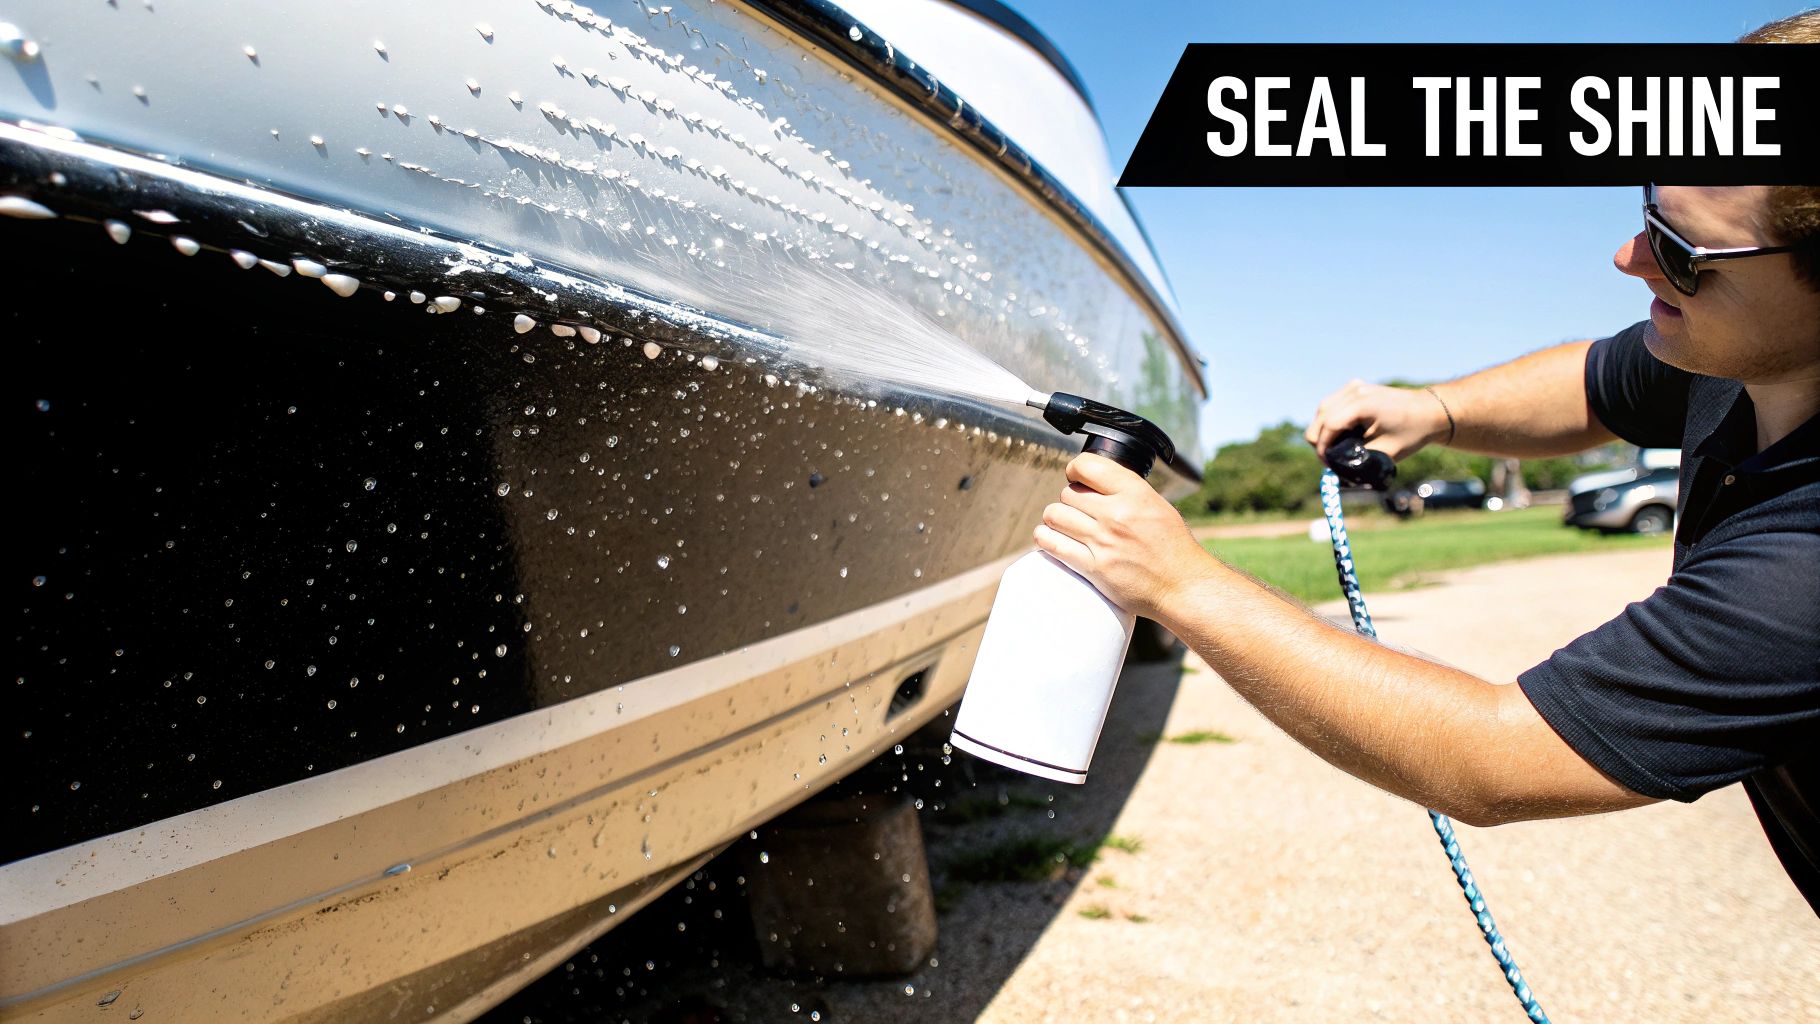
That incredible shine you see is fresh, raw aluminum. It's beautiful, but it's also completely exposed and will start to re-oxidize almost immediately. This final step isn't a suggestion—it's absolutely essential. You must apply a protective sealant to lock in that shine and shield it from water, UV rays, and grime.
Skipping this step is like detailing your truck and then immediately driving it down a muddy road. You'll have wasted all that effort.
Choosing Your Shield
You’ve got a few solid options for protecting your freshly polished aluminum boat. Each has its pros and cons, so the key is picking one that fits your maintenance style and gives you the lasting protection you need.
Here’s a quick rundown of your main choices:
- Traditional Marine Wax: This is the classic approach. Carnauba-based waxes look fantastic, giving the aluminum a deep, warm gloss. The downside? They don't last very long, so you'll likely be reapplying it every month or two.
- Polymer Sealants: Think of these as a modern upgrade to wax. These synthetic products chemically bond to the surface for a much more durable and longer-lasting shield, often lasting 3-6 months per application.
- Ceramic Coatings: This is the top-tier, heavy-duty option. It creates an incredibly hard, sacrificial layer over the aluminum that offers the best protection available. However, the application process is more technical. If you're curious, it's worth understanding the differences between a ceramic coating vs. PPF.
For most boat owners who want a perfect balance of easy application and solid durability, a modern spray sealant is tough to beat. You simply mist it onto a clean microfiber towel, wipe it on, and flip the towel over to buff it to a perfect, streak-free shine.
A good sealant creates a powerful hydrophobic barrier that makes water bead up and roll right off, taking dirt with it. If you want to dive deeper, check out our guide on the best spray wax for boats.
For those of you trailering wake boats or pontoons, this protection directly impacts your investment. Diligent maintenance can help aluminum boats retain about 70% of their value after five years, and a simple polish-and-protect routine can extend the life of your hull by 20-30%.
To keep that shine looking its best all season, get into the habit of reapplying your chosen sealant every few months. A good rule of thumb is to re-up your protection whenever you notice water isn't beading as tightly on the surface anymore. A few minutes of maintenance now will save you from a full weekend of polishing later.
Answering Your Aluminum Boat Polishing Questions
Even if you're comfortable with boat maintenance, you might have a few questions when it comes to polishing aluminum. Let's tackle some of the most common ones so you can get started with confidence.
How Often Should I Polish My Aluminum Boat?
This really depends on how and where you use your boat. If your boat lives in saltwater or is stored uncovered, it’s taking a constant beating from the elements. For boats like these, I recommend a full, deep polish once a year, followed by reapplying a quality sealant like Boat Juice every 3-4 months to maintain protection.
If you have a freshwater boat that's trailered and stored indoors, you can likely go longer. You might only need to do a complete polish every couple of years. The key is to keep an eye on the finish. As soon as you spot that dull, chalky haze starting to return, it’s time for a polish before oxidation really sets in.
Can I Polish Anodized or Painted Aluminum?
This is a crucial one, and the answer is a hard no. Never use an abrasive polish on an anodized or painted aluminum surface. Polishing works by removing the very top layer of the metal to make it smooth. If you try this on a coated surface, you’ll strip the anodized layer or paint right off, causing permanent damage.
If you're not sure what kind of surface you have, always test your polish on a small, hidden area first. For coated surfaces, use gentle, non-abrasive cleaners and protectants made specifically for them.
What Is That Black Gunk That Comes Off When Polishing?
Don't panic when you see that thick, black residue coming off your hull! It might look alarming, but it’s actually a sign that you’re doing it right. That gunk is just a combination of the oxidized aluminum you’re removing, the spent polishing compound, and microscopic particles from the polishing pad. The important part is to wipe it all away thoroughly with a clean microfiber towel.
Pro Tip: Use a two-towel system. Dedicate a few towels just for wiping off the black residue. Then, grab a separate, fresh set of clean towels for the final buff and sealant application. This simple step prevents you from accidentally grinding that old, gritty polish back into your beautiful new finish.
Will Polishing Fix Streaks and Water Spots on My Pontoons?
Yes, absolutely. Polishing is the best way to permanently remove those ugly, chalky streaks and stubborn water spots that seem to love aluminum pontoons.
For really etched-in spots, you can make your life easier by pre-treating them. A product like our Boat Juice Extreme Water Spot Remover is designed to dissolve the mineral deposits first, doing a lot of the heavy lifting for you. After you’ve treated the spots, just follow the full polishing process in this guide to erase any leftover marks and bring back that perfect, uniform look.
Your next step is simple: pick a weekend, gather your supplies, and get started. That mirror shine is closer than you think.