


· By Boat Juice Team
How to Winterize a Boat: A Complete DIY Guide
Winterizing your boat is more than just a single task—it's a critical series of steps to protect your investment from the harsh off-season. Your goal is to clean every surface, stabilize the fuel, flush the engine with antifreeze, drain all plumbing, and care for the battery. By following this guide, you can ensure a seamless start to the next boating season.
Why Winterizing Your Boat Is a Must-Do Task
As the days get shorter and the water gets colder, it’s tempting to just pull your boat out, throw a cover on it, and call it a day. But skipping winterization is a recipe for disaster. This process isn't just about preventing a little ice; it's about saving the very heart of your boat from damage that is expensive, frustrating, and completely avoidable.
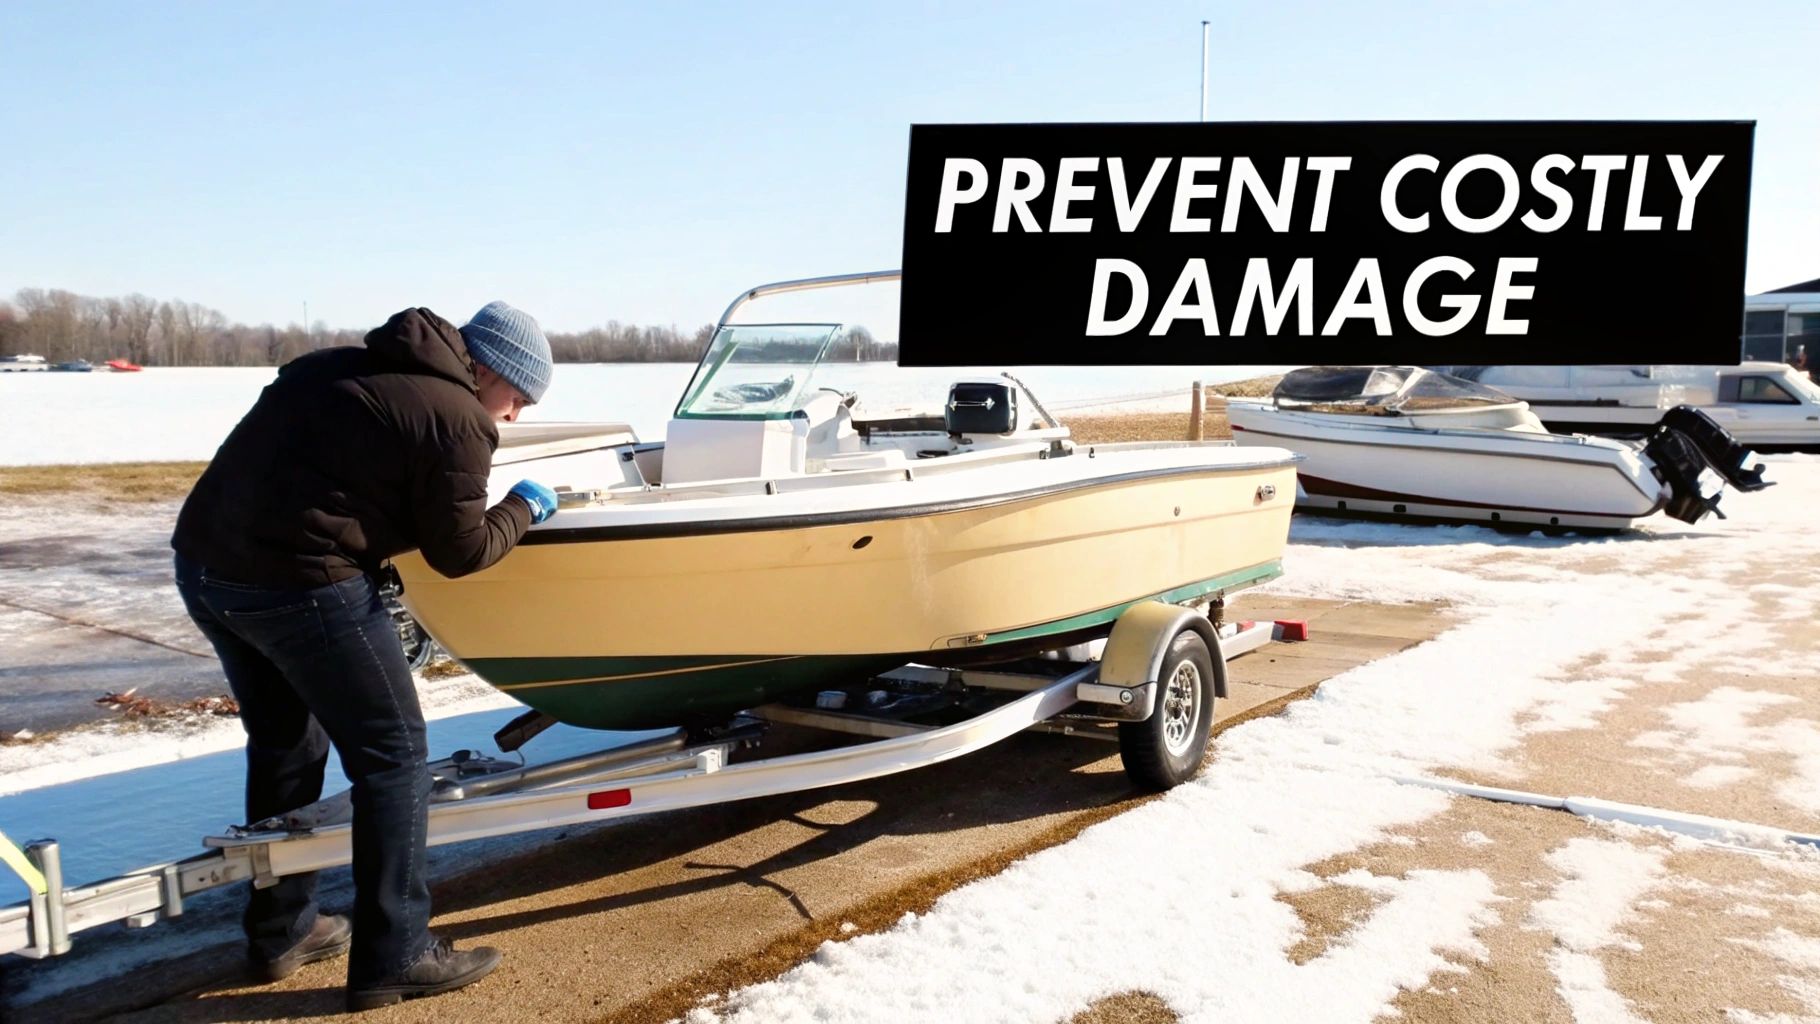
The entire reason you winterize comes down to a simple fact of physics: water expands when it freezes. This is the primary enemy of every pipe, pump, and engine passage on your boat. Even a small amount of trapped water will expand with enough force to crack solid metal components, leading to major repairs.
Understanding the Risks of Skipping Winterization
"My boat's on a trailer in a milder climate, it'll be fine," is a common mistake. A surprising number of freeze-damage claims come from states that don't have severe winters. It only takes one unexpected cold snap to catch you off guard and cause irreversible damage.
Failing to winterize properly can lead to serious headaches. Here’s what you’re preventing with these crucial steps:
- A Cracked Engine Block: This is the worst-case scenario. Water left in the engine's cooling passages freezes, expands, and can split the engine block or manifold. This is a repair that can easily cost thousands of dollars.
- Burst Hoses and Pipes: Your boat's freshwater system, head (toilet), and raw water washdown are all vulnerable. Frozen pipes and cracked plastic fittings are common and can lead to a boat full of water come springtime.
- Fuel System Nightmares: Old fuel is bad news. Over winter, it degrades and leaves behind gummy deposits that clog fuel lines, injectors, or a carburetor. Water can also condense in the tank, causing the engine to sputter or fail entirely.
- Mold and Mildew Takeover: A damp, covered boat is a perfect environment for mold and mildew. Once it takes hold, it can permanently stain your vinyl seats, cushions, and carpets, and be very difficult to remove.
Winterizing isn't just another chore to check off a list. It’s the single best thing you can do for your boat’s long-term health and your own peace of mind when next season rolls around.
Your Roadmap to a Secure Winter Layup
Tackling this project might seem overwhelming, but it’s completely manageable when you break it down into a clear plan. The U.S. ocean-based tourism and recreation sector contributes USD 143 billion to the nation's GDP, and recreational boats are a huge part of that. Protecting your investment with proper maintenance is key. You can find more insights about the marine industry from this global market analysis.
By understanding the "why" behind each step, you'll have the confidence to get it done right. We'll walk you through every critical area to make sure your boat weathers the winter without a scratch and is ready to hit the water on that first beautiful day of spring.
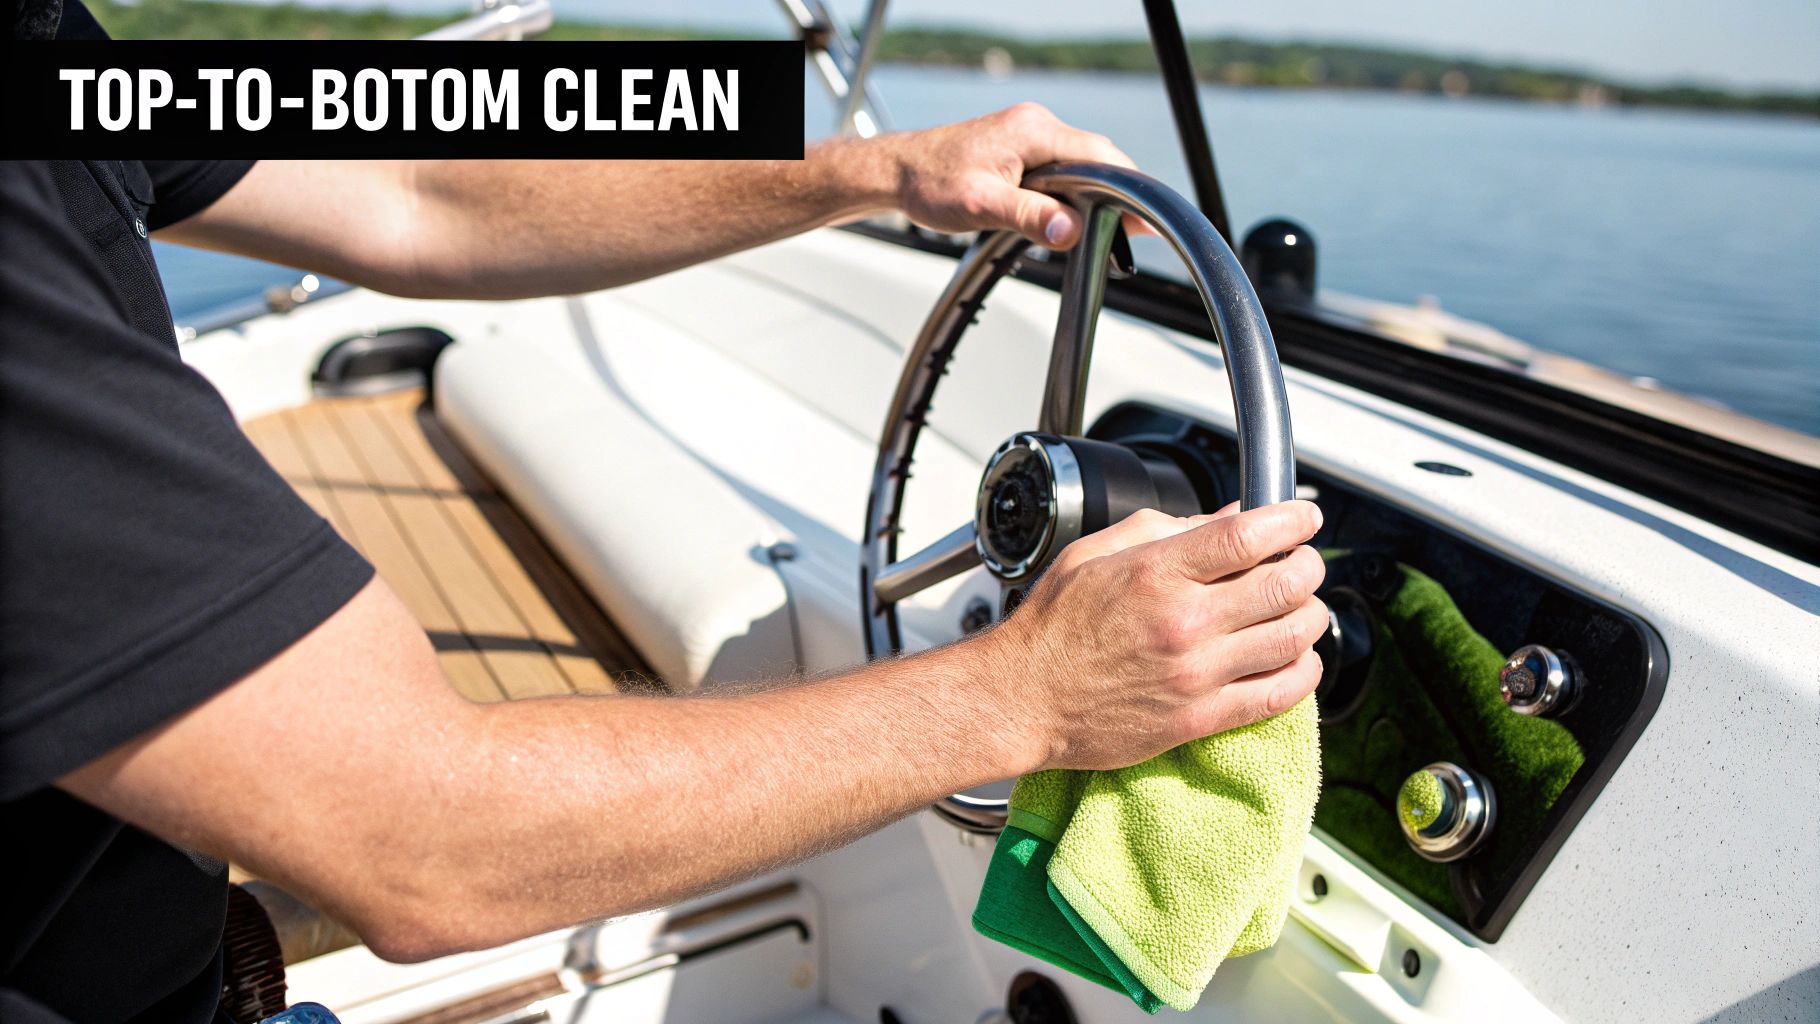
Your Pre-Winter Deep Clean and Protection Strategy
Before you even think about fogging an engine or pouring a drop of antifreeze, your very first job is a top-to-bottom deep clean. Putting your boat away dirty is like going to bed without brushing your teeth—you're just asking for bigger problems down the road.
This initial cleaning spree is your first line of defense against the mold, mildew, and stubborn stains that thrive in a boat during a long, dark winter.
Think about all the grime on your boat after a season on the water: fish scales, dried lake scum, sunscreen grease, and spilled drinks. When you cover all that up, you’re creating an ideal breeding ground for mildew. A thorough cleaning now prevents a nasty surprise when you pull the cover off in the spring.
Tackling the Exterior Grime
Your boat's hull and deck have taken a beating all summer. Water spots, algae, and road grime from trailering can slowly damage your gelcoat if left to sit. Your mission is simple: get every last trace of organic buildup off the boat before storage.
Start with a strong spray-down to knock off loose debris. Then, grab a cleaner made for marine surfaces. A product like Boat Juice Exterior is a great choice because it's formulated to cut through tough scum lines and water spots without stripping your wax. Work in small, manageable sections, scrub lightly, and rinse completely before it dries.
A pro tip: Pay special attention to non-skid surfaces. These textured areas are magnets for dirt and can become ground zero for a mildew outbreak. Use a medium-bristle brush to lift out all that trapped grime.
Once the boat is spotless and dry, apply one last coat of wax or a spray sealant. This creates a barrier that helps moisture bead off and makes your spring cleanup much easier. A little effort now pays huge dividends later.
A Deep Clean for the Interior
The inside of your boat is where the real battle against mildew is won or lost. Every crumb, sticky spill, and drop of moisture is a potential problem. Your goal is to get the interior as clean and, more importantly, as dry as possible before you cover it for winter.
Here’s your interior game plan:
- Empty Everything Out: First, pull out all personal gear: life jackets, towels, ropes, fenders, and safety equipment. This clears the deck for cleaning and gives you a chance to inspect your gear for damage before storing it somewhere warm and dry.
- Vacuum Thoroughly: Use a shop vac to suck up every grain of sand, dirt, and crumb from every corner, locker, and under-seat storage area.
- Wipe Down Every Surface: Every inch of vinyl, fiberglass, and plastic needs to be wiped clean. Using a dedicated interior cleaner like Boat Juice Interior is perfect for this job. It’s designed to lift away sunscreen oils and daily grime without the harsh chemicals that can make vinyl brittle in the cold.
After cleaning, let the boat air out completely. On a dry, sunny day, open every hatch and compartment to ensure all moisture has evaporated. Remember, trapped moisture is the #1 cause of mildew growth in a stored boat.
If you want to get your interior looking like new, check out our full guide on how to clean your boat's interior.
Applying a Final Protective Shield
Your final cleaning mission is all about protection. Winter temperature swings are hard on your boat's materials, especially vinyl seats. Cold weather makes vinyl stiffen, making it much more likely to crack.
Once your vinyl is clean and completely dry, apply a quality protectant spray. A product like Boat Juice - The Protector conditions the vinyl while creating a barrier that shields it from UV rays and moisture. It’s a quick final step that helps keep the material supple, ensuring your seats are in perfect shape when you pull the cover off next spring.
Protecting Your Engine and Fuel System
With the deep clean done, it's time to tackle what many boat owners see as the most intimidating part of winterizing: the engine and fuel system. This is the heart of your boat, but protecting it is straightforward when you follow a few key steps.
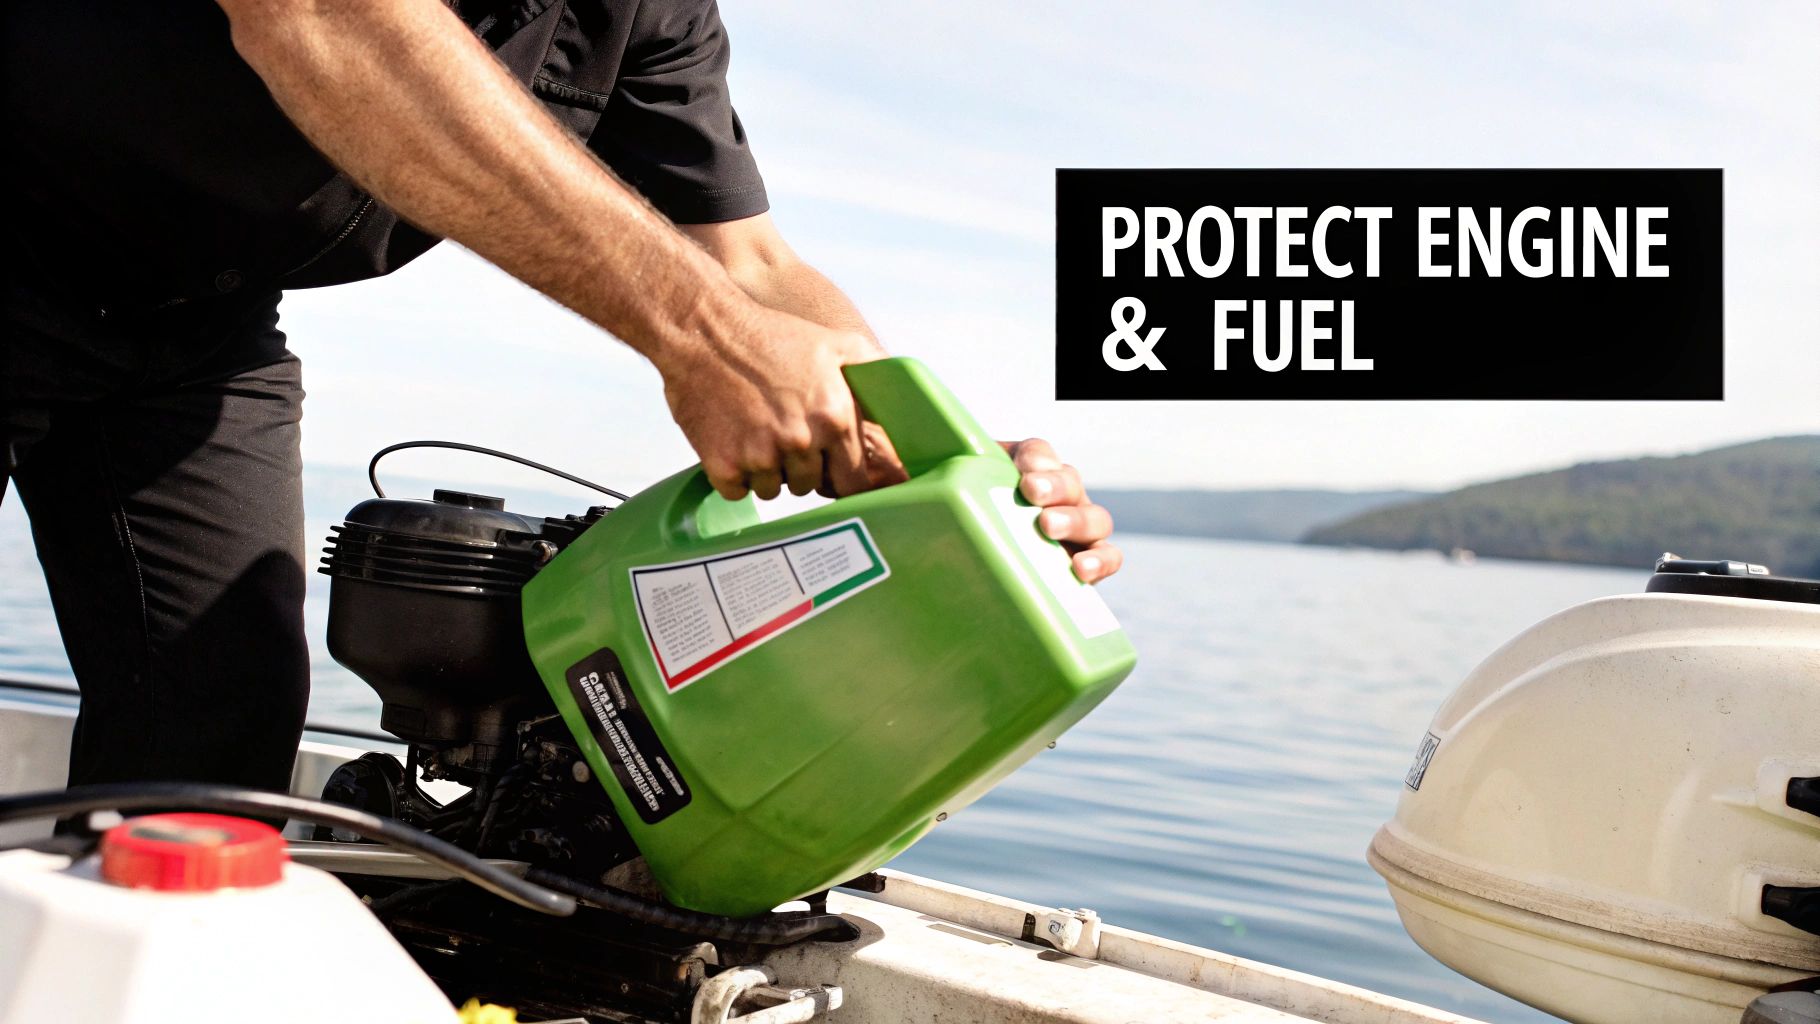
Whether you have an inboard or an outboard, the goals are the same. You need to stop the fuel from degrading, shield internal metal parts from corrosion, and—most importantly—get every drop of water out of the cooling system before it can freeze and crack something expensive.
Stabilize Your Fuel for a Clean Start
Modern gasoline, especially ethanol blends, doesn't store well. Over a long winter, it can degrade and leave behind a gummy varnish that will clog your fuel lines, filters, and injectors. It also attracts water through condensation, which is the last thing you want in your fuel system.
Here’s how to prevent this with a marine fuel stabilizer:
- Top It Off: Before hauling the boat, visit the fuel dock one last time and fill the tank to about 90-95% full. A full tank leaves very little room for air, which dramatically reduces condensation.
- Add Stabilizer: Follow the instructions on your stabilizer bottle and pour the correct amount for your tank size directly into the fuel.
- Mix It In: This step is critical. Start the engine and let it run for 10-15 minutes. This circulates the stabilized fuel through the entire system—the lines, filters, and engine—ensuring every component is protected.
A few minutes of run time now will save you from major headaches and a hefty repair bill in the spring.
Change the Oil and Filter Before Storage
Many new boat owners ask, "Why change the oil before storage? Shouldn't I do it in the spring so it's fresh?" The answer is a definite no, and here's why.
Used engine oil is filled with moisture, acids, and other corrosive byproducts from combustion. Letting that contaminated oil sit in your engine all winter can slowly damage sensitive parts like bearings and rings.
By changing the oil and filter now, you flush out those harmful contaminants. Your engine gets to spend its hibernation bathed in clean, protective oil. Always warm the engine for a few minutes before draining the oil; it will flow out much faster and more completely.
The Most Critical Step: Flushing with Antifreeze
This is the single most important thing you will do to prevent catastrophic freeze damage. You must get all the raw water out of the engine's cooling passages and replace it with non-toxic marine antifreeze.
The exact process varies between inboards and outboards, but the principle is the same. You'll typically use a flushing kit—often called "muffs" or a "fake-a-lake"—that lets you run the engine out of the water.
Crucial Tip: Only use non-toxic, propylene glycol-based marine/RV antifreeze. It’s usually pink. Never use automotive antifreeze (ethylene glycol). It is highly toxic to aquatic life and will harm the environment when you start your boat in the spring.
You'll run the engine while feeding it a 50/50 mix of this pink antifreeze and water from a bucket. Once the engine reaches operating temperature, the thermostat will open, allowing the antifreeze to circulate through the entire engine block. The job is done when you see pink antifreeze coming out of the exhaust ports, giving you visual confirmation that all the plain water is gone.
If you want to dive deeper, our guide on the benefits of a salt-away engine flush covers similar principles for keeping your engine's internals pristine.
Fog the Engine to Prevent Internal Rust
The final step for engine protection is "fogging." Fogging oil is a light, waxy oil that you spray into the engine to coat the cylinder walls, pistons, and rings. This creates a protective barrier against damp winter air that can cause internal rust.
For an older carbureted engine, spray the fogging oil into the carburetor's air intake while the engine is running at a fast idle, right before you shut it down for good. For modern fuel-injected engines, the process can be different, so consult your owner's manual for specific instructions.
While you're at it, don't forget the battery. Power storage principles are similar across different vehicles; knowing how to maintain golf cart batteries can give you some great transferable knowledge for keeping your marine battery healthy through the cold.
Tackling Your Freshwater and Sanitation Systems
Once the engine is protected, your next mission is to winterize the boat's plumbing. Think about every place water can sit—your freshwater tank, the toilet, the shower lines. When temperatures drop below freezing, these areas are like ticking time bombs. A frozen, cracked pipe or water tank is a catastrophic mess to discover in the spring.
The good news is that this is a straightforward job that provides peace of mind all winter long.
Your goal is to find every drop of plain water in the system and replace it with non-toxic antifreeze that won't freeze.
Getting the Freshwater Lines Bone-Dry
First, you have to completely empty the freshwater system. This includes the main tank, the hot water heater, and every line running to your faucets, showerheads, and washdowns.
Start by opening all the faucets—both hot and cold sides—and don't forget the transom shower. Now, turn on your freshwater pump and let it run until it's just sputtering air. Once the lines are clear, find the drain for your main water tank and let it empty completely.
Next is the hot water heater. Most have a drain plug at the bottom. Be careful, as the water inside can still be hot. After it's drained, bypass the heater to avoid wasting 6 to 10 gallons of antifreeze filling it up. Many boats have a bypass kit installed; if not, it’s a simple and worthwhile upgrade.
Pumping the Pink Stuff
With the system drained, it's time for the non-toxic marine/RV antifreeze. It’s that bright pink liquid you see in stores every fall, and it’s an absolute must-have. Remember, never use automotive (ethylene glycol) antifreeze in your drinking water systems, as it is extremely poisonous.
You have two main ways to get the pink antifreeze flowing:
- The Tank Method: Pour a few gallons directly into your empty freshwater tank and let your boat's pump circulate it.
- The Bypass Method: A more efficient approach is to disconnect the hose on the intake side of your water pump. Attach a short piece of spare hose, stick the other end into your jug of antifreeze, and let the pump draw directly from the jug.
With your method chosen, turn the pump back on. Go to the faucet furthest from the pump and open the cold tap. You'll see water, then sputtering, and finally a steady stream of pink. Now do the hot side. Repeat this process at every sink, shower, and sprayer on the boat.
That moment you see solid pink antifreeze pouring from the tap is your visual confirmation that the plain water is gone and your pipes are protected from freezing.
Don't Forget the Head and Holding Tank
Finally, address the marine head (the toilet) and its holding tank. The first step is to get the holding tank pumped out at a marina or pump-out station.
With an empty tank, pour about a quart of the pink antifreeze into the toilet bowl and flush it several times. This circulates antifreeze through the toilet's pump and discharge hoses while sending some into the holding tank to deal with any leftover liquid. This simple step protects the toilet's pump and prevents the tank fittings from cracking in a deep freeze.
Final Steps for a Worry-Free Winter Storage
You've made it through the hardest parts, and you’re on the home stretch. Getting these last few tasks right ensures your boat will be in perfect shape come spring.
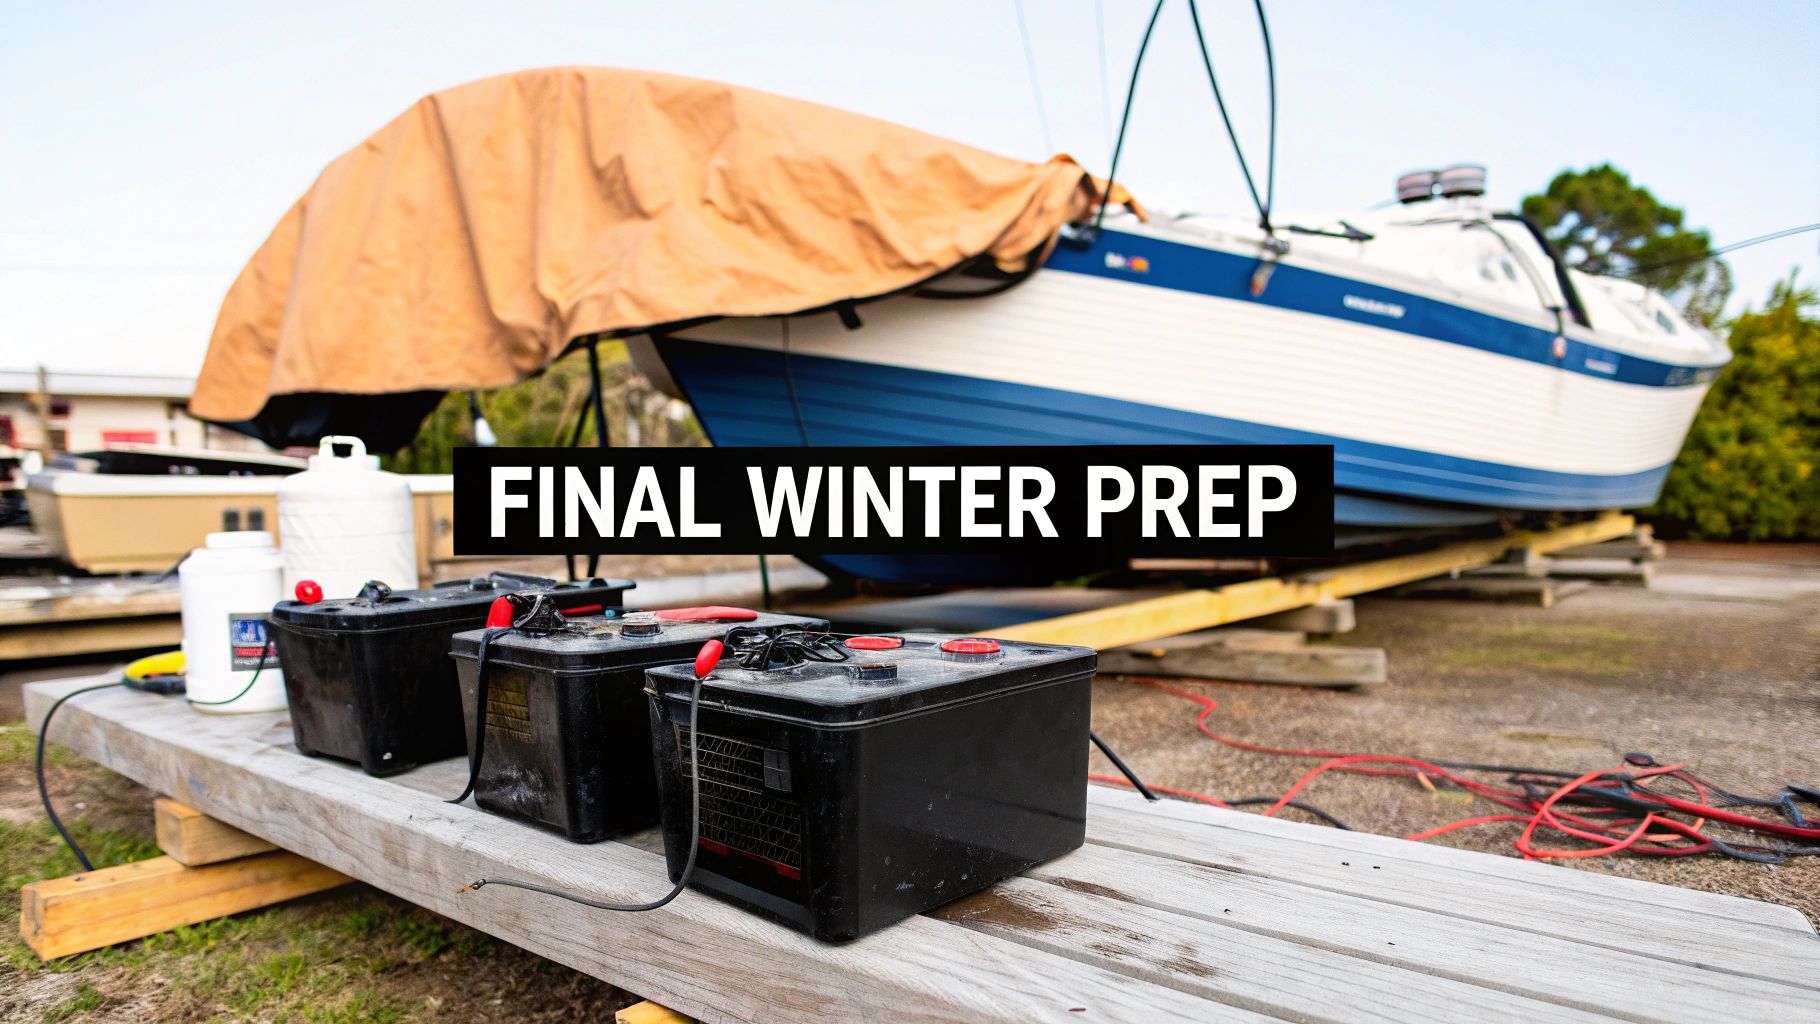
Give Your Batteries Some TLC
Your boat's batteries hate the cold. Leaving them in the boat is a fast way to kill them, as cold weather slowly drains their charge. A dead battery can freeze, crack, and become a useless, leaky paperweight.
The best practice is to remove them from the boat. Once out, use a wire brush to scrub any corrosion off the terminals. Store them in a cool, dry place off the concrete floor, like a shelf in the garage.
For a true set-it-and-forget-it solution, connect them to a smart trickle charger or battery maintainer. These devices keep the battery at an ideal charge all winter without overcharging it, ensuring it’s ready to go in the spring.
Let the Boat Breathe and Drain
Once your boat is on its trailer or blocks, don't forget one of the simplest yet most critical steps: pull the bilge drain plug. This allows any water from rain or melting snow to drain out over the winter instead of pooling in the bilge where it can freeze and cause damage.
This is also the perfect time for a quick trailer inspection. A few minutes now can prevent a major headache on launch day. If you need a refresher, check out our guide on essential boat trailer maintenance tips.
Your boat cover is your primary defense against the elements. A small tear can lead to a big leak. A quick pre-storage inspection and repair is time well spent.
Control Moisture Inside the Boat
Even with the best cover, some moisture can get inside. Over winter, this dampness creates the perfect breeding ground for that musty, mildewy smell. The goal is to keep humidity down.
Here are a few easy tricks:
- Prop things open: Lift all your seat cushions and prop them up. Open interior cabinet and locker doors to promote air circulation.
- Use moisture absorbers: Place a few moisture-absorbing buckets or bags (like DampRid) around the cabin and cockpit to pull humidity out of the air.
- Vent your wrap: If you're shrink-wrapping, ask the installer to add a couple of small vents. This allows the boat to breathe and prevents it from turning into a terrarium.
Prepare Your Boat Cover for Battle
Your boat cover is about to face wind, snow, and ice. Before putting it on, make sure the cover is completely clean and dry to avoid trapping moisture and grime against your boat's finish.
When you install it, pull it as tight as possible so snow and water slide right off. Use a support pole in the center of the boat to create a high point that prevents sagging and pooling. A well-secured cover for proper long term storage is the key to protecting all your hard work until spring.
Your Printable Boat Winterization Checklist
We've covered a lot, from cleaning vinyl to fogging the engine. To make sure you don't miss a step, use this handy checklist. Print it out, keep it on your phone, and check things off as you go.
Printable Boat Winterization Checklist
A step-by-step checklist to track your progress and ensure no critical task is forgotten during the winterization process.
| Task Area | Specific Action Item | Completed (✔) |
|---|---|---|
| Pre-Winter Cleaning & Protection | Remove all gear, lines, fenders, and personal items. | |
| Wash the entire exterior (hull, deck, non-skid). | ||
| Deep clean the interior vinyl, fiberglass, and carpets. | ||
| Apply a vinyl protectant like Boat Juice - The Protector to seats. | ||
| Open all hatches and storage to let the boat air out completely. | ||
| Engine & Fuel System | Top off the fuel tank to 95% full. | |
| Add the correct amount of marine fuel stabilizer. | ||
| Run the engine for 10-15 minutes to circulate treated fuel. | ||
| Change the engine oil and replace the oil filter. | ||
| Drain and replace the lower unit/outdrive gear lube. | ||
| Flush the engine cooling system with non-toxic marine antifreeze. | ||
| Spray fogging oil into the engine's air intake before shutdown. | ||
| Plumbing, Head & Drains | Drain the freshwater tank, hot water heater, and all lines. | |
| Pump non-toxic antifreeze through all faucets and showers. | ||
| Pump out the holding tank completely. | ||
| Flush antifreeze through the toilet and into the holding tank. | ||
| Once on land, remove the main bilge drain plug. | ||
| Battery & Storage Prep | Disconnect and remove all batteries. | |
| Clean battery terminals and charge fully. | ||
| Store batteries in a cool, dry place on a trickle charger. | ||
| Install a clean, dry, and well-supported boat cover. |
Once you’ve checked every box on this list, you can relax. You've earned it! Your boat is now protected and will be ready to hit the water trouble-free next spring.
Got Questions? We’ve Got Answers.
Even with a checklist, questions often come up. Here are answers to some of the most common ones we hear from boat owners.
Can I Just Use Car Antifreeze in My Boat?
No, you should never use automotive antifreeze in your boat's plumbing. For any part of your boat’s freshwater system—the sinks, shower, or head—you must use a non-toxic propylene glycol-based antifreeze, usually the pink stuff labeled for RV and Marine use.
Car antifreeze contains ethylene glycol, which is extremely toxic. For the engine block, you also need a marine-specific antifreeze designed to protect the specific metals in your engine from corrosion.
Do I Really Need to Bother Winterizing in a Milder Climate?
Yes, it's cheap insurance for an expensive asset. Even if a hard freeze seems unlikely, an unexpected cold snap can cause thousands in damages.
A surprising number of freeze-damage insurance claims come from states with milder winters. Boat owners get caught off guard, and a single cold front is all it takes to crack an engine block.
Beyond freeze protection, winterizing also prevents fuel system problems and internal engine corrosion that can occur during any long storage period.
Should I Store the Boat with a Full or Empty Fuel Tank?
You should always store your boat with the fuel tank about 90-95% full. A full tank leaves very little room for air, which means less opportunity for condensation (water) to form inside as temperatures fluctuate.
Don’t forget the most important part of this step: add a quality marine fuel stabilizer to that full tank! After adding it, run the engine for 10-15 minutes to make sure the stabilized fuel circulates through the entire system.
You’ve done the work to get your boat tucked away safely for winter. Your next step? Relax and start dreaming about next season. And when you need to keep your boat looking its best year-round, trust Boat Juice for all your cleaning and protection needs. Our products are made by boaters, for boaters, to make maintenance easy.
Check out our full lineup of boat care products at shopboatjuice.com.