


· By Boat Juice Team
Cleaning Boat Vinyl Seats: A DIY Guide to a Lasting Shine
Cleaning your boat's vinyl seats is about more than just appearances. It's a core maintenance task that, when you do it right, prevents dreaded cracking, fading, and the hefty bill for reupholstery down the road. You can absolutely get professional results yourself.
The secret is a simple, consistent routine. By using a gentle, marine-specific cleaner with a soft-bristle brush, and then following up with a solid UV protectant, you create the best defense against grime, sun, and salt. This guide will walk you through exactly how to do it.
Why Your Boat Seats Need Extra TLC
Think about it: your boat's vinyl seats are ground zero for every trip out on the water. Unlike the seats in your car or the couch in your living room, they are constantly under attack from the elements. Marine-grade vinyl is built tough, but it’s not indestructible. Knowing what you're up against is half the battle.
The combination of intense sun, saltwater spray, and thick humidity creates a perfect storm for damage. Add in sunscreen, spilled drinks, or even a wet towel left behind, and you've got a recipe for stubborn stains that can permanently discolor the vinyl if you let them sit. This isn’t just about looking good; it's about protecting the material itself.
The Real Enemies of Vinyl Seats
All that exposure eventually wears down the vinyl's protective top layer. That's when you start to see older boat seats get brittle, crack at the seams, or develop that ugly, chalky fade. The main culprits you’re fighting are:
- UV Radiation: The sun is vinyl's #1 enemy. It relentlessly breaks down the material, causing it to lose its flexibility and vibrant color.
- Mildew: Any damp, warm spot—especially under a poorly ventilated boat cover—is a perfect breeding ground for those nasty black spots.
- Chemical Stains: Things like sunscreen, bug spray, and even the dye from wet jeans or towels can transfer onto and chemically bond with the vinyl surface.
The real goal isn't just to scrub away dirt. It’s to gently lift away all those contaminants without stripping the vinyl's essential plasticizers—the compounds that keep it soft—and protective coatings. This is the key to keeping it durable for years to come.
Many of the same principles apply to other types of vinyl. In fact, exploring car vinyl seat cleaning techniques can give you some extra perspective. By being proactive with your cleaning, you can avoid those exhausting, deep-scrubbing marathons and keep your seats looking like they just came off the showroom floor.
Getting Your Vinyl Cleaning Kit Together
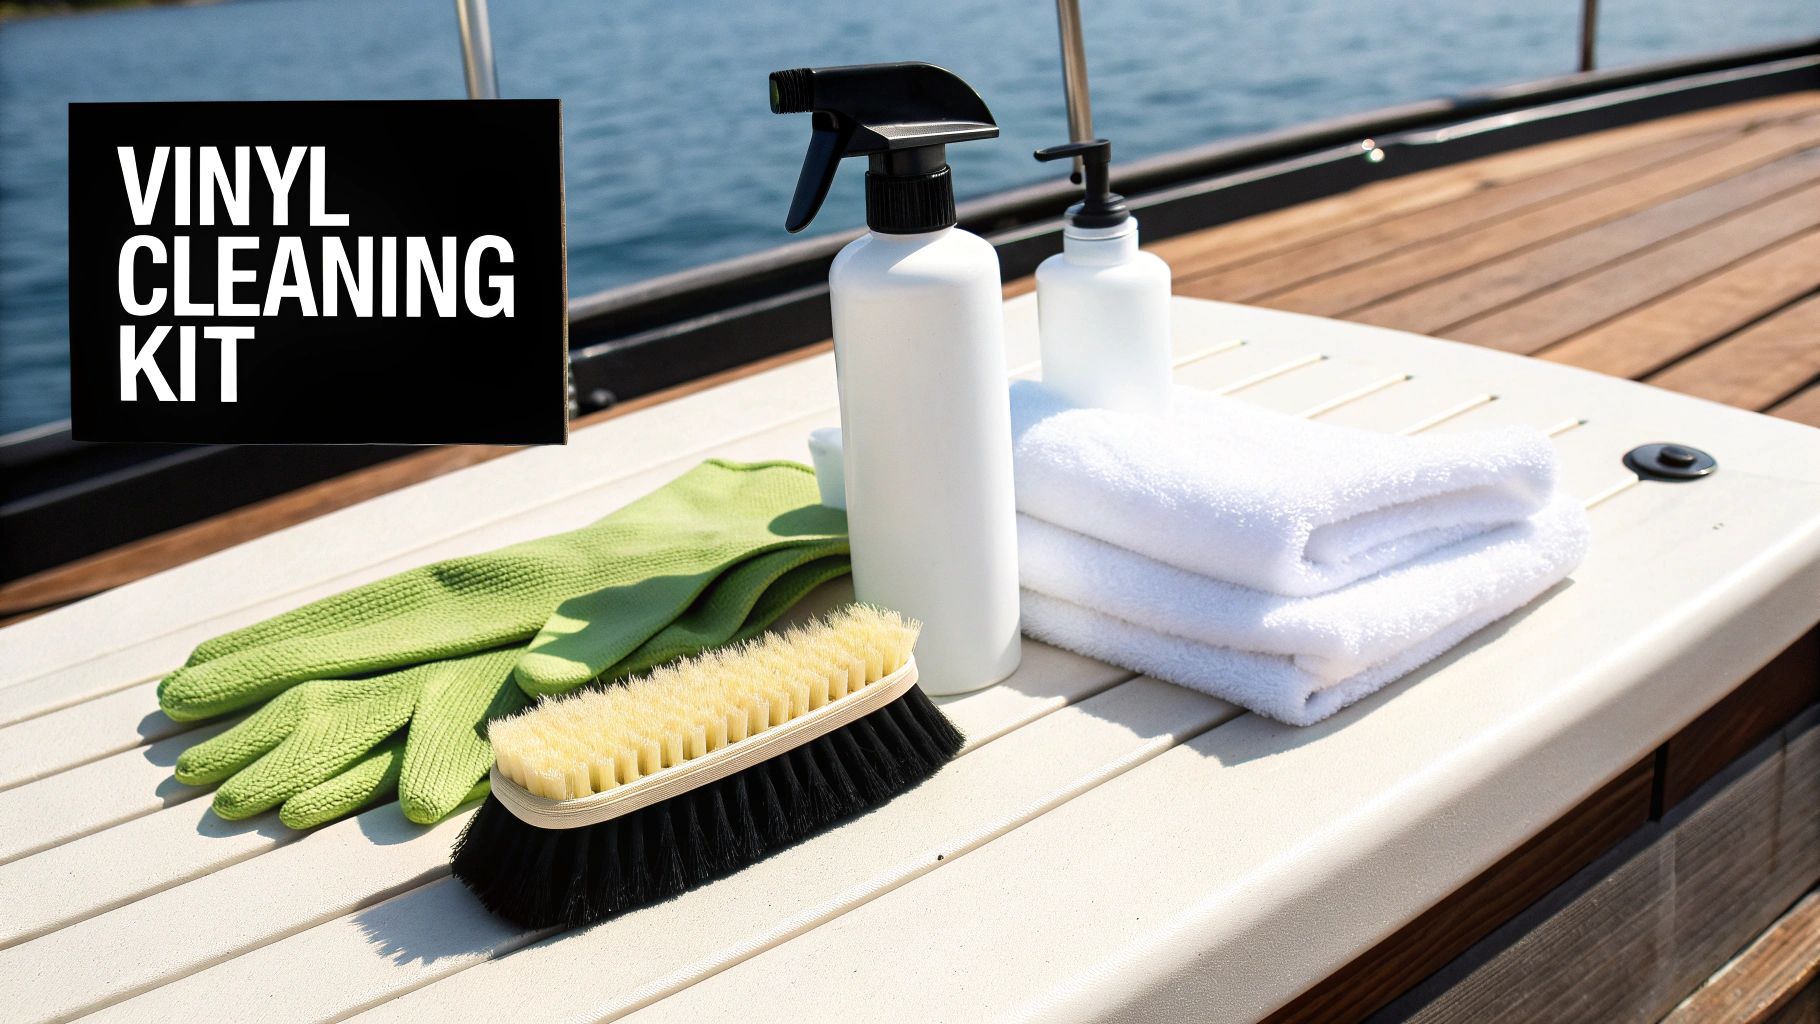
Before you can tackle any job, you need the right tools. Having a dedicated kit ready to go can turn a frustrating chore into a quick, satisfying task. The right gear not only gets the job done faster but, more importantly, protects your seats from accidental damage.
This is one area where you absolutely should not grab your household cleaners. Products with bleach, ammonia, or harsh abrasives will strip the vinyl's protective topcoat, leading to premature cracking and fading. Using marine-specific products is your best bet for getting professional results without causing long-term harm to your upholstery.
Your Essential Vinyl Cleaning Toolkit
Your core cleaning kit doesn’t need to be complicated, but every item has a key role to play. Here's a quick reference for the tools you'll need for every vinyl cleaning job, from routine wipe-downs to serious stain removal.
| Tool/Product | Purpose | Pro Tip |
|---|---|---|
| Soft-Bristle Brush | Gently lifts dirt from the vinyl's texture without scratching. | Get a brush that's comfortable to hold. You'll use it a lot, especially on stubborn sunscreen marks. |
| Microfiber Towels | Cleaning, drying, and polishing without leaving streaks or lint. | Have at least 2-3 clean towels. Dedicate one for cleaning, one for drying, and a third for applying protectant. |
| Boat Juice Interior | Your go-to for daily wipe-downs of dirt, spills, and grime. | Keep a bottle on the boat for quick cleanups after a day on the water. It prevents stains from setting in. |
| Boat Juice Mildew | A targeted cleaner for tough mold and mildew stains. | Always test on a small, hidden spot first to ensure compatibility with your specific vinyl. |
With these basics covered, you're equipped to handle about 90% of the cleaning tasks you'll face.
Choosing the Right Cleaners
Not all messes are created equal, so your arsenal needs a couple of different solutions. This way, you're ready for anything from a post-trip wipe-down to a serious mildew invasion that can happen after a few rainy days.
For everyday upkeep, a pH-balanced, non-abrasive cleaner is perfect. A product like Boat Juice Interior is made to safely remove common grime like dirt, spills, and sunscreen without drying out the vinyl. This is what you'll use most often.
When you're up against tougher challenges like stubborn mold or mildew spots, you need something with more muscle. A targeted product like Boat Juice Mildew Stain Remover is a must-have. It’s designed to break down and eliminate mildew stains at their source without damaging the vinyl itself. For a different but also effective option, something like Gold Class™ Leather Vinyl Cleaner can also work wonders on boat vinyl.
There’s a reason marine vinyl is so popular—it’s built to last in harsh environments. In fact, the global marine vinyl market is projected to hit USD 488.0 million by 2030, largely because of its incredible resistance to UV rays, saltwater, and mildew. Choosing the right products helps you maintain that factory-fresh resilience.
For a complete rundown of what to look for in a quality product, check out our guide on the best boat cleaning products. Once you have these items on hand, you’re ready to get to work.
The 5-Minute Wipe-Down for Lasting Results
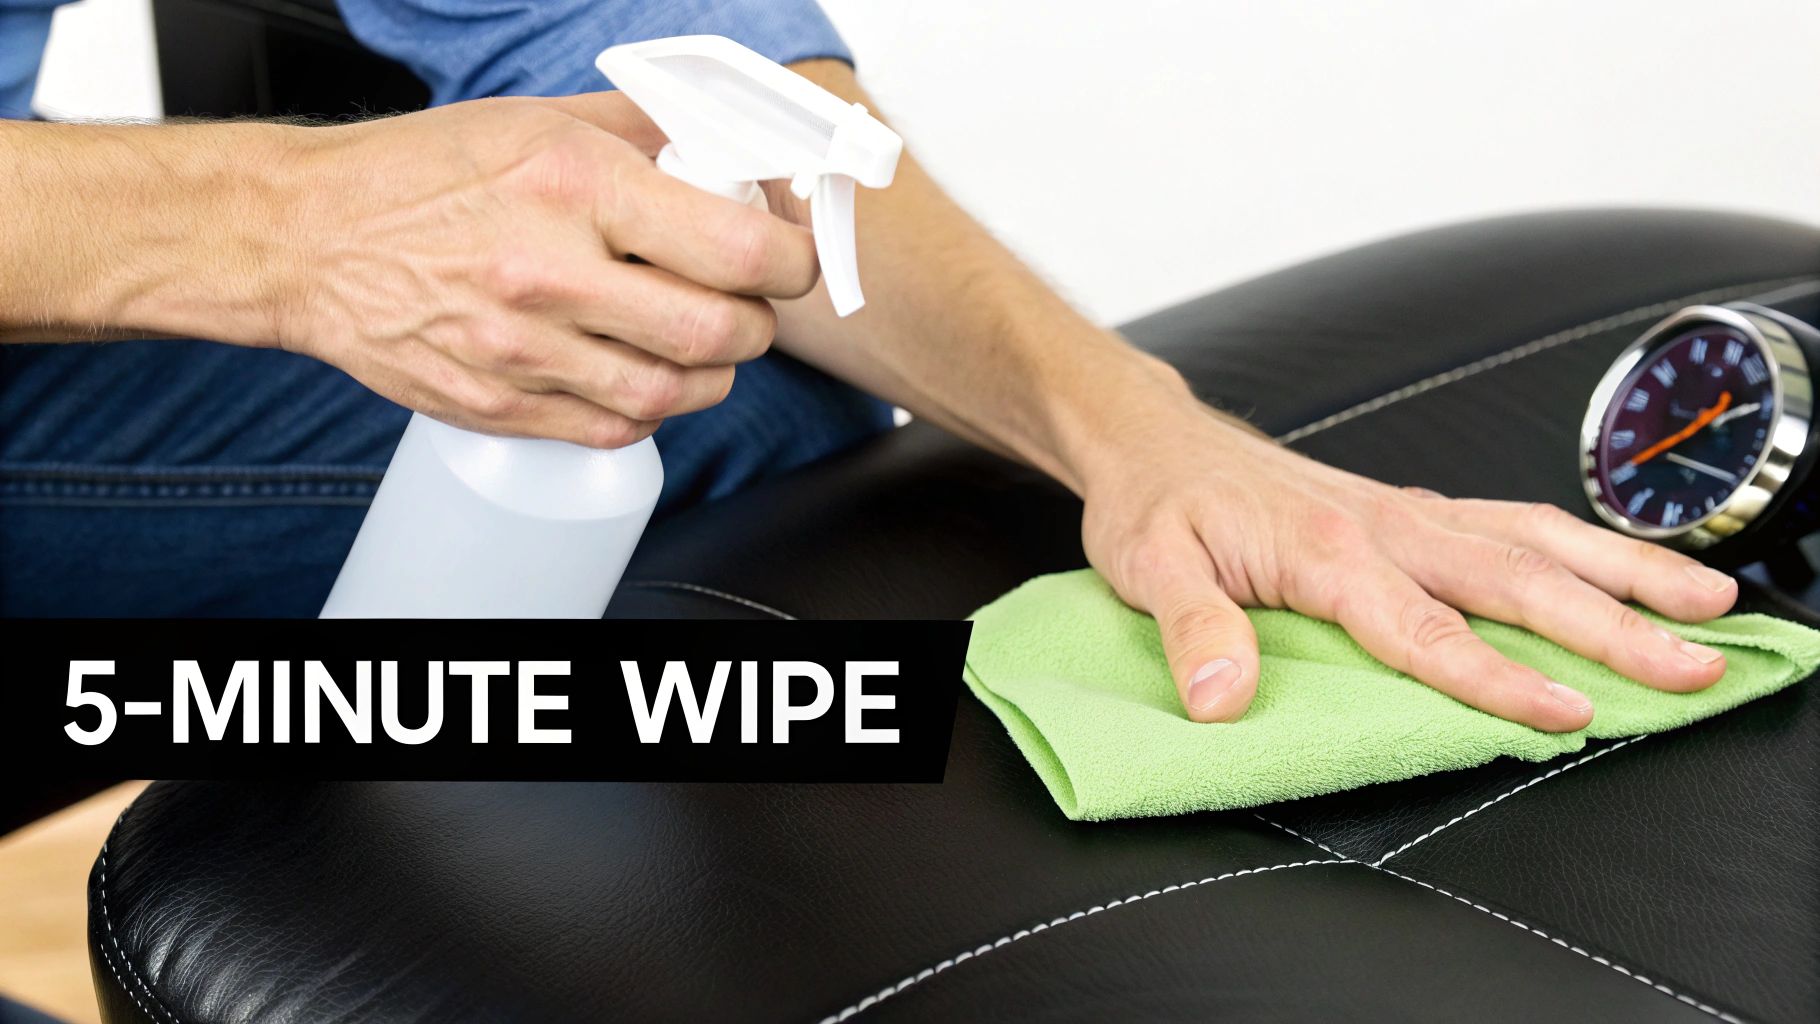
If you think the secret to spotless boat vinyl is a grueling, hours-long scrubbing session once a season, I’ve got good news. The best way to keep your seats looking brand new is actually a quick, consistent routine you can do in less time than it takes to tie up at the dock.
This simple habit separates boats that look good for a year from those that look great for a decade. The whole idea is to stop dirt, sunscreen, and salt from getting a chance to bake into the vinyl. When you let that grime sit under the hot sun, it starts to chemically bond with the material. A quick wipe-down stops this before it begins, making your deep cleans far easier and less frequent.
Your Post-Trip Cleaning Habit
Think of this as your end-of-day ritual. It’s a small time investment that pays off big time in the long run. Seriously, making this a habit is the single best thing you can do to avoid tough, set-in stains on your boat’s vinyl.
Your goal here isn't to deep clean; it's just to hit the reset button. All it takes are two quick steps: removing loose debris and then wiping away surface grime.
Step 1: A Quick Sweep or Vacuum
Before you spray anything, get rid of the loose debris. Grab a handheld vacuum or a soft brush to quickly clear away any sand, crumbs, or stray leaves. This step is more important than it sounds. Wiping down a sandy seat with a cloth is like taking sandpaper to your vinyl—it creates tiny scratches that dull the finish and trap more dirt down the road.
Step 2: The Wipe-Down
Now you're ready for the surface. You don’t need a bucket of soapy water; a light mist of a dedicated cleaner is all it takes.
- Mist Lightly: Grab a bottle of Boat Juice Interior and give the vinyl a light, even mist. You don't need to soak it; a little goes a long way.
- Gently Agitate: With your soft-bristle brush, gently work the cleaner into the vinyl’s texture using small, circular motions. This lifts the grime out of the grain without being harsh.
- Wipe Clean: Immediately follow up with a clean, dry microfiber towel to wipe away the cleaner and the dirt it lifted. Keep flipping your towel to a fresh side so you’re not just spreading grime around.
The real magic here is consistency. A five-minute wipe-down after every trip is 100% more effective than a two-hour deep scrub every two months. You're tackling problems when they're small and easy to manage.
Why This Simple Routine Works So Well
This quick process is a game-changer because it deals with the main enemies of vinyl before they can cause lasting damage. Sunscreen, for example, contains oils and chemicals like avobenzone that react with vinyl and cause permanent yellowing if left to sit. Wiping it away promptly prevents that chemical reaction from ever starting.
It’s the same story with salt residue. It holds moisture against the vinyl, which can accelerate mildew growth and slowly break down the material. By getting these contaminants off right away, you’re preserving the vinyl’s protective topcoat and keeping it looking its best. This simple habit keeps cleaning your boat vinyl seats an easy task, not a dreaded chore.
How to Tackle Tough Stains on Your Vinyl
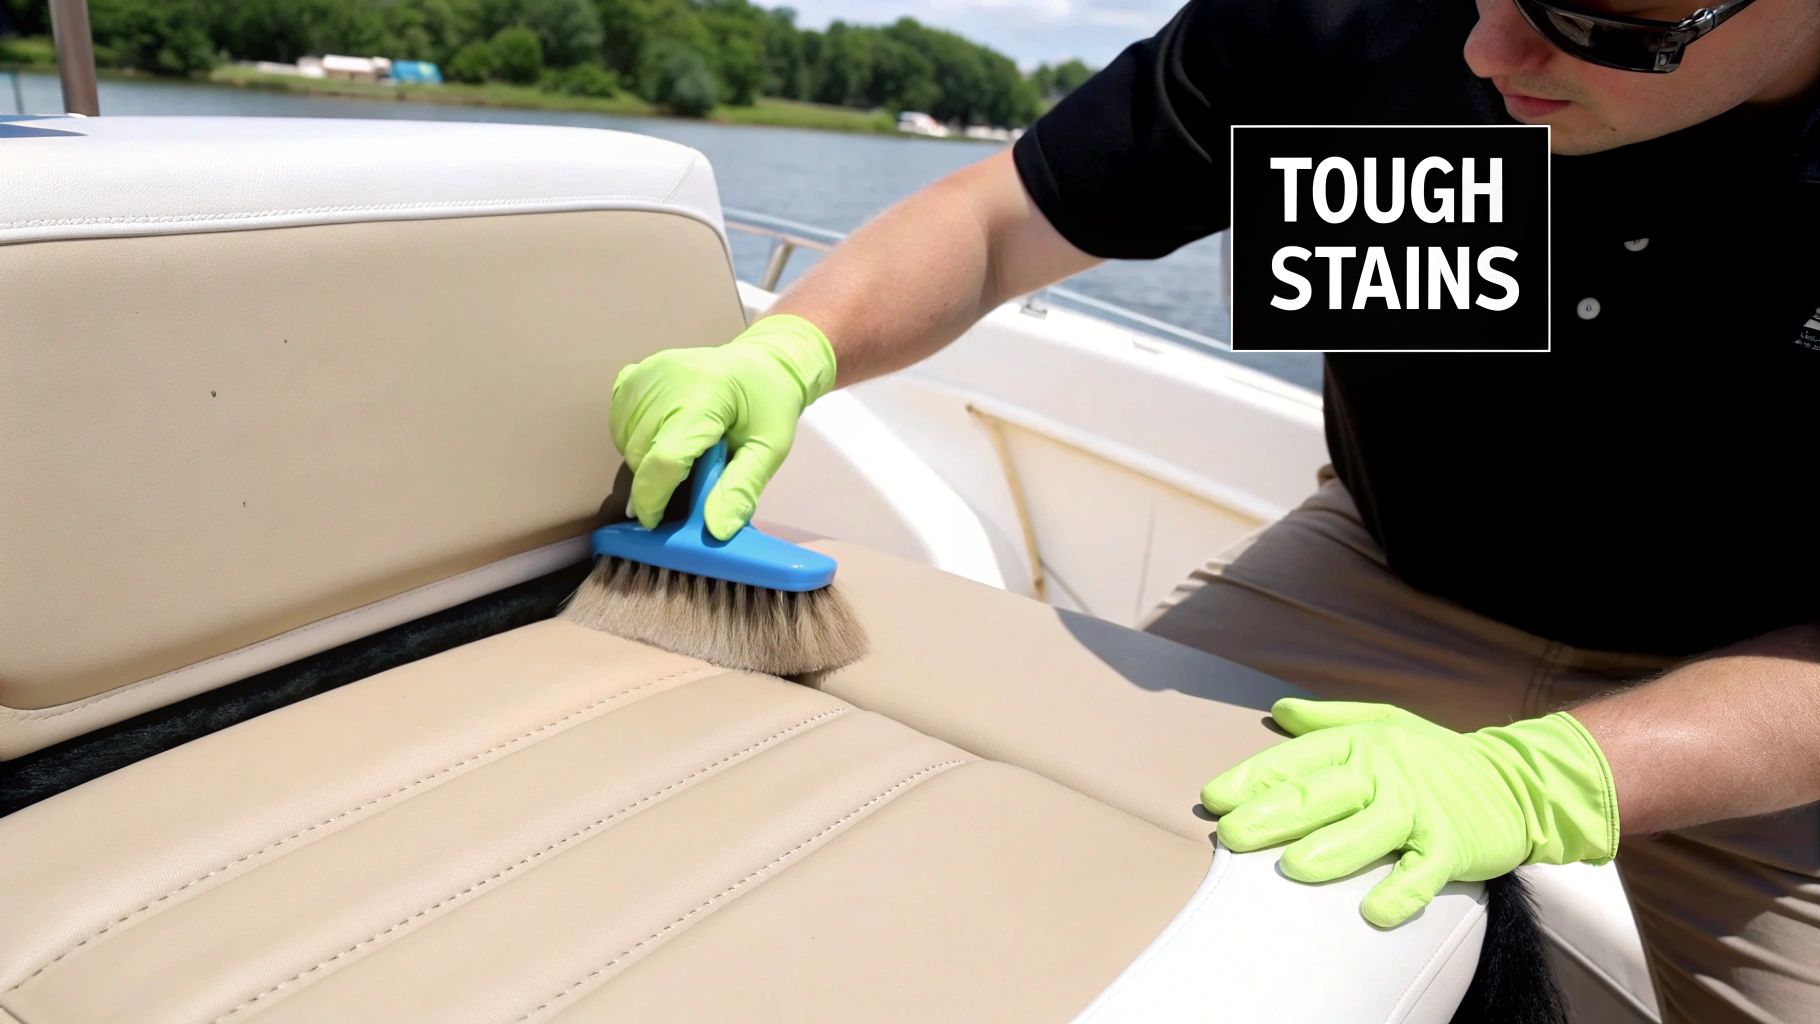
Your five-minute wipe-down is your best friend for daily maintenance, but some stains are in a different league. Whether it's those ugly black specks of mildew that pop up after a rainy week or a mystery smudge from sunscreen, tougher marks demand a real battle plan. This is where you shift from maintenance to restoration.
Don't panic. You can conquer most of these stubborn stains without reaching for harsh chemicals that will wreck your vinyl. The secret is to identify the type of stain, then use the right product and technique. Let's break down the usual suspects and get your vinyl looking brand new again.
Defeating Mildew The Right Way
For boat owners, mildew is public enemy number one. Those little black spots aren't just surface grime; they're a living fungus with roots burrowed deep into the pores of your vinyl. That's why your average interior cleaner just won't cut it—it might wipe away the surface stain, but the mildew will grow right back.
You need something specifically formulated to kill the mildew at its source. This is where a dedicated cleaner like Boat Juice Mildew Stain Remover comes in. It’s designed to penetrate the vinyl and kill the mildew deep down, all without harsh abrasives that can chew up your seat’s protective topcoat.
Here's the game plan:
- Work in the Shade: Always start with cool vinyl, out of direct sunlight. If the seats are hot, the cleaner will evaporate before it can do its job.
- Spray and Wait: Hit the affected areas with the mildew remover. Now, walk away for a minute or two. You have to give the formula time to work its magic and break down the stain.
- Gently Agitate: Grab your soft-bristle brush and gently scrub the area in small circles. You’ll literally see the black spots lifting right out of the vinyl.
- Wipe and Repeat: Use a clean microfiber towel to wipe the area clean. For really stubborn, set-in stains, you might need a second application to get every last trace.
This targeted approach makes all the difference. To learn even more about this common problem, check out our complete guide on how to remove mildew from boat seats.
Getting Rid of Greasy Sunscreen and Oil Stains
Sunscreen stains are sneaky. They often start as a greasy film but can bake in the sun and turn into a stubborn yellow or orange stain. This happens when chemicals in the sunscreen, like avobenzone, react with the vinyl itself. The key here is to break down those oils quickly.
- Spray It On: Apply a cleaner like Boat Juice Interior directly onto the sunscreen smudge. Don't be shy with it.
- Let It Dwell: Give it 30-60 seconds to start breaking down and emulsifying the oils.
- Scrub Gently: Use your soft brush to work the cleaner into the texture of the vinyl, lifting the grease out.
- Wipe It Clean: A fresh microfiber towel will pull the residue right off. Flip to a clean side of the towel for a final pass to make sure you got it all.
This exact method works wonders for other greasy messes, too, like food spills or lotion. The trick is always to act fast before the stain has a chance to set permanently.
Handling Ink, Dye Transfer, and Pen Marks
Nothing makes your heart sink faster than seeing a leaky pen or a wet, dark-colored towel leave a stain on your pristine white vinyl. These dye-based stains are notoriously tough because the pigment soaks right into the vinyl’s porous surface. With these, speed is everything.
Pro Tip: For a fresh ink stain, grab some isopropyl alcohol (rubbing alcohol). Put it on a microfiber cloth and dab the stain gently—whatever you do, don't rub, or you'll spread it. Work from the outside of the stain inward.
After you've treated the spot with alcohol, give the whole area a good cleaning with your regular vinyl cleaner to remove any leftover residue. Be warned: if the stain has been there for a while, it might be permanent. In that case, aggressive scrubbing will only damage the vinyl without removing the color.
Common Boat Vinyl Stains and How to Beat Them
Here’s a quick-glance table for tackling the most common stains you'll find on your boat seats.
| Stain Type | Recommended Solution | Step-by-Step Method | Caution |
|---|---|---|---|
| Mildew | Boat Juice Mildew Stain Remover | Spray, let it sit for 1-2 mins, gently scrub with a soft brush, and wipe clean. | Always test on a small, hidden spot first. Try to avoid spraying directly on stitching. |
| Sunscreen | Boat Juice Interior | Spray, let dwell for 30-60 seconds, agitate with a soft brush, and wipe away with a clean microfiber. | Deal with these quickly. Once the yellowing sets in from sun exposure, it can be permanent. |
| Ink/Pen Marks | Isopropyl Alcohol | Dab gently with a cloth—don't rub! Follow up with a full cleaning using an interior cleaner. | Alcohol can be drying to vinyl, so always follow up with a cleaner and a protectant. |
| Dye Transfer | Boat Juice Interior or Isopropyl Alcohol | Try the cleaner first on fresh stains. For stubborn spots, carefully dab with alcohol. | Never leave dark, wet towels, life vests, or clothing sitting on light-colored seats. |
A quick wipe-down after every trip and a regular coat of a quality UV protectant will make your vinyl far more resistant to stains in the first place. But when you do run into a tough spot, just stay calm, identify the culprit, and use the right game plan to bring your seats back to life.
Protecting Your Vinyl for the Long Haul
Getting your vinyl seats sparkling clean is a great feeling, but the job isn't quite done. The final step—protecting the vinyl—is what keeps your seats looking fantastic for years, not just for the next trip. Think of it like sunscreen for your boat.
The sun's powerful UV rays are constantly beating down on your seats, breaking down the vinyl's structure. This relentless exposure is what causes fading, loss of flexibility, and eventually, those dreaded cracks. A high-quality protectant creates an invisible shield, absorbing or reflecting those harmful rays before they can do any real damage. It’s the best insurance policy you can get for your boat's interior.
Why a UV Protectant is a Must-Have
Marine-grade vinyl has an Achilles' heel. Over time, the sun’s energy drains the plasticizers from the material—these are the compounds that keep it soft and pliable. Once they're gone, the vinyl becomes brittle and starts cracking under the normal stress of people sitting on it.
A good protectant does more than just block UV rays; it also helps lock in that essential moisture, keeping the material supple. It’s a simple, proactive step that prevents irreversible damage and saves you from the massive expense and headache of reupholstery down the line.
Your cleaning routine gets rid of the past, but your protection routine secures the future. It’s the difference between constantly fighting stains and enjoying a boat that’s always ready to go.
Applying Your Vinyl's Best Defense
Don't worry, this isn't a complicated process. Applying a protectant is one of the quickest and most satisfying parts of boat care. When you use a product designed for the marine environment, like Boat Juice Protection, you’re getting more than just a UV blocker.
This type of formula also creates a hydrophobic (water-repelling) surface. That means spills will bead up instead of soaking in, making your next cleanup a breeze. It also helps repel dirt and sunscreen, stopping future stains before they can even set.
Here’s how easy it is to apply:
- Start Fresh: Always apply a protectant to a clean, dry surface. If you put it on over dirt, you're just sealing the grime in.
- Spray Lightly: Give a section of your vinyl seat a light mist of the protectant. You don’t need to soak it.
- Wipe and Spread: Grab a clean microfiber towel or applicator and spread the product in an even layer. Use overlapping passes to work it into the vinyl's texture.
- Let It Cure: Allow the protectant to dry completely. This gives it time to bond with the vinyl, creating a durable, long-lasting barrier.
Doing this simple routine every few weeks during boating season will dramatically extend the life of your seats. The number of boaters taking maintenance seriously is growing, with the global market for boat vinyl cleaners hitting about USD 750 million by 2025. This shows how many people recognize that proper care is key to protecting their investment.
Creating a Long-Term Maintenance Plan
A protectant isn't a "one-and-done" deal—it wears off over time. The key is to make it a regular part of your schedule. Here’s a good rule of thumb for summer maintenance:
- For boats in heavy use: If you're on the water every weekend and your boat is stored in the sun, reapply a protectant every 3-4 weeks.
- For covered or stored boats: If your boat lives under a cover or in a garage, you can stretch that out to every 1-2 months.
Building this habit ensures your vinyl is never left vulnerable. For more tips on choosing the right products, check out our guide on the best marine vinyl cleaner. Now, you have the knowledge to protect your seats for the long haul.
Your Top Questions About Boat Vinyl Care, Answered
Even with the best cleaning routine, you're going to have questions. Let's dig into some of the most common things boat owners ask so you can sidestep costly mistakes and keep your seats looking incredible.
Think of this as the expert advice you'd get down at the marina. Knowing the right answers prevents those "oops" moments that can ruin your upholstery.
Can I Just Use a Magic Eraser on Scuffs?
This one comes up all the time. A magic eraser seems like a miracle worker, but for boat seats, the answer is a hard no. A magic eraser is basically super-fine sandpaper made of micro-abrasive melamine foam. When you scrub with it, you are literally sanding away the protective topcoat on your marine vinyl.
Sure, it might take the scuff off, but it also strips away that essential barrier. Once the topcoat is gone, your vinyl becomes dull, porous, and a magnet for UV damage, dirt, and future stains. It’s a classic short-term fix that leads to permanent, long-term damage.
Stick with soft-bristle brushes and dedicated, non-abrasive cleaners. This is the only way to gently lift dirt from the vinyl's texture without scratching or stripping its protective layer. Your seats will thank you for it.
What Household Cleaners Are a Definite "No-Go" for Vinyl?
It's tempting to grab a bottle from under the kitchen sink, but this is one of the fastest ways to destroy your boat's interior. Most household cleaners are packed with chemicals that are too harsh for marine vinyl.
Here are the top offenders to keep far away from your boat:
- Bleach: This is vinyl’s worst enemy. It chemically attacks the material, making it brittle and prone to cracking, while also fading the color.
- Ammonia: Found in many glass cleaners, ammonia sucks the life out of vinyl by stripping its essential plasticizers, leaving it dried-out and old before its time.
- Harsh Solvents: Products with acetone or mineral spirits will literally melt the vinyl's surface, leaving a sticky, gummy, and permanently damaged mess.
Always use products made specifically for marine interiors. A pH-balanced cleaner like Boat Juice Interior is engineered to clean deeply without any of these destructive side effects.
How Often Should I Be Using a UV Protectant?
This boils down to how much sun your boat sees. Think of it like sunscreen for your seats—the more time you spend in the sun, the more often you need to apply it. Consistency is key.
Here’s a simple schedule to follow:
- For boats kept outside or used heavily: During the season, you'll want to re-apply a protectant like Boat Juice Protection every 3-4 weeks.
- For boats stored indoors or always covered: A fresh coat every 1-2 months is probably all you need to keep it protected.
Regular application doesn't just block the sun's rays. It also leaves behind a non-stick surface that repels dirt and future stains, making your regular wipe-downs much faster.
Is Covering My Boat Seats Really That Important?
Yes, 100%. Even the best UV protectant can't beat a physical barrier. A quality boat cover is your vinyl's single best friend. A good cover does more than block sunlight; it shields your seats from rain, preventing moisture from pooling and giving mildew a place to start. It also protects against bird droppings and dust. Making it a habit to cover your boat after every outing is the easiest and most effective thing you can do to make your vinyl last.
Now that you have the complete plan for cleaning and protecting your vinyl, your next step is to get the right tools for the job. The Boat Juice interior lineup is engineered to tackle everything from routine wipe-downs to stubborn stains. Grab our Interior Kit and make your next cleanup fast, easy, and incredibly effective.