


· By Boat Juice Team
The Best Way to Clean Boat Seats: A DIY Guide for Lasting Results
The absolute best way to clean your boat seats is to use a pH-balanced cleaner made specifically for marine vinyl, a soft-bristle brush, and a few clean microfiber towels. This simple combo is your ticket to getting rid of grime, sunscreen, and mildew without destroying your vinyl's protective topcoat. Skip the harsh household chemicals—they'll only lead to cracking and fading down the road.
Why Proper Boat Seat Care is Your Best Investment
Let’s be honest—your boat seats have probably seen better days. You're dealing with those stubborn sunscreen smudges, a little mildew creeping into the seams, or just the general funk from a fantastic day on the water. Keeping them clean is a must, and it's about more than just looking good. It’s about protecting one of the most expensive and visible parts of your boat.
Good cleaning habits directly prevent the cracking and fading that force so many boat owners to shop for pricey replacements. When you neglect your vinyl, you're not just letting dirt pile up. You’re inviting the sun’s harsh UV rays and constant moisture to break down the material, making it brittle, weak, and ultimately, ruined.
More Than Just a Chore
Think of cleaning your boat seats less like a chore and more like smart, preventative maintenance. A little consistency goes a long way. A regular cleaning routine does more than just impress your guests; it fundamentally extends the lifespan of your upholstery. You’re not just wiping away a bit of dirt—you’re preserving the material's flexibility, color, and finish for years to come.
There's a reason the market for specialized boat care products is booming. The global boat cleaner market hit a massive USD 4.8 billion in 2024 and is on track to nearly double by 2033. This isn't just hype. A 2023 survey of 1,200 U.S. boat owners found that 72% reported that using marine-specific formulas extended their seat life by 2-3 years, successfully preventing the cracking that plagues 40% of untreated vinyl. You can read more findings on the boat cleaner market to see just how much this space has grown.
The Right Approach for Lasting Results
This guide gives you a proven process, built for boat owners like you. I'll walk you through the best way to clean boat seats, focusing on the durable marine vinyl most of us have, without causing any accidental damage.
Here’s what you're going to learn:
- Actionable Techniques: Simple, clear steps that actually work.
- The "Why" Explained: You'll understand why these methods are effective, so you can clean with confidence.
- Product Clarity: No more confusion at the store. I'll help you pick cleaners that are both safe and powerful.
By using the right tools and techniques, you can keep your seats looking incredible season after season. Let's get your boat ready to hit the water.
Getting Your Boat Seat Cleaning Kit Ready
Before you start scrubbing, let’s talk about your gear. Having the right tools makes all the difference—it's what separates a quick, satisfying clean from a frustrating afternoon that does more harm than good. I've seen it happen: someone grabs a brush that's too stiff and leaves permanent scratches on their beautiful vinyl, or uses a harsh cleaner that strips off its protective coating, basically rolling out the welcome mat for UV damage.
Putting together the perfect boat seat cleaning kit is simple. You don't need a whole arsenal, just a few key items that will save you a ton of headaches. It's all about working smarter, not harder.
Your Must-Have Gear
Your core toolkit should be lean and effective. These are your non-negotiables for keeping your seats looking brand new, season after season. Everything here has a specific job, designed to clean deeply without causing any damage.
Here's what you absolutely need in your dock box:
- Soft-Bristle Brushes: Grab a couple of different sizes. A larger brush is great for big, flat surfaces, while a small detail brush is a lifesaver for getting into tight seams where mold and mildew love to start. Why soft bristles? They're stiff enough to lift dirt but won't scratch the delicate topcoat of your vinyl.
- Clean Microfiber Towels: Seriously, stock up on these. Microfiber is the gold standard for a reason—its tiny fibers trap dirt and lift moisture away from the surface. An old cotton t-shirt just pushes the grime around, but microfiber actually removes it.
- Two Buckets: This is a pro tip that makes a huge difference. Dedicate one bucket to your cleaning solution and keep the second one filled with clean water for rinsing your brush. This stops you from wiping dirty water right back onto the seats you just cleaned, leaving a truly spotless finish.
Picking the Right Cleaner
The star of your toolkit is the cleaner. It’s easy to get lost in the sea of options, but the key is finding a pH-balanced product made specifically for marine interiors. This guarantees it’s strong enough to cut through caked-on sunscreen but gentle enough that it won't damage your vinyl or stitching.
A high-quality, dedicated interior cleaner is one of the best investments you can make for your boat. For example, a cleaner like Boat Juice Interior is designed to be safe and effective on just about every surface inside your boat—vinyl, carpet, and even glass. If you want to learn more about what makes a cleaner both safe and effective, check out our guide on finding the best marine vinyl cleaner.
Expert Tip: Resist the urge to grab a generic all-purpose household cleaner or anything with bleach. These products are too aggressive for marine vinyl. They break down the material's essential plasticizers—the compounds that keep it flexible—leaving it brittle, faded, and prone to cracking.
How to Deep Clean Your Vinyl Boat Seats: A Step-by-Step Guide
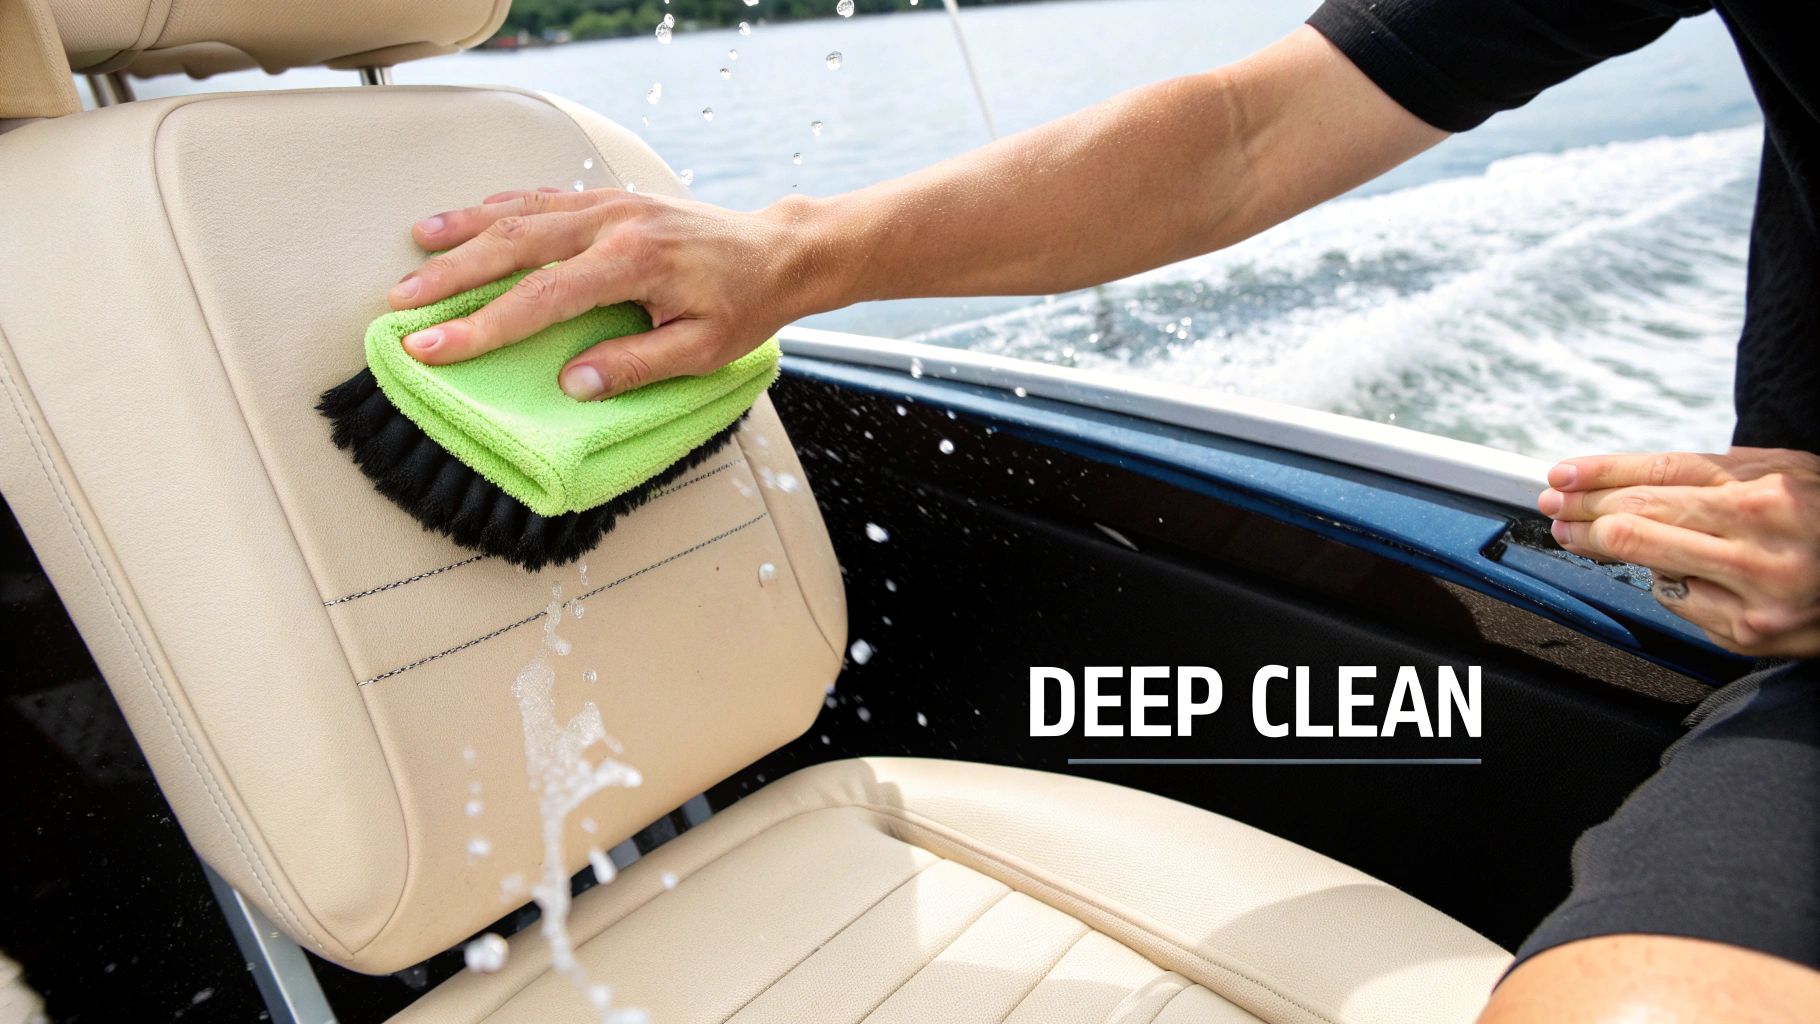
Your vinyl boat seats take a beating from scorching sun, salt spray, spilled drinks, and muddy feet. Sooner or later, a simple wipe-down just won't cut it. When that day comes, it's time for a proper deep clean to restore their original color and feel.
This is your battle plan for a serious refresh. Think of it as the perfect project for spring prep or that mid-season moment when the grime has gotten out of hand. A good deep clean isn't just about appearances; it’s about getting rid of the embedded gunk that can break down the vinyl over time.
Step 1: Start with a Clean Slate
Before you grab a cleaner, give the seats a quick pre-rinse with a hose. A gentle spray is all you need to wash away loose sand, food crumbs, and surface dust. This simple step keeps you from grinding abrasive particles into the vinyl when you start scrubbing.
Once the surface is clear, grab your dedicated marine vinyl cleaner. Spray it generously over a manageable section, like a single cushion. Why work in sections? Direct sun can make your cleaner evaporate too fast, leaving behind a sticky, streaky mess that attracts more dirt.
Let the cleaner sit for a minute or two. This "dwell time" is crucial. The cleaner is actively breaking down and lifting stubborn oils, sunscreen residue, and dirt from deep inside the vinyl's grain. If you jump the gun, you'll end up doing twice the work.
Step 2: The Art of Gentle Agitation
Now it's time for a little elbow grease, but the key word is gentle. With a soft-bristled brush, start scrubbing the section in small, overlapping circles. This technique works far better than just scrubbing back and forth because it hits the grime from multiple angles, coaxing it out of the vinyl's texture.
Pay close attention to the high-traffic spots and the seams, which are notorious hiding places for dirt and mildew. The goal here is to agitate the grime, not to punish the vinyl. A soft brush is stiff enough to work the cleaner in without scratching the material’s protective topcoat. After you've scrubbed a section, rinse it completely with clean, fresh water to wash away all the cleaner and the dirt it pulled up.
Step 3: The Final Touch for a Perfect Finish
You're on the home stretch. The last step is to dry the seats completely with clean, dry microfiber towels. It’s tempting to let them air dry, but this is the #1 cause of those annoying water spots—the mineral deposits left behind when water evaporates.
A thorough towel-dry accomplishes two crucial things:
- It prevents water spots, removing the mineral-heavy water before it can leave chalky marks on your freshly cleaned vinyl.
- It preps for protection, leaving the surface perfectly clean and dry, which is the ideal canvas for a UV protectant spray.
This deep cleaning process is the bedrock for keeping your boat seats looking great. For anyone wanting to get deeper into choosing the right products, our guide on what to look for in a boat upholstery cleaner is a great resource.
How to Conquer Tough Stains Like Mildew and Sunscreen
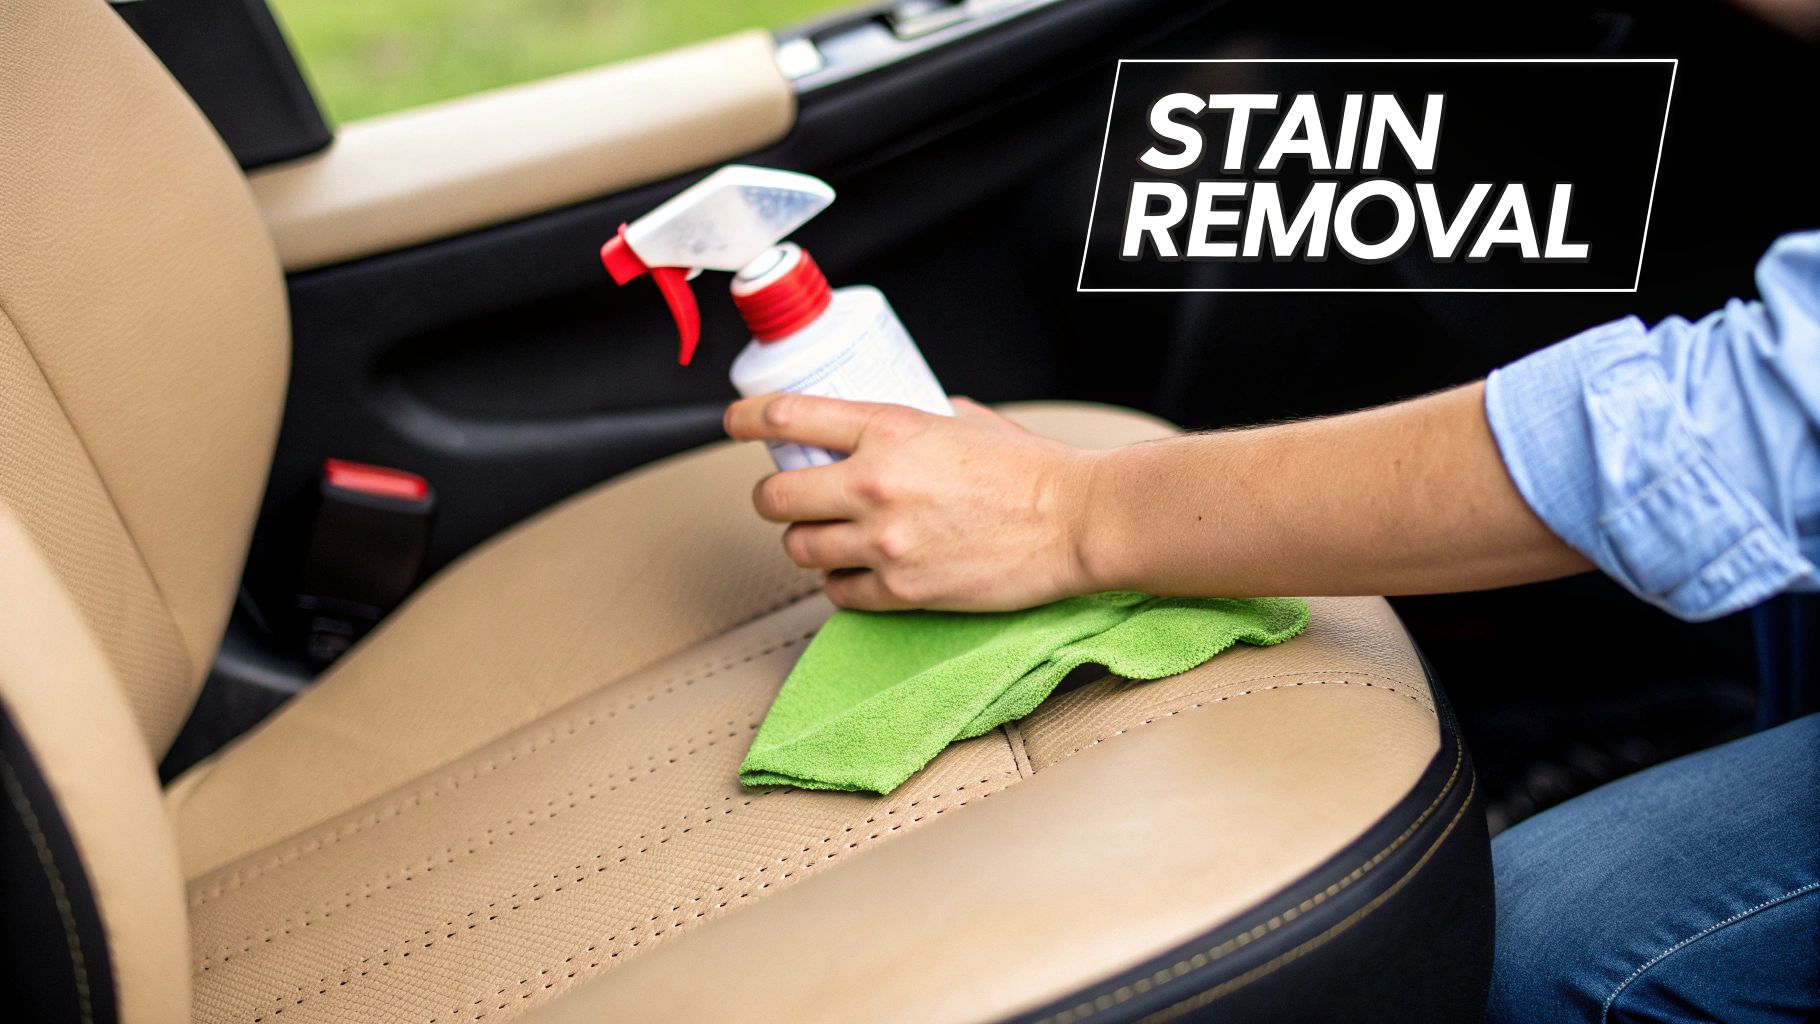
Let's be real—stains are just part of boating life. From ugly black mildew spots to greasy sunscreen smears, you need a game plan to tackle them without wrecking your seats. Think of stain removal as pulling individual weeds. It demands a focused attack. The secret is to act fast and use the right tool for the job.
Battling Mildew The Right Way
Mildew is the number one enemy of boat upholstery. Your first thought might be to grab household bleach, but that’s one of the worst mistakes you can make. Why? Bleach is incredibly destructive to marine vinyl and its stitching. It leaches the plasticizers out of the vinyl, leaving it brittle, and it rots the tough threads holding your seams together, leading to expensive repairs.
A much smarter route is to use a dedicated, bleach-free mildew stain remover. Products like Boat Juice Mildew Stain Remover are engineered to attack mildew spores at the source without harming the vinyl or stitching. You're not just wiping away a stain; you're killing the organism that's causing it.
Here’s the simple process:
- Spray the remover right on the mildewed areas.
- Let it sit for a few moments to break down the stains.
- Gently agitate with a soft detail brush to work it into the vinyl's texture.
- Wipe everything clean with a fresh microfiber towel.
For a deeper dive into this common headache, check out our complete guide on how to remove mildew from boat seats and keep it from coming back.
Handling Sunscreen and Oily Stains
Sunscreen is a nightmare for boat seats. The oils and chemicals can soak into vinyl, leaving behind stubborn, greasy stains that a simple wipe-down won't touch. Your pH-balanced interior cleaner is the perfect starting point. Spray it on, let it dwell for a minute to penetrate the grease, and then agitate with a soft brush before wiping it clean. For really tough stains, you might need to repeat the process.
Erasing Chalky Water Spots
If you boat in an area with hard water, you know all about those chalky white spots that appear after your seats air dry. Those are mineral deposits that can etch into your vinyl over time. You need something that can chemically dissolve them without harsh abrasives.
A specialized water spot remover is your best friend here. A product like Boat Juice Extreme Water Spot Remover is designed to break down these mineral bonds on contact. Just spray it on, and a quick wipe with a microfiber towel is usually all it takes to make them vanish. Tackling each of these stains with the right strategy will keep your seats looking their best.
How to Protect Your Clean Seats for the Long Haul
Getting your boat seats looking new is a great feeling, but the job's only half done. If you stop there, the sun’s brutal UV rays and salt spray will start breaking down your vinyl, leaving it faded and brittle. This is where the most important step for long-term care comes in: sealing the deal with a quality protectant.
Think of it like sunscreen for your boat's interior. A good marine protectant creates an invisible shield that deflects UV radiation and makes water bead up and roll right off. This means less moisture soaking in and less opportunity for mildew to get a foothold. It also makes your next cleanup easier, as spills and grime will sit on top of the protective layer instead of sinking into the vinyl's pores.
Applying a Protectant the Right Way
Applying a protectant isn’t difficult, but technique matters. The goal is an even, non-greasy, satin finish—not a slippery, shiny mess. Before you start, make sure the seats are completely clean and bone dry.
Here’s the simple method for a perfect application:
- Spray and Spread: Lightly mist the protectant onto a clean microfiber applicator pad first. This gives you more control and prevents overspray from getting on your deck or hardware.
- Work it In: Gently wipe the product across the surface using overlapping motions to get full, even coverage.
- Buff to a Finish: Grab a separate, clean, dry microfiber towel and immediately buff the area. This is the secret. Buffing removes any excess product and is the key to getting that non-slip, non-greasy feel and a deep, conditioned look.
Your Seasonal Boat Seat Maintenance Schedule
So, how often do you need to do this? It all comes down to how you use and store your boat. Sticking to a simple schedule will keep you on track. A product like Boat Juice Protection is perfect for this because it goes on fast and restores that factory-fresh look in minutes.
Here’s a simple cheat sheet to help you map out your year.
| Time of Year | Key Cleaning Task | Frequency | Recommended Product Focus |
|---|---|---|---|
| Spring (Pre-Season) | Deep clean to remove winter grime; apply the first protective coat. | Once at the start of the season. | Boat Juice The Interior & Protection |
| Summer (Peak Season) | Wipe down after each use; re-apply protectant regularly. | Every 3-6 weeks, depending on use. | Boat Juice Protection |
| Fall (End of Season) | Thorough cleaning to remove summer buildup (sunscreen, salt). | Once before storage. | Boat Juice The Interior |
| Winter (Storage Prep) | Apply a final, robust coat of protectant before covering. | Once for winterization. | Boat Juice Protection |
When you combine a solid cleaning routine with consistent protection, you're doing more than just maintenance—you're preserving the value of your boat and making sure it’s always ready for the next adventure.
Frequently Asked Questions About Boat Seat Cleaning
Even with the best instructions, you're bound to have questions. Let's clear up a few of the most common ones I get from other boaters. My goal is to give you straightforward answers so you can clean with confidence.
Can I use a Magic Eraser on my boat seats?
I see this all the time, and the answer is a hard no. I understand the appeal; they work wonders on scuffs around the house. But a Magic Eraser is basically a block of super-fine sandpaper. When you scrub your seats with it, you’re not just lifting the stain—you're physically scraping away the vinyl's protective top layer.
This opens it up to UV damage, cracking, and makes it more susceptible to future stains. It's a classic short-term fix that causes long-term, irreversible damage. Always stick with a soft brush or a microfiber towel.
How often should I deep clean my seats?
This really comes down to how much you use your boat. A quick wipe-down after every outing is a game-changer, but a true deep clean requires a more thoughtful schedule.
Here’s a simple guide:
- Casual Boater (out a few times a month): A solid deep clean at the start and end of the season should do the trick.
- Weekend Warrior (out every weekend): You'll want to do a deep clean about once a month during the boating season to stay ahead of the grime.
- Harsh Environments (saltwater or high humidity): A monthly deep clean is non-negotiable. Salt crystals and constant moisture are tough on upholstery.
Is it okay to use household cleaners in a pinch?
I know it's tempting to just grab whatever you have under the kitchen sink, but please don't. All-purpose cleaners, dish soap, and especially anything with bleach or ammonia are absolute boat-killers. Those products are designed for hard surfaces like countertops, not for delicate marine upholstery. Their harsh chemicals strip away the plasticizers that keep your vinyl soft and flexible.
Using them, even just once, starts a process that leads to:
- Brittleness and Cracking: Your seats will get stiff and start to split.
- Discoloration: You'll see weird fading or yellowing that you can't get rid of.
- Stitching Failure: The chemicals, especially bleach, will eat away at the threads holding your seats together.
Your best bet is to always use a product made specifically for marine interiors. It’s a small investment that protects a much bigger one.
Ready to build a simple cleaning routine that actually works? At Boat Juice, we’ve put together a lineup of products that are safe for your boat but tough on grime, making it easy for you to get professional results.
Shop the complete Boat Juice cleaning system today and see the difference for yourself.