


· By Boat Juice Team
Your DIY Guide to Aluminum Sealer for Boats
Think of an aluminum sealer for boats as a clear coat of armor for your hull and pontoons. It’s a special liquid you apply that hardens into a tough, transparent barrier over the metal. This shield effectively shuts the door on nasty stuff like oxidation, corrosion, and water spots caused by the sun, salt, and general moisture. The whole point is to keep your aluminum looking sharp while protecting its strength for the long haul.
Why Your Aluminum Boat Needs a Shield
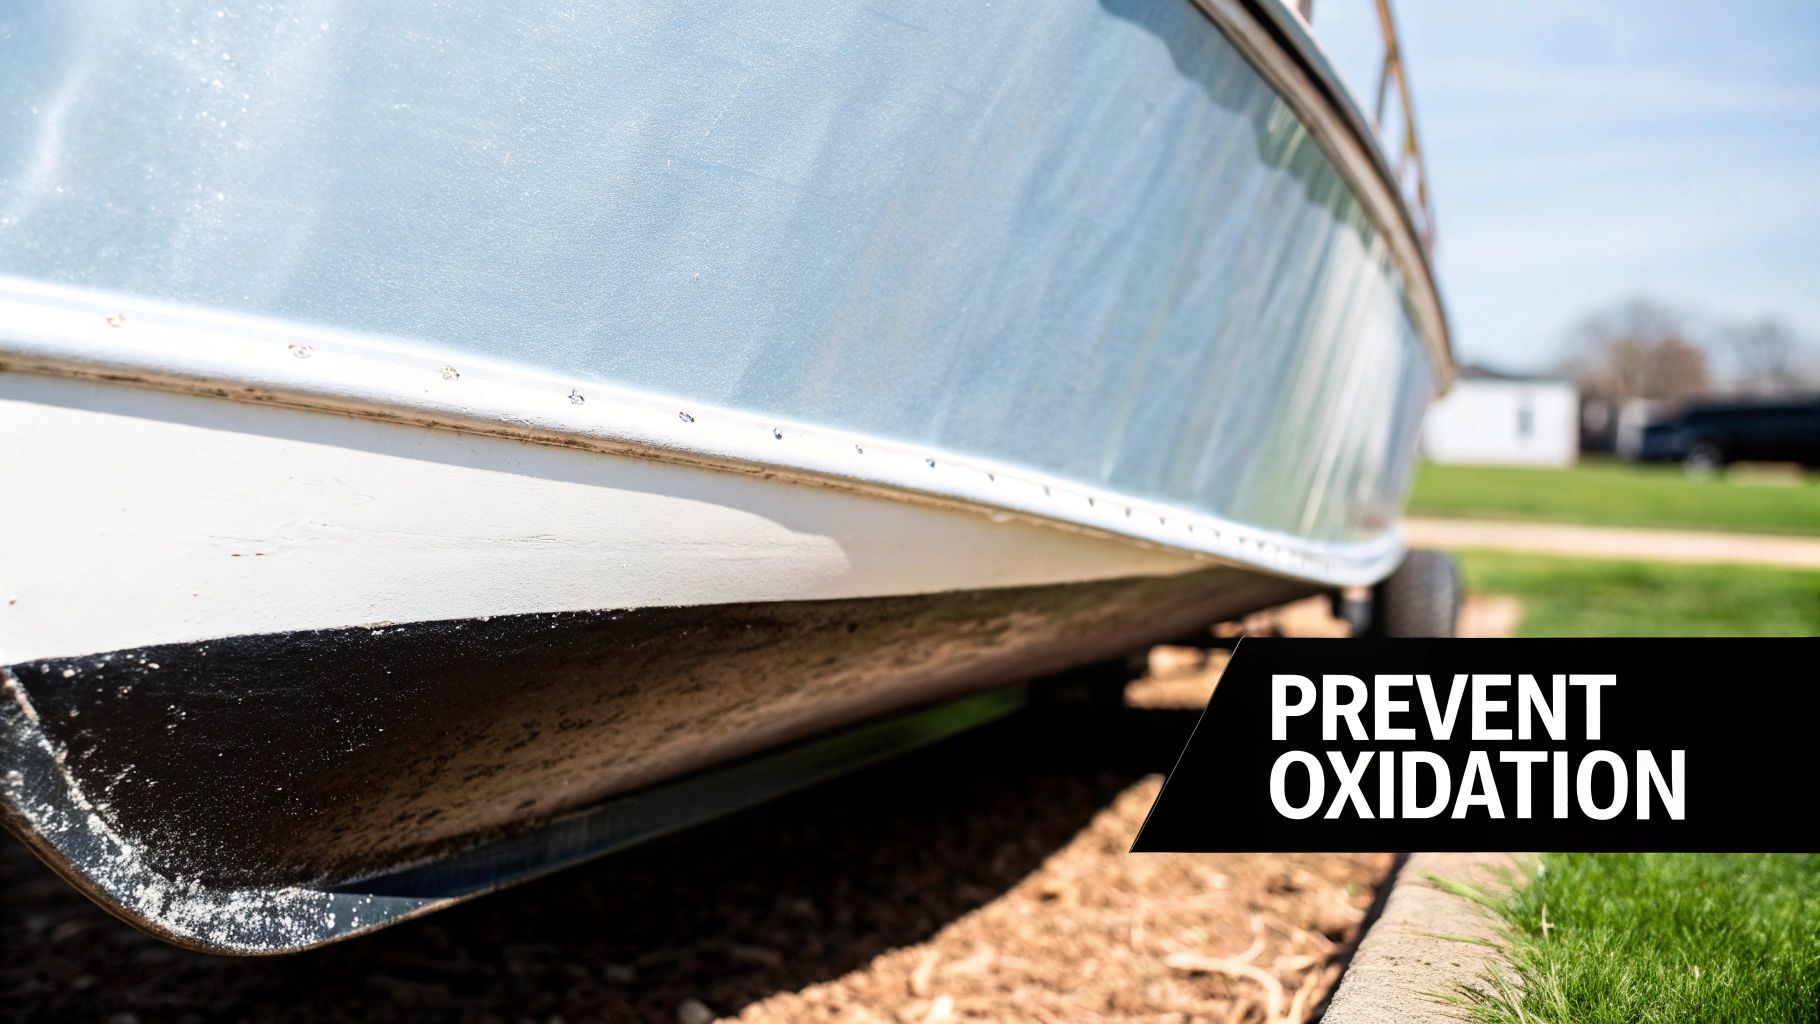
If you've ever seen a once-gleaming aluminum pontoon turn dull and chalky, that's oxidation at work. It's a natural chemical reaction when aluminum meets air and water. While that initial dull layer offers a tiny bit of protection, it's really the first step toward bigger, more expensive problems down the road if you ignore it.
Your boat's hull is under constant assault. Every wave of saltwater, every bit of road gunk kicked up on the trailer, and even the morning dew are all working against the metal. Left unchecked, this constant exposure can lead to pitting—tiny little holes that slowly eat away at the aluminum, weakening it from the inside out.
The Invisible Enemy: Oxidation and Pitting
A good aluminum sealer is your best defense, creating an invisible shield against these corrosive forces. By sealing the pores of the metal, it stops the breakdown process before it even gets a foothold. This isn't just about keeping your boat shiny; it's about protecting its long-term health and your investment.
Why does this matter so much? Aluminum boats are incredibly popular because they're durable and lightweight. However, untreated aluminum can start showing serious pitting in as little as two to three years of regular use in harsh water. This can lead to costly and frustrating repairs down the line.
Applying a quality sealer can add five to seven years to your hull's life and prevent up to 90% of certain types of corrosion. It's a simple project that pays off big time.
More Than Just a Pretty Finish
The payoff for sealing your boat goes way beyond looks. Here’s what you’re really getting for your effort:
- Structural Integrity: By stopping pitting and corrosion in their tracks, you're preserving the original strength of your hull and pontoons. This keeps your boat safe and seaworthy for years to come.
- Easier Maintenance: Sealed aluminum is smooth and non-porous. That means algae, scum lines, and general grime have a much harder time sticking. Your regular cleanups become way faster and less of a chore. If you need some pointers, check out our guide on how to clean a pontoon boat.
- Higher Resale Value: Let's be honest, a boat with a clean, well-kept hull free of chalky oxidation and pitting will always fetch a better price. It instantly tells a potential buyer that you’ve taken great care of it.
Your Actionable Takeaway: Sealing your aluminum boat isn't a cosmetic luxury. It's one of the smartest preventative maintenance tasks you can do to protect your investment, sidestep costly future repairs, and make your life easier.
Next up, we'll get into the nitty-gritty of choosing the right sealer for your boat and walk you through the entire process, from prep to the final coat.
Choosing the Right Sealer for Your Boat
Walking into a marine supply store can feel overwhelming. You’re hit with a wall of tubes, cans, and bottles, all claiming to be the best thing for your aluminum boat. The truth is, the “best” sealer depends entirely on your boat, how you use it, and how much time you want to spend on maintenance.
Think of it like picking tires for your truck. A knobby off-road tire is a champ in the mud but will be loud and inefficient on the highway. In the same way, slathering a thick epoxy sealant meant for a leaky old jon boat onto a newer pontoon that just needs UV protection is complete overkill. You're using the wrong tool for the job.
Let’s cut through the noise and figure out what you actually need.
Polymer Sealants vs. Ceramic Coatings: What’s the Difference?
When you boil it all down, you’re usually looking at two main families of protective coatings: classic polymer sealants and newer ceramic-infused coatings. They both protect your boat, but they work in different ways and solve different problems.
- Polymer Sealants: These are the tried-and-true workhorses. Think of products based on silicone or polyurethane. They’re flexible, tough, and fantastic for sealing up leaky seams and rivets because they cure into a durable, almost rubbery barrier that can move and flex with your boat.
- Ceramic Coatings: This is the high-tech stuff that’s become incredibly popular. These are liquid polymers that cure into an intensely hard, glass-like shell over your aluminum. The big win here is the slick, hydrophobic surface it creates—meaning water, grime, and algae slide right off, making cleanup a breeze.
So, what's your main goal? If you're chasing a stubborn leak on an older hull, a flexible polymer is your best friend. If you want to protect a beautiful finish and make washdowns quick and easy, a ceramic coating is the way to go.
What to Look For on the Label
No matter which type you lean toward, there are a few non-negotiable features you need to see on the product label. Skimping on these means you’ll be redoing the entire job way too soon.
UV Resistance
This is the big one. Your boat is constantly baked by the sun. Any sealer without serious UV blockers will chalk, yellow, and fail in short order, leaving your aluminum unprotected. For any boat that isn’t kept in a dark garage, this is your number one priority.
Flexibility
An aluminum hull isn't a static object—it flexes, vibrates, and expands with temperature changes. A brittle coating will just crack and peel off. This is why the marine sealants market is dominated by flexible materials; they need to move with the boat as it pounds through waves.
Water Type Compatibility
Saltwater is a completely different beast than freshwater. It's incredibly corrosive. If you're a coastal boater, you absolutely need a sealer formulated to withstand that harsh, salty abuse. A product designed for freshwater just doesn’t have the chemical backbone to survive for long in the ocean.
Your Boat's Use Case Dictates the Product. A polished pontoon boat used for lazy weekend cruises has vastly different needs than a rugged fishing boat that's constantly being trailered through road grime and splashed with brackish water.
To help you visualize the options, here's a quick comparison of the most common types of sealers you'll encounter.
Comparing Aluminum Sealer Types
This table gives you a quick-glance comparison of the main sealer types to help you find the best fit for your boat and your budget.
| Sealer Type | Best For | Durability | Application Difficulty |
|---|---|---|---|
| Clear Polymer Sealant | General protection, UV blocking, enhancing shine on newer boats. | Good (1-2 years) | Easy (wipe on, buff off) |
| Ceramic Coating | Extreme gloss, hydrophobic properties, easy cleaning. | Excellent (2-5+ years) | Moderate (requires meticulous prep) |
| Flexible Marine Sealant | Sealing leaky seams, rivets, and below-the-waterline fittings. | Excellent (5-10+ years) | Moderate (can be messy) |
| Epoxy Coating | Heavy-duty protection, filling pits, and corrosion repair. | Very High (permanent if prepped correctly) | Difficult (multi-step, precise mixing) |
Ultimately, choosing the right product is about matching the sealer's strengths to your boat's weaknesses. Don't just grab the most expensive or the most popular option; take a moment to consider what problem you are trying to solve.
Investing in a quality, marine-specific product is always worth it. Understanding a bit about how advanced sealants and waterproofing solutions are engineered for harsh environments really drives home why a generic metal sealer from the hardware store just won't cut it. The right product is the foundation for a lasting, professional-looking finish.
Getting Your Boat Prepped for a Flawless Finish
Here’s a secret every seasoned pro lives by: a great sealing job is 90% preparation and only 10% application. Rushing the prep is the single biggest mistake you can make. It’s like trying to paint a dusty wall—it doesn't matter how great the paint is, it won’t stick right, and you’ll just be redoing it all next season.
Think of your aluminum pontoons or hull as a fresh canvas. For any sealer to grab hold and create that tough, lasting bond, the canvas has to be perfectly clean. That means every last bit of old wax, oily film, road grime, and—most importantly—oxidation has to go.
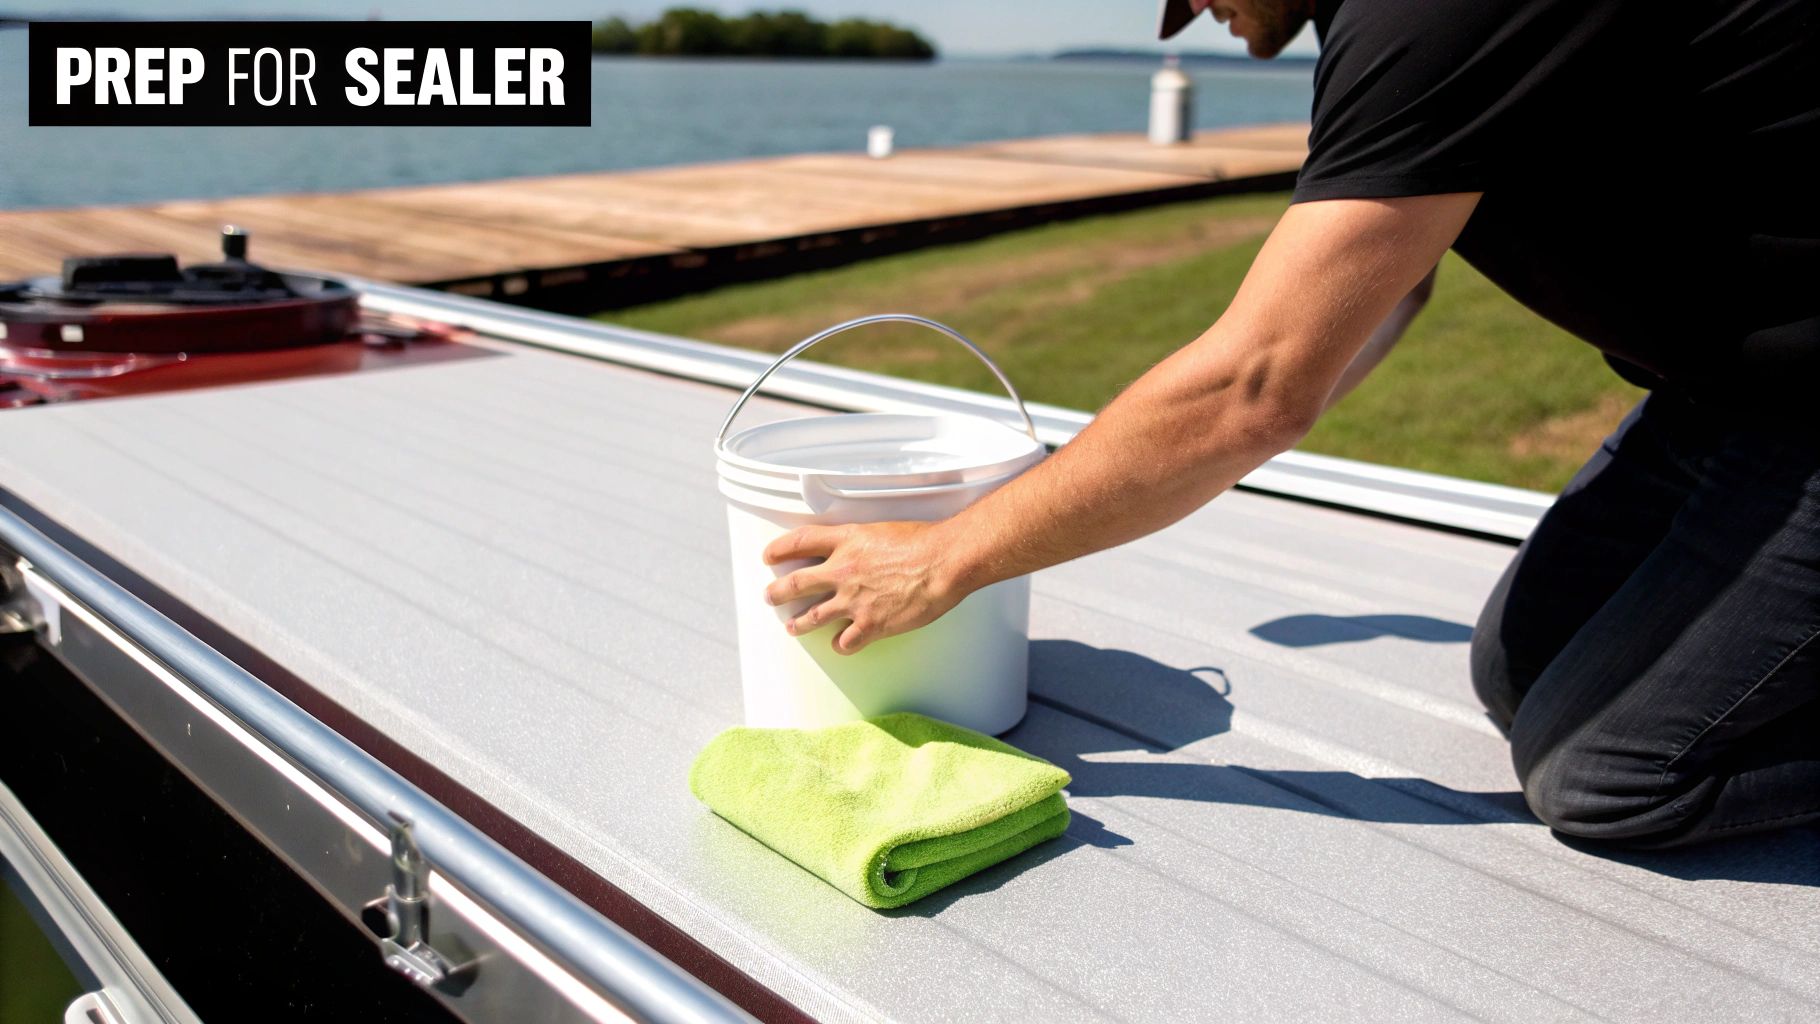
Step 1: The Initial Deep Clean to Cut Through the Grime
First things first, you need to wash away all the loose dirt, algae, and that lovely scum line that builds up from just being on the water. Grab a quality boat soap, a soft-bristled brush, and get to it. This is your first line of attack.
My advice? Work in smaller, manageable sections, especially if you're outside in the sun. Tackle a 5-foot by 5-foot area, rinse it completely, and then move on. This simple trick stops the soap from drying on the surface, which can leave behind a film that’s just as bad as the dirt you were trying to get rid of.
Pro Tip: Whatever you do, steer clear of dish soap or harsh household detergents. They’re great for greasy pans but terrible for boats. They can strip essential oils from your rubber and plastic trim and often leave a residue that will sabotage the sealer’s ability to bond with the aluminum.
Step 2: Tackling That Chalky Oxidation and Stubborn Stains
After a good wash, you’ll probably notice a dull, chalky film or some stubborn, crusty water spots. That's aluminum oxide—the very thing you’re trying to stop. You have to remove this layer for the sealer to have any chance of working. It cannot bond to a chalky, unstable surface.
For heavier buildup, you'll need an aluminum-specific cleaner or a mild acid-based brightener to chemically dissolve that oxidation. For those incredibly frustrating, chalky water spots that look etched into the metal, a dedicated remover is a lifesaver. Products formulated to dissolve these mineral deposits without harming the aluminum, like Boat Juice Extreme Water Spot Remover, are your best bet.
Here's how to use it effectively:
- Spray the remover right on the problem spots.
- Let it dwell for about 30-60 seconds so it can break down the minerals.
- Wipe it away with a clean microfiber towel.
- Rinse the area thoroughly to neutralize the cleaner.
Nailing this step ensures your surface is truly bare and ready to bond. For a deeper dive into this, check out our guide on finding the best aluminum corrosion cleaner to match the right product to your specific problem.
Step 3: The Final, Can’t-Skip Wipe-Down
You're almost there. The aluminum is clean, bright, and oxidation-free. But there’s one last, non-negotiable step before you open that can of sealer: the final wipe-down. This is what removes any lingering oils, polishing residue, or even fingerprints. The goal is a surgically clean surface.
For this, all you need is a 50/50 mixture of isopropyl alcohol (IPA) and distilled water. Why this combo? The alcohol is a solvent that evaporates fast, taking any final contaminants with it and leaving a perfectly sterile surface. Using distilled water is key because it won't leave behind any new mineral spots.
Here's your final prep action:
- Lightly mist the solution onto a clean microfiber towel—not directly on the boat.
- Wipe down one section of the aluminum.
- Follow immediately with a second, dry microfiber to buff the area completely dry.
- Repeat this process over the entire boat, swapping towels often.
This final touch creates the perfect canvas for your aluminum sealer for boats. The sealer can now get maximum grip, giving you that flawless, protected finish you're after. Now that your prep work is dialed in, you're ready for the fun part: laying down that beautiful new coat of sealer.
Applying Your Aluminum Sealer Like a Pro
With all the hard prep work behind you, it’s finally time for the satisfying part where you lock in that brilliant shine. Don't let this step intimidate you; putting on a modern aluminum sealer for boats is surprisingly straightforward if you just follow a few ground rules. You don't need a garage full of fancy gear. For most wipe-on sealants, your whole toolkit is just a couple of quality microfiber applicator pads and a fresh stack of clean microfiber towels for buffing.
Step 1: Find the Perfect Application Conditions
Before you even crack open the bottle, take a look at the weather. Your environment plays a massive role in how well the sealer goes on and cures. Trying to do this job on a hot, sunny afternoon is a perfect recipe for a streaky, hazy disaster. Why? Because the heat makes the sealer dry too fast, before it has time to level out and bond correctly.
Your ideal setup is working in the shade on a calm, mild day. Here's exactly why those conditions matter so much:
- Low Humidity: High humidity can trap moisture under the sealer as it cures, leading to a cloudy finish. Aim for humidity below 60%.
- Cool Surface Temp: The aluminum itself should be cool to the touch. A hot surface will cause the sealer to flash-dry instantly.
- No Direct Sun: The sun is your enemy. It heats the aluminum and makes the sealer cure too fast, causing streaks.
- Calm Winds: A breezy day kicks up dust, pollen, and debris that will get permanently stuck in your fresh coating.
Pro Tip: Think of applying sealer like you're painting a classic car. You want a clean, controlled space. A garage is perfect, but a carport or even just waiting for an overcast morning will make a world of difference in your final result.
Step 2: Use the Right Technique for a Streak-Free Finish
Alright, let's get to it. The key to a perfect finish is all about control and consistency. The golden rule here is to work in small, manageable sections. Don't try to coat an entire pontoon tube in one shot. A 3-foot by 3-foot area is a great place to start, giving you plenty of time to apply and buff off the product before it sets up too much.
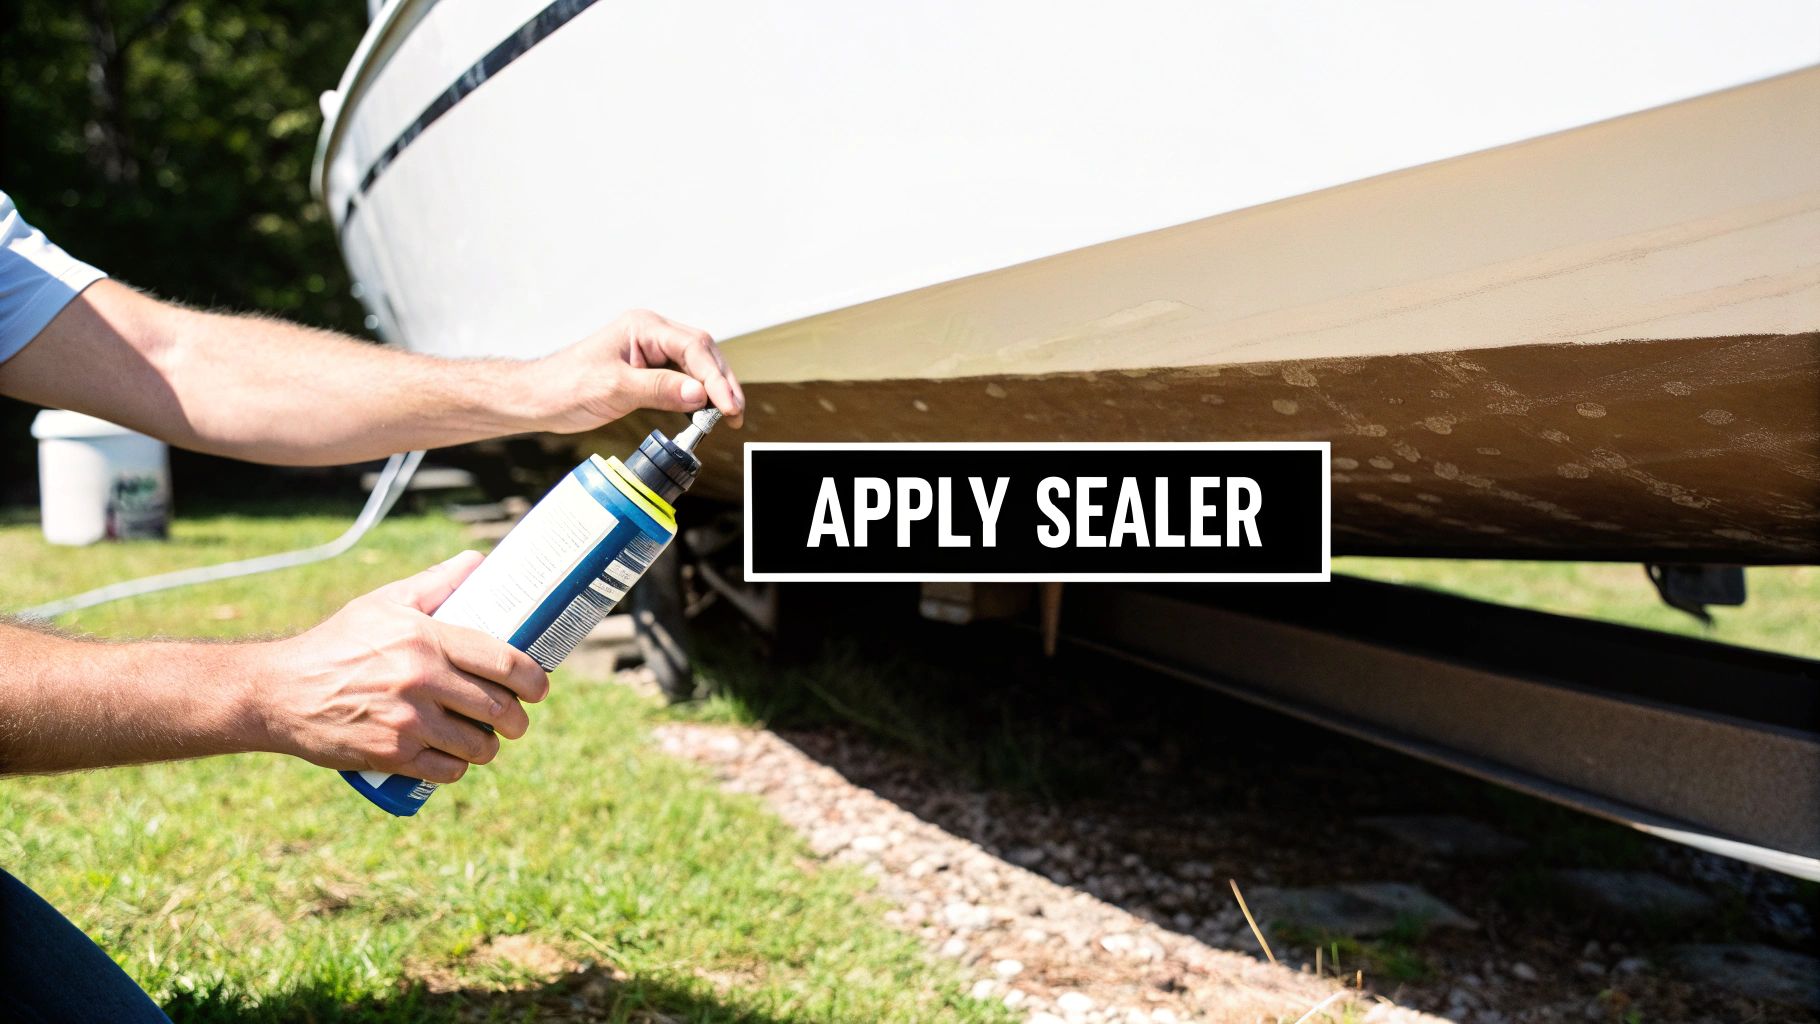
For each section, just follow this simple process:
- Apply Sealer to Pad: Dab a small amount of sealer onto your microfiber applicator—not directly on the boat. This prevents drips and runs.
- Wipe On: Apply it to the aluminum using overlapping, straight-line motions. Go side-to-side first, then up-and-down over the same area to create a cross-hatch pattern. This ensures even coverage.
- Let it Haze: Let the sealer sit for the time recommended on the bottle, usually just a minute or two. You’ll see it transform from clear to a cloudy, hazy film. This tells you it's ready for the next step.
- Buff Off: Using a separate, clean microfiber towel, gently buff away the haze to reveal that slick, glossy finish underneath. Flip your towel to a clean side often to avoid spreading the residue.
If you’re using a sprayable sealer, the same principles apply. Picking the right tip for your sprayer is critical for an even coat; you can consult an ultimate paint spray tip chart for a perfect finish to dial in your setup. Always keep a consistent distance and speed to prevent sags.
Step 3: Respect the Cure Times
Once that last section is buffed out, you’re not quite done. The sealer needs time to fully cure, which is the chemical process where it hardens and bonds to the metal. "Cure time" isn't the same as "dry time." The surface might feel dry in an hour, but the chemical cross-linking that gives the sealer its strength is still happening.
Most products need at least 12-24 hours in a dry spot before they should see any water—and that includes morning dew. Rushing your boat back to the lake too soon can completely undo all your hard work. Always read the manufacturer’s specific instructions, as some high-performance coatings might need even longer.
Keeping Your Sealed Aluminum Looking Great
You’ve already done the hard part—getting your aluminum perfectly sealed and protected. Now comes the easy bit: keeping that beautiful, slick finish looking its best all season long. The great news is that maintaining a sealed surface is a world away from the constant battle of caring for bare aluminum. It's quick, simple, and won't cut into your time on the water.
The golden rule of post-sealer care is to avoid harsh, abrasive chemicals. Seriously, put them away. Think of your new coating as a shield; aggressive detergents, acid-based hull cleaners, or gritty compounds will just strip that shield away, leaving your aluminum vulnerable again. The whole point of the sealer was to make life easier, so you shouldn't need those heavy-duty products anymore.
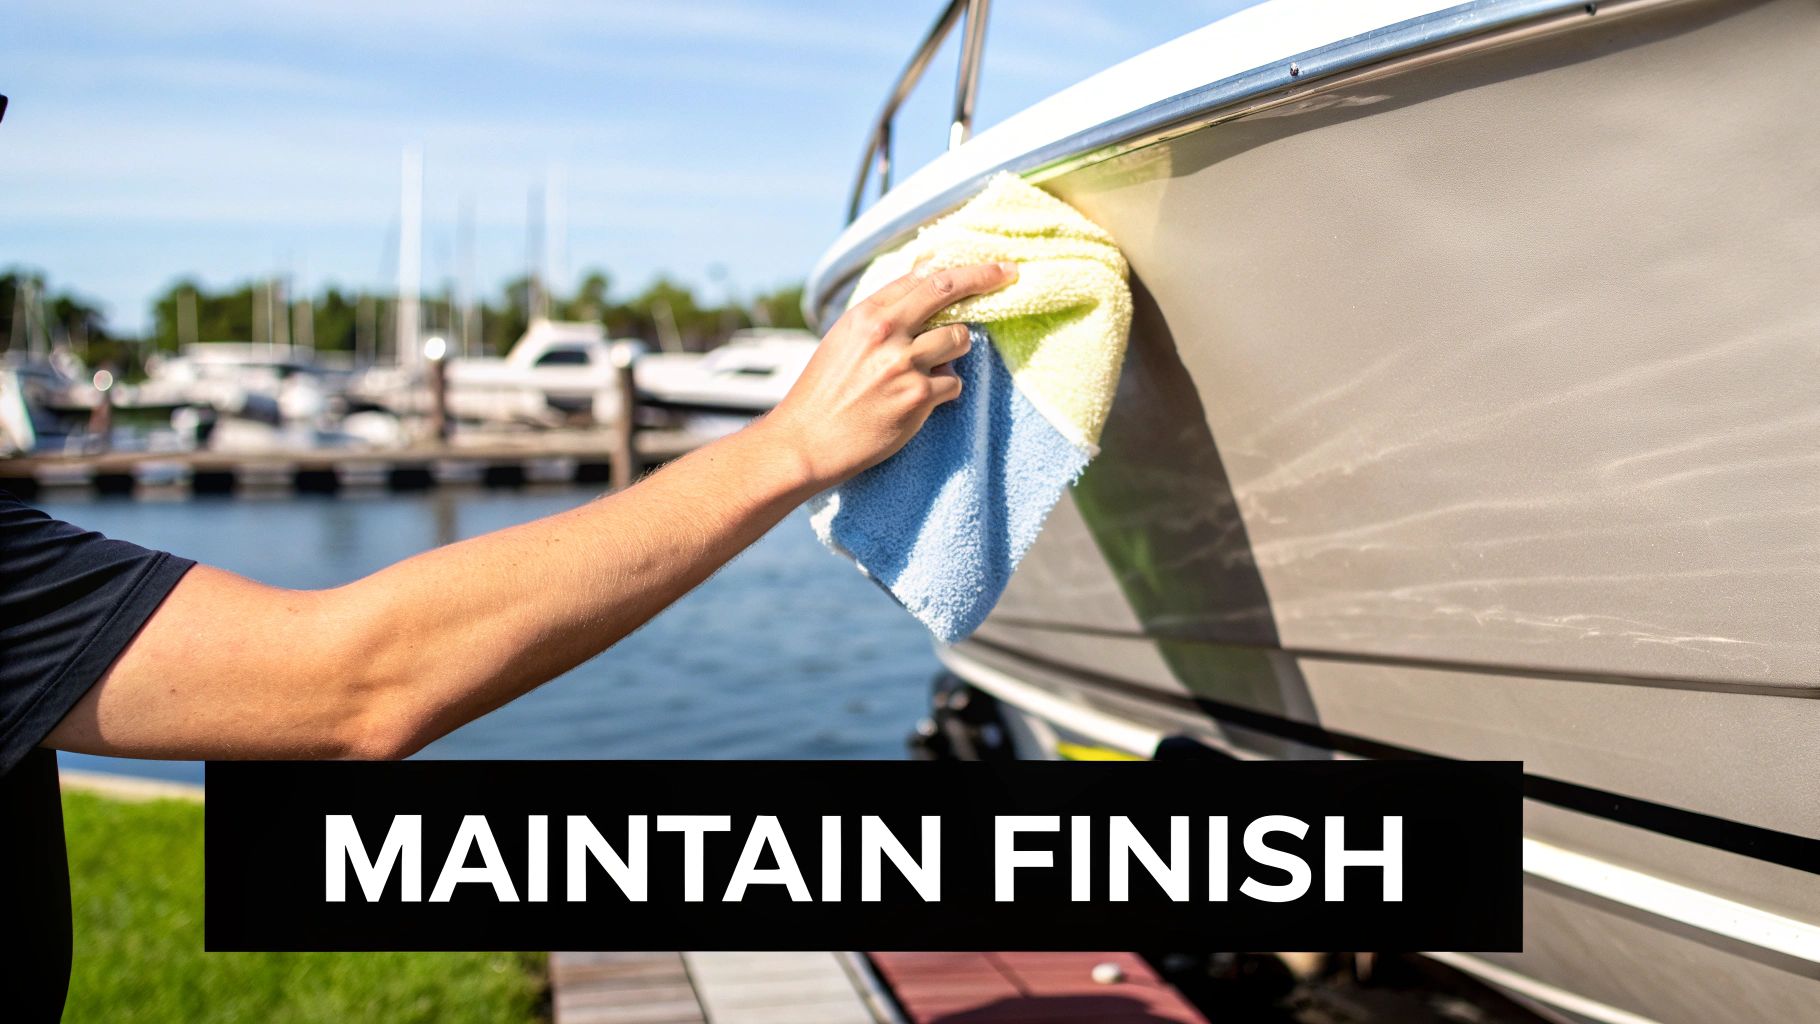
Your New, Easier Cleaning Routine
For routine cleanups after a day on the lake, gentle is the name of the game. A quick rinse with fresh water is often all it takes to knock off loose dirt and stop those annoying water spots from forming.
When you need a little more muscle to lift away grime or scum, a pH-neutral boat soap is your new best friend. This is where a product like Boat Juice Exterior Cleaner slots perfectly into your maintenance kit. It’s made to be gentle on protective coatings, lifting away fresh contaminants without any harsh chemicals that could weaken your aluminum sealer. A quick spray and a wipe with a clean microfiber towel is all it takes.
Your Actionable Takeaway: You're not cleaning the aluminum anymore; you're cleaning the sealer on top of it. Gentle, pH-neutral cleaners preserve that protective layer, making it last longer and keeping your boat looking sharp with way less effort.
Spotting the Signs of Wear and Tear
Even the toughest aluminum sealer won't last forever. Things like intense sun, saltwater, and friction from trailering will eventually wear down that protective layer. The trick is to spot the early warning signs so you can act before the aluminum itself is at risk.
Here’s what to look for during your regular wash-downs:
- Water Isn't Beading Anymore: When the sealer is fresh, water will bead up into tight little balls and roll right off. As it wears down, you'll see water starting to "sheet" or cling to the surface in flat puddles. This is the first sign that its hydrophobic power is fading.
- Dull Patches Appear: Keep an eye out for areas that have lost their slick, glossy look. High-wear spots, like the waterline or where fenders constantly rub, are usually the first places to show this kind of dullness.
- Grime Starts to Stick: If you notice that algae and scum lines are becoming a pain to wash off again, it’s a clear sign the non-stick properties of the sealer are wearing thin.
Seeing these signs doesn't mean you have to strip everything and start from scratch. Often, a quick touch-up or reapplication on the worn areas is all you need. If you're looking to bring back that original shine before you reapply, our guide on choosing an aluminum polish for boats is a great place to start.
How Often Should You Reapply the Sealer?
This is the million-dollar question, and the honest answer is: it depends entirely on how and where you use your boat.
- Saltwater Boaters: If you're out in the salt, the environment is just plain harsh. Plan on reapplying your sealer once a year to stay ahead of corrosion. Make this part of your winterization or spring prep routine.
- Freshwater Boaters: For those on lakes and rivers, you have it a bit easier. You can often get two to three seasons from a single application, especially if your boat is covered or stored indoors.
Your next step is to make this inspection a regular part of your routine. During your annual spring prep, give the pontoons and hull a close look. It’s the perfect time to reapply the sealer and kick off the year with maximum protection.
Got Questions About Sealing Your Aluminum Boat? We've Got Answers.
Alright, let's tackle some of the questions that pop up most often when boaters are thinking about sealing their aluminum pontoons or hulls. Getting these details right is the key to a job you'll be proud of for years to come.
Can I Just Seal Over the Old Paint or Decals?
I know it's tempting to look for a shortcut, but trust me on this one: applying a sealer over old paint or decals is a recipe for failure. To get that rock-solid bond and lasting protection, your aluminum sealer for boats needs to go onto a completely clean, bare metal surface.
Think about it this way: the sealer can only stick as well as the surface underneath it. Sealing over peeling paint just means your new sealer will peel off right along with the old paint. You'll trap moisture and air underneath, which can actually make corrosion worse. You’ll end up with a blotchy mess and have to do the whole job over again way sooner.
How Often Do I Really Need to Redo This?
This is the classic "it depends" answer, but it really does come down to your boat's lifestyle. Where you boat and how often you're out on the water are the two biggest factors. It's a lot like waxing your truck—the more it's exposed to the elements, the faster that protective layer wears away.
Here’s a simple guide based on my experience:
- Saltwater Warriors: If your boat lives in the salt, plan on reapplying the sealer annually. That constant salt spray is brutal on aluminum, and a yearly touch-up is your best defense.
- Freshwater Cruisers: You’ve got a bit more breathing room here. A good quality application can easily last two or even three seasons, especially if the boat is covered or stored indoors.
My go-to rule of thumb? Check the surface when you're doing your spring cleaning. If you notice water isn't beading up like it used to, that's your signal. The sealer's protective magic is starting to wear off and it's time for a new coat.
What's the Big Deal About Applying Sealer in Direct Sunlight?
Working on a hot, sun-drenched surface is probably the most common mistake I see people make. When the sun beats down on aluminum, that metal gets hot. Trying to apply a sealer to it is like trying to paint a hot skillet—the product will "flash dry" almost the instant it touches the surface.
This causes two major problems. First, the sealer doesn't have time to flow and level out, leaving you with ugly streaks and an uneven finish. More importantly, it prevents the sealer from creating a strong chemical bond with the aluminum, which guts its durability and protective power. Do yourself a huge favor: always work in the shade or wait for a cool, overcast day. It makes a world of difference in the final result.
Ready to make your post-boating cleanup easier than ever? The Boat Juice Exterior Cleaner is specifically designed to be pH-neutral, making it the perfect choice for safely cleaning your newly sealed aluminum surfaces without stripping away the protection. Keep your boat looking its best with products trusted by the pros.